If you have a table with your app user data in your Caspio platform account, you can convert the table to a directory. Thanks to this, your newly created directory will have your existing user data from the start. You will still be able to add users manually.
In the conversion process, you will migrate your user data from custom fields in your table to the fields required in directories (Email, UserGUID, First_Name, Last_Name, Password).
For a video guide on converting tables to directories, click here.
Prerequisites: You must have a user table with a unique field for storing email addresses.
Steps:
- From the sidebar navigation menu, select Directories.
- In the upper right corner, click the Create directory button.
- Click the ...convert an existing table to a directory link.
- Select a table used in your apps for conversion into a directory.
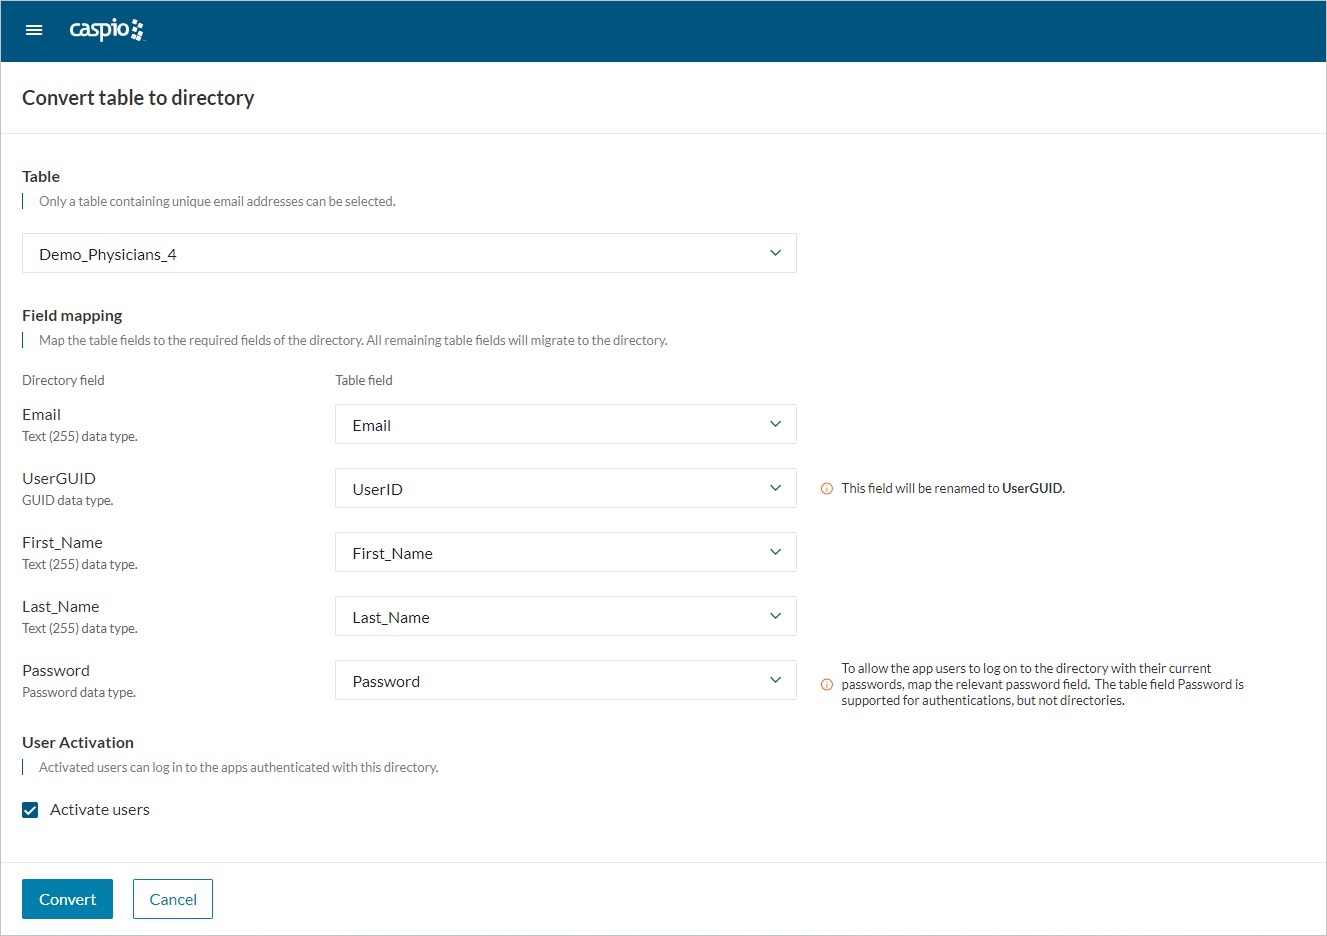
- In the Field mapping section that appears, from the Table field dropdowns, select the relevant table fields:
-
- From the dropdown next to the Email directory field, select an email field in the table.
- From the dropdown next to the UserGUID directory field, select a GUID data type field from the table, or select the Create new field option.
- From the dropdown next to the First_Name directory field, select the relevant first name field from the table, or select the Create new field option.
- From the dropdown next to the Last_Name directory field, select the relevant last name field from the table, or select the Create new field option.
- From the dropdown next to the Password directory field:
- If you want your users to sign in using their current password, select the relevant password field from the table (Password data type).
- If you want to generate new passwords for users, select the Create new field option.
Note: The Password data type field used in a user table is not used in Caspio Directories. In directories, passwords are managed within the interface and do not appear in user datasheet view.
If the table fields selected have different names than the default directory field names, they will be renamed to the preset directory field names.
- Perform one of the following actions:
-
- If you want to instantly activate the users added during the conversion, in the User activation section, select the Activate users checkbox.
Result: Your users are now able to log in to apps authenticated with this directory. - If you prefer not to activate users now, in the User activation section, leave the Activate users cleared.
Result: You will have to activate users later. See Activating Users.
Note: If you copied the users’ passwords to the directory during conversion, we strongly recommend selecting the Activate users checkbox. If you leave the checkbox cleared, users will not be able to sign in.
- If you want to instantly activate the users added during the conversion, in the User activation section, select the Activate users checkbox.
- Click the Convert button.
Step result: The system checks whether all the values in the Email field are valid email addresses. If any value is incorrect, an error message appears, asking you to correct that value before converting the table. If all the email addresses are correct, a confirmation message appears. - Perform one of the following actions:
- If you want to continue editing your directory, click Close.
- If you want to configure using this directory for user authentication, in the modal, click the Authentications link and follow the steps below.
Steps to change app authentication to a directory:
- In the list of Authentications, select the authentication you want to update.
- From the Authentication data source dropdown, select your directory or a view built on directory.
In the dropdown, directories are visible under Tables. - In the Authentication Method panel, select the Directory radio button.
- Click Save.
For more information on authentication methods, see Authentication.