Creating a Triggered Action
4 minutes to read-
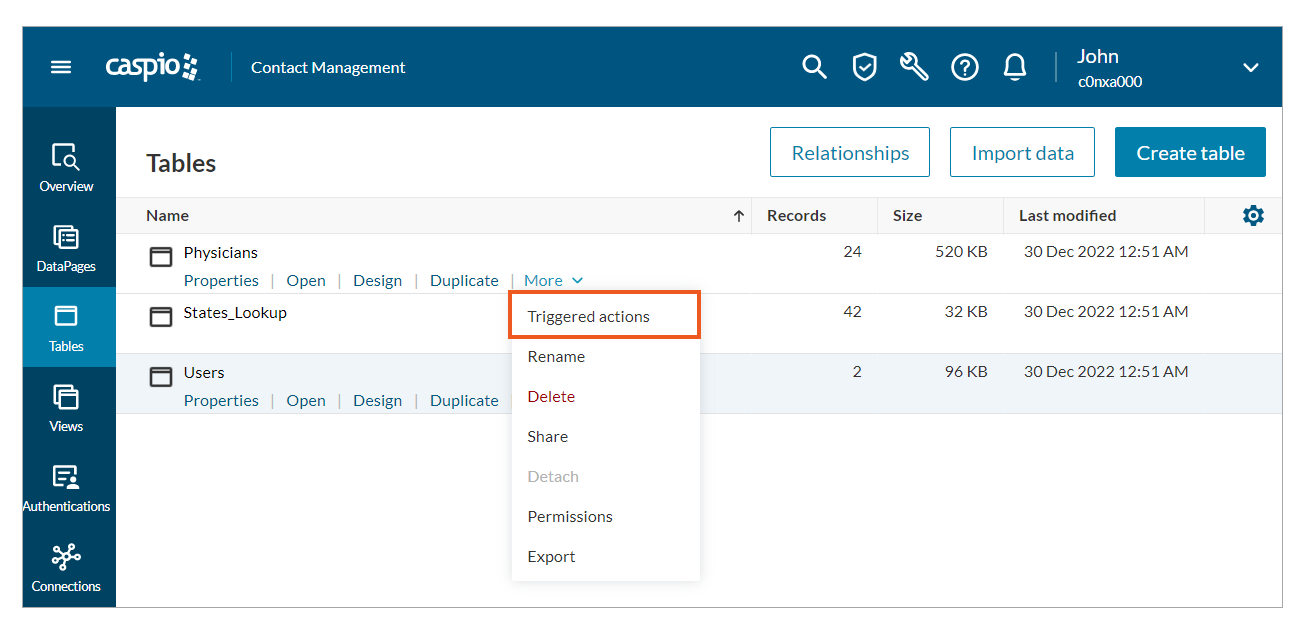
- Access triggered actions using one of the following methods:
- Hover over a table you wish to create a trigger on, then select More > Triggered actions.
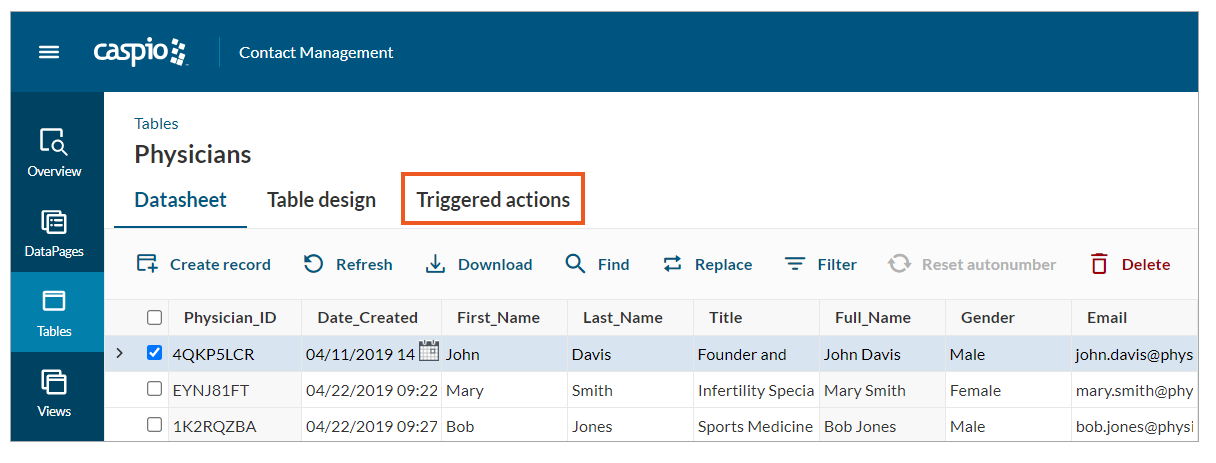
- Open a table and select theTriggered actions tab.
- Hover over a table you wish to create a trigger on, then select More > Triggered actions.
- Select Create triggered action to access the visual builder.
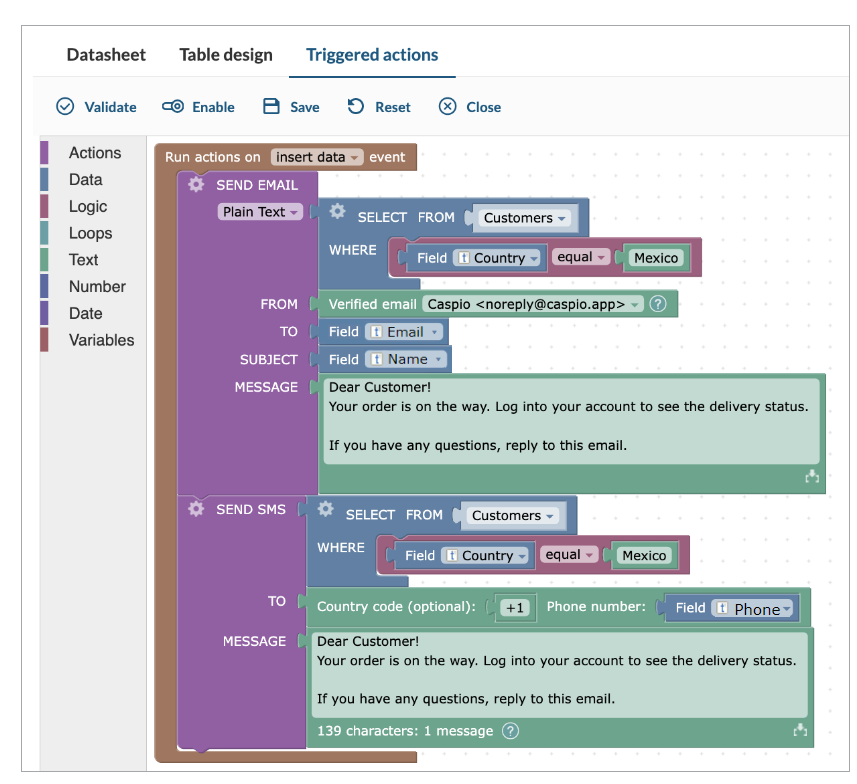
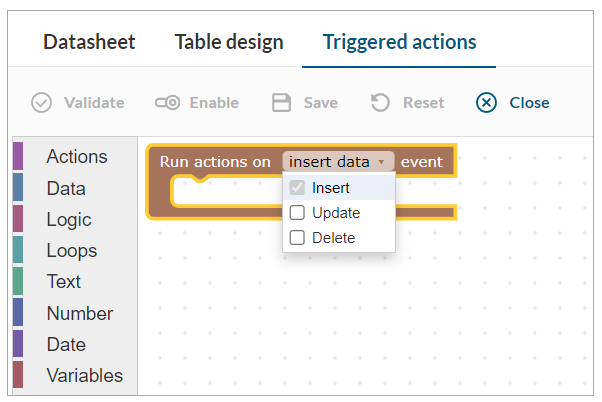
- Select an event upon which a trigger will be executed. You can choose between the following options or combine them as needed:
- Insert – a trigger is fired upon adding new records.
- Update – a trigger is fired upon modifying existing records.
- Delete – a triggered is fired upon deleting existing records
- Access triggered actions using one of the following methods:
Note:
- One table can have multiple triggered actions associated with it, however, only one instance of each event can be enabled at any given time per table. For example, only one trigger can be enabled on insert action.
- A single triggered action may contain multiple actions. These multiple actions will execute in a top-down hierarchy. By combining multiple actions, you can manipulate data in multiple tables on a single executed triggered action.
- Actions tab, select or drag an action that will be executed by a trigger.
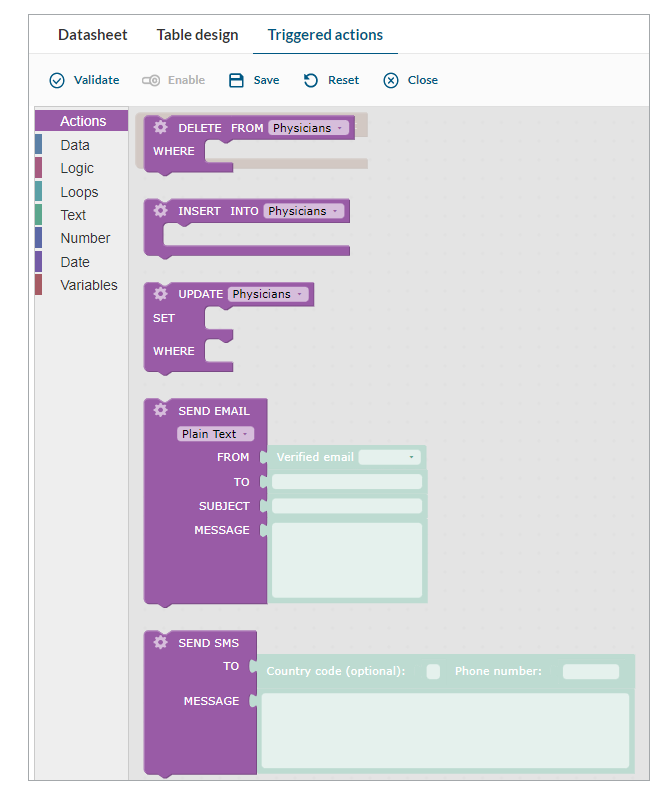
You can select or drag data manipulation or notification actions into the logic builder. For data manipulation, the following actions are available:- DELETE FROM – deletes records from a table. Learn more.
- INSERT INTO – creates new records. Learn more.
- UPDATE – updates records in a table. Learn more.
For notifications, the following actions are available:
- SEND EMAIL. Learn more.
- SEND SMS. Learn more.
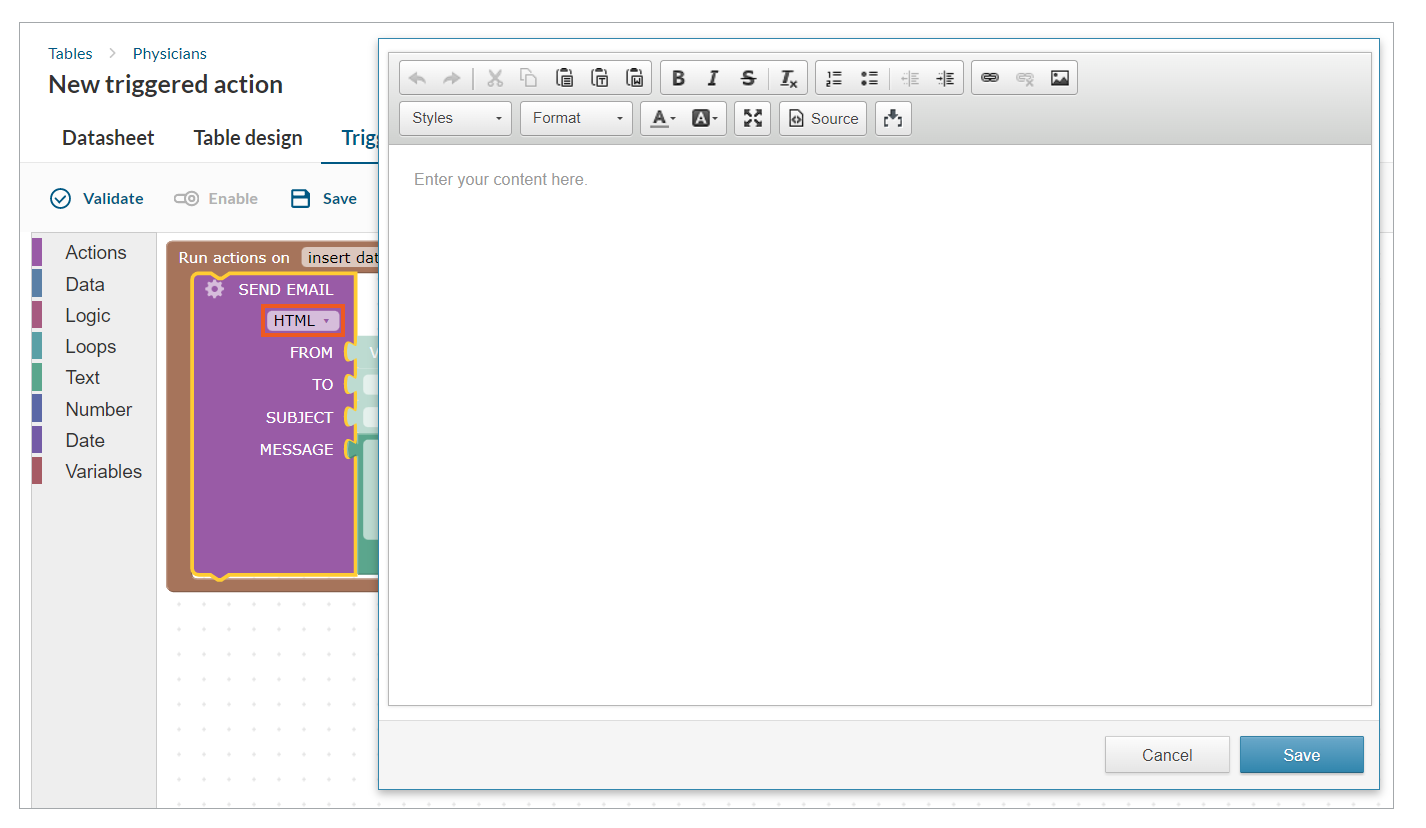
For SEND EMAIL, you can send email as Plain Text or HTML. In HTML mode, you can launch the rich text editor to create or edit your email content by clicking the
 icon in the message block.
For SEND EMAIL and SEND SMS, you can pass values dynamically by inserting parameters with the parameter picker
 . In triggered actions, we support parameters that pass values from data source fields.
If the SELECT block is used in the TO field, a recipient will be able to view other recipients listed in the recipient field. However, if the field block is used in the TO field, the recipient will only see their own name listed in the recipient field. What’s more, when using the SELECT block to specify recipients, the list of phone numbers or emails is truncated to 250 characters, which results in sending a limited number of SMS messages or emails.
- To build more complex logic, click the gear icon in the action block and select relevant options. Learn more about actions.
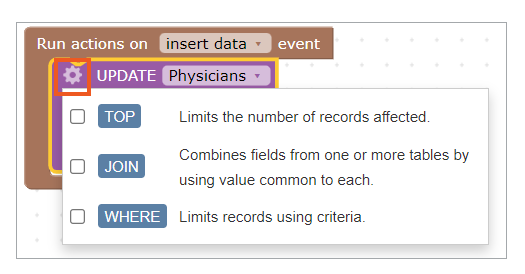
You can build complex trigger logic by using a combination of all the available trigger action elements, such as DATA, LOGIC, LOOPS, TEXT, NUMBER, DATE and VARIABLES. - Optional: To modify additional options for triggered action blocks, right-click a block and select one of the following actions:
- To create a copy of the block with all the values, select Duplicate.
- To add an additional description for the block that will appear when you click the Info button, select Add comment and enter your text.
For example, you can use this comment to explain complex logic. - To change how the block options are displayed, select Vertical View or Horizontal View.
- To show or minimize the block options and values, select Collapse or Expand.
- To activate or deactivate the block logic when the triggered action runs, select Enable or Disable.
For example, you can disable a block during tests to check how the triggered action logic works without it. - To remove the block from the triggered action logic, select Delete.
- Optional: To check the correctness of your trigger logic, from the upper menu, select Validate.
- Name your trigger and select Save or Save & Enable.