Creating a Web Services API Profile
3 minutes to readTo use Web services API, you must have at least one Web services profile in your Caspio account. Web services profiles may be given specific permissions to create and access tables, views, files, webhooks, data import/export tasks, Bridge applications, and directories in the corresponding Caspio account.
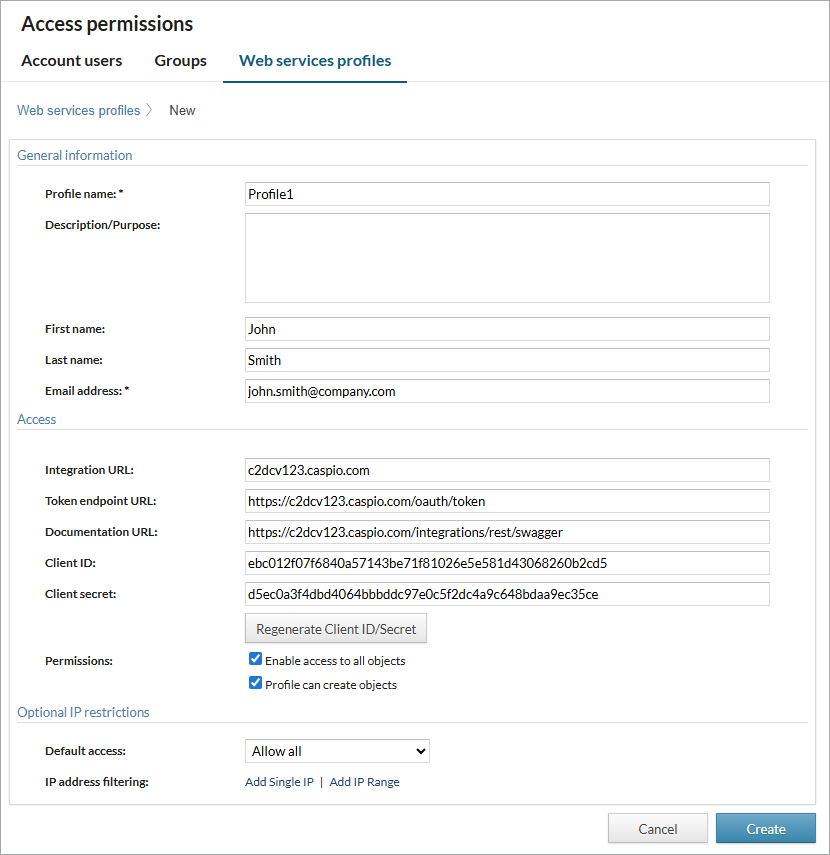
To create a Web services profile:
- From the top navigation bar, select Account
 → Access Permissions.
 - Click the Web services profiles tab.
- Click Create web services profile.
- Enter the Profile name that will help you identify this profile.
- Optional: Enter the profile Description/Purpose.
- Optional: Under Permissions, your profile’s permissions are selected by default. If you want to remove them, clear the following permissions as required:
- Enable access to all objects – Allows access to all tables, views, files, webhooks, data import/export tasks, Bridge applications, and directories in your Caspio account.
If you choose not to enable access to all objects, you can add permissions manually. See Editing profile permissions below. - Profile can create objects – Allows the profile to create tables, views, and DataPages, as well as upload Files.
- Enable access to all objects – Allows access to all tables, views, files, webhooks, data import/export tasks, Bridge applications, and directories in your Caspio account.
- Optional: In the Optional IP restrictions section, restrict the IP addresses that are allowed to access this profile:
- If you want to add specific addresses that are not allowed to access this profile, select Allow all and add IP addresses or ranges that are restricted.
- If you want to add specific addresses that are allowed to access this profile, select Deny all and add IP addresses or ranges that are allowed.
- Click Create.