Submission Forms
10 minutes to readCaspio offers one of the easiest ways of creating feature-rich Submission Forms to place on your website. These Submission Forms validate and store information in your Caspio table. Submission Forms can be configured to perform the following:
- Receive and pass parameters to facilitate data input or build multi-paged applications that use all relational database capabilities
- Generate automatic email and SMS messages to users who submit information (acknowledgement emails and SMS) and people in your organization (notification emails and SMS)
This article shows you how to create a sample Submission Form. This form will accept new submissions and trigger automatic email and SMS messages.
Steps to Create a Submission Form:
Ensure that you already have a Table or View for this Submission Form. If you are using a view, make sure that it is based on an editable table.
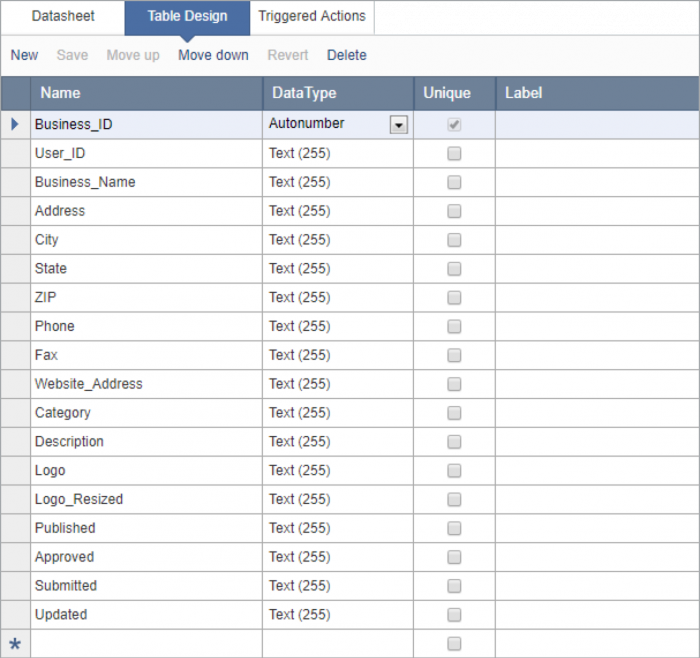
On Caspio homepage, select an app or create a new app. In the App Overview page, click DataPages on the sidebar menu and click on New DataPage.
Detailed instructions to create the Submission Form are as follows:
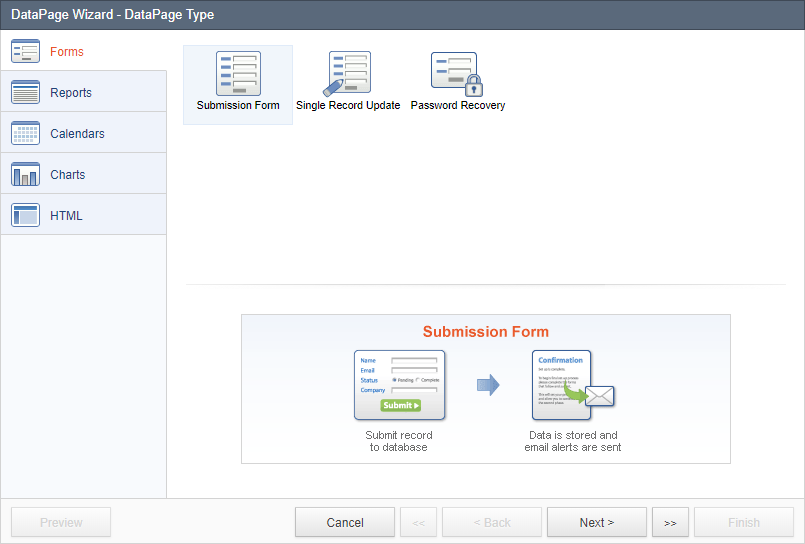
DataPage Type
Select the type of DataPage. By default, the cursor selects Submission Form as the first DataPage type. Select the same and proceed.
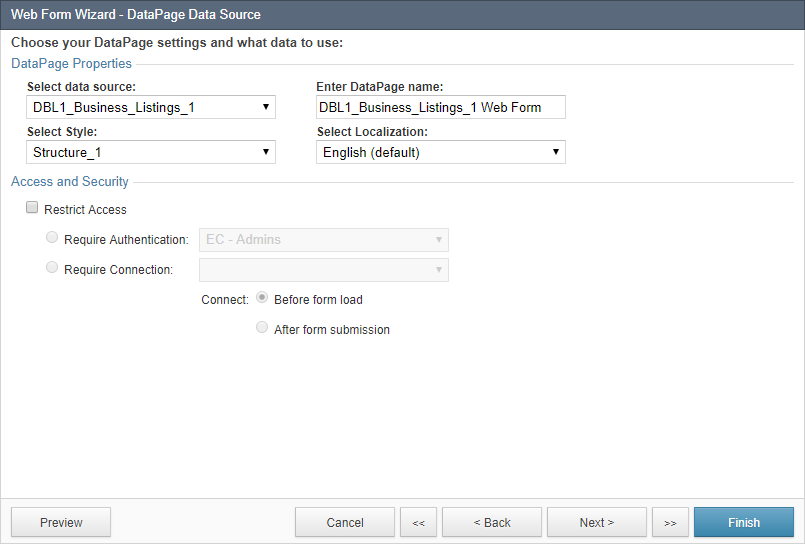
DataPage Data Source
On this screen, you can set the data source (table or view) that is the basis for this DataPage. Additionally, you can assign other objects that change the behavior of this DataPage. These options are listed below:
- Select a Table or View that will be the primary data source for your DataPage.
- Name your DataPage or use the suggested name.
- Style determines the look and feel for your DataPage. Select a Style or use the default selections.
- Localization determines DataPage time zone, formatting for number, currency and date, and language of DataPage messages. Select a Localization or use the default selections.
- Restrict access to this DataPage based on an Authentication or Connection. Without this option, the DataPage can be accessed without any restriction. Note the important difference between Authentication and Connection.
- Authentication: Users will need to login prior to accessing your DataPage. Learn more about Authentications. The list of authorized users must be known and available in a table in your account.
- Connection: Public users will need to connect using a social profile account (Facebook, Google, Twitter, etc.) before or after accessing your DataPage. Learn more about Connections. Note that essentially anyone can access your DataPage as long they are logged into their social profile account. This is not a security feature.
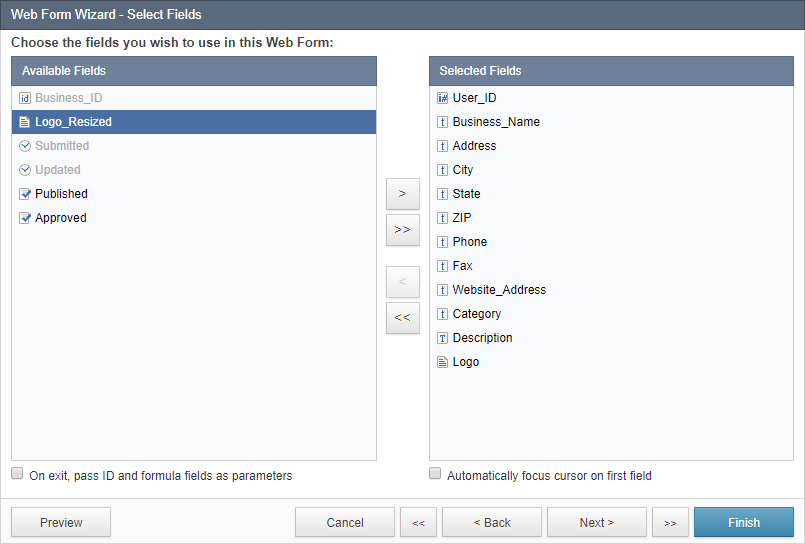
Select Fields
On this screen you can move fields to include in this Submission Form from the Available Fields list to the Selected Fields list. Users will need to enter values in these selected fields. An icon on the left of every field indicates the field’s data type. AutoNumber fields cannot be selected for a Submission Form since this value is automatically maintained by Caspio. However, they can be passed as parameters. Check On exit, pass AutoNumber ID field as a parameter if AutoNumber field needs to be passed as a parameter to the next page. Check Automatically focus cursor on first field to automatically place the cursor on the first field of the form when the page loads.
Configure Fields
Now, you are in the Configure Fields screen where in you can configure the functionality, appearance, data validations, and other properties for each field that were selected on the previous screen. Select a field from the DataPage Elements menu on the left and configure field properties on the right. You can insert new elements into your Submission Form, including a New Section, HTML Block, Virtual Field, Header & Footer, and CAPTCHA.
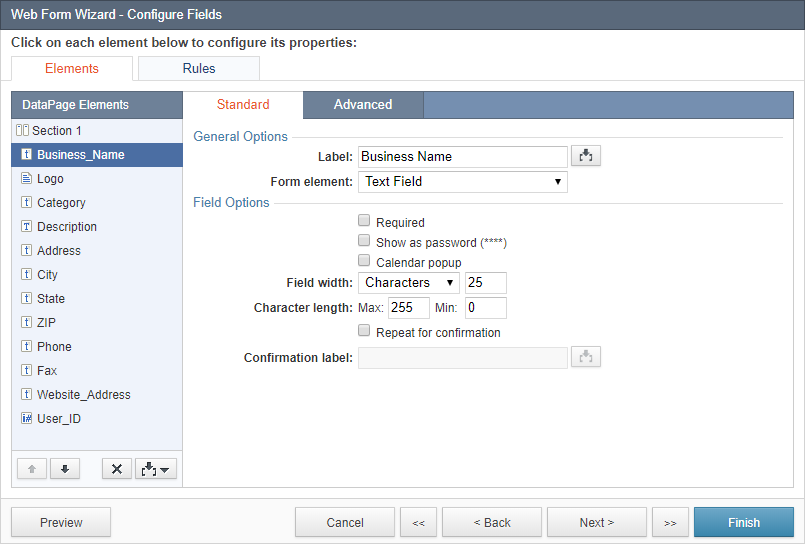
Click the Insert button to add a section, a virtual field, an HTML Block , CAPTCHA or Header & Footer.
Use the Move up and Move down buttons to change the display order of the sections, fields and blocks.
On the Standard tab, you can configure the following properties:
General Options
- Label – this is the instructional text or field name which displays to the left or top of the field.
- Form element – the form element controls the visual display of the field and how its value is changed.
Field Options
Various field’s properties can be configured here, such as make the field Required in the form, and adjust the number of characters for the field.
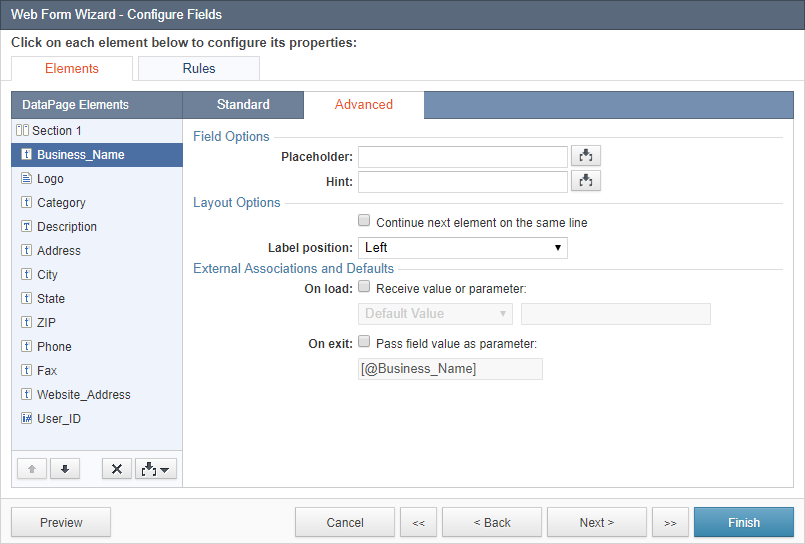
You can configure the following in the Advanced tab:
Layout Options
- By default, every form field starts on a new line. Check Continue next element on same line to place multiple fields on one line.
- You can override the default label position and specify another one using the Label Position dropdown.
External Associations and Defaults
The options under External Associations and Defaults allow you to assign values for your fields, receive or pass parameters, and customize or edit parameter names.
- By default, form fields are assigned to load its value. To receive a parameter in a field, select an option from the On load dropdown by checking the Receive value or parameter. Enter a parameter value in the space provided. You can choose to receive External Parameter, Authenticated Fields, Connection Fields, and App parameters. Additional options will be displayed if External Parameter options are selected.
- To pass a parameter to the next page, enable the On exit option by checking Pass field value as parameter and enter the parameter value. You need to follow the parameter structure as indicated in the gray text.
On the Rules tab, you can define conditional behavior to hide, show, require or disable fields based on specific criteria. Learn more about Rules.
- Click the Add (+) button to create a new rule.
- In the Criteria section, click the New button to define a condition for the rule. Criteria can include editable fields, parameters or conditional values.
- To define Actions, click New in the Action section. Next, select an action type and the field or section to make conditional.
Destination and Emails
Here you can configure what happens after the form is submitted. This is the page that is displayed for the user when this form is submitted. The following options are available in the Destination and Emails screen of the DataPage wizard.
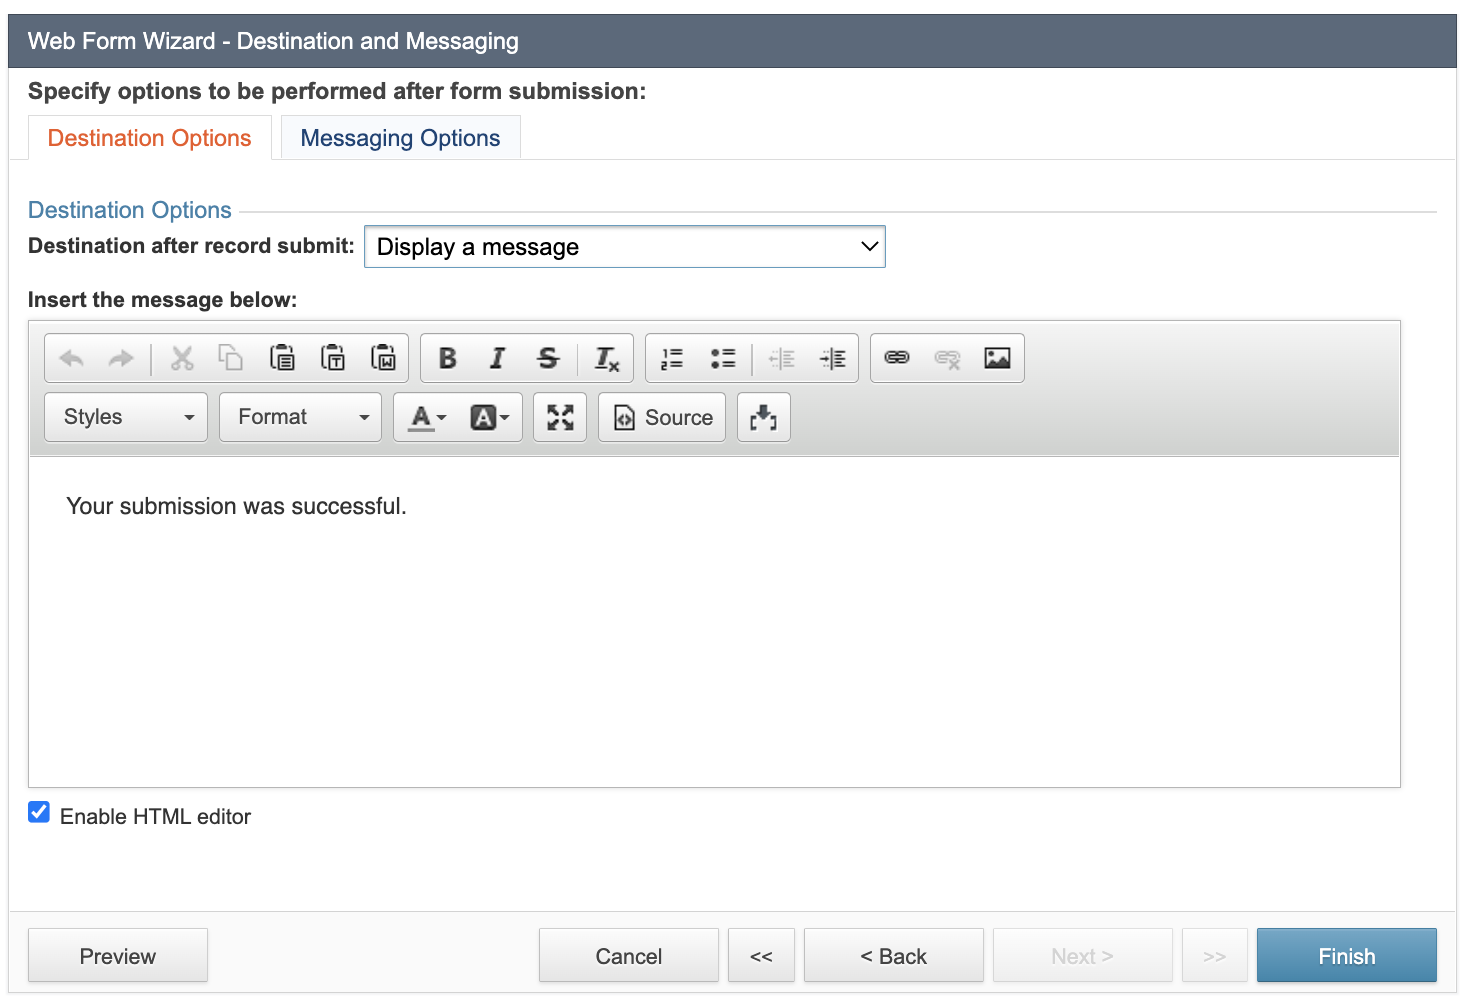
- Same Form – displays the same form. This is useful for data entry purposes.
- Go to a new page – redirects users to a confirmation web page (URL) on your own site. For the URL address, you can enter the full URL address or a relative path. To enable a relative path for your destination page, check Relative and enter a valid path in relation to the deployed DataPage. A confirmation page must be designed and accessible on your site.
- Display a message – by default, the destination is set to display a confirmation message. Compose a new message in text, HTML format or use the default one. To insert HTML or JavaScript code you must go to the Source view.
- Go to a DataPage – opens another DataPage.
- Close Window – automatically closes the current window after submission.
When Parameters are enabled, you can use a picker button to insert field values submitted through the form into the URL and confirmation message. When entering URLs into the above destinations, be sure to include a protocol (http:// or https://).
Messaging Options
In the Destination and Messaging screen, you can select whether you want your app to send automatic email and/or SMS messages upon a record submission.
Email Options
In the Automatic Emails Options section, you can trigger your application to send automatic acknowledgement or notification emails upon record submission.
Acknowledgement emails are emails that are sent to your users to confirm the form submission. If enabled, you need to select a field that contains your users’ email addresses.
Notification emails are sent to fixed email addresses, normally within your organization, to notify designated people within your organization that a record was submitted. You may assign a Table-driven value to the Reply-to field from the drop-down list or choose to use the same email address as the one in the From field.
Learn more about email options.
In this scenario, the destination page is set to display a message and Notification email to specific email recipient is checked.
If you enabled Acknowledgement and/or Notification emails, an additional screen is included that allows you to configure each automatic email.
SMS Options
In the SMS Options section, you can trigger your application to send automatic acknowledgement or notification SMS messages upon a record submission.
Acknowledgement SMS messages are generated upon the submission of new data and are sent to a phone number from a form field. If enabled, you need to select a field that contains your users’ phone number and select an option for country code handling.
Notification SMS messages are generated upon the submission of new data and are sent to fixed phone numbers.
Learn more about SMS options.
If you enabled Acknowledgement and/or Notification email or SMS, an additional screen is included that allows you to configure each automatic message.
In this scenario, the destination page is set to display a message and Notification email to specific email recipient is checked.
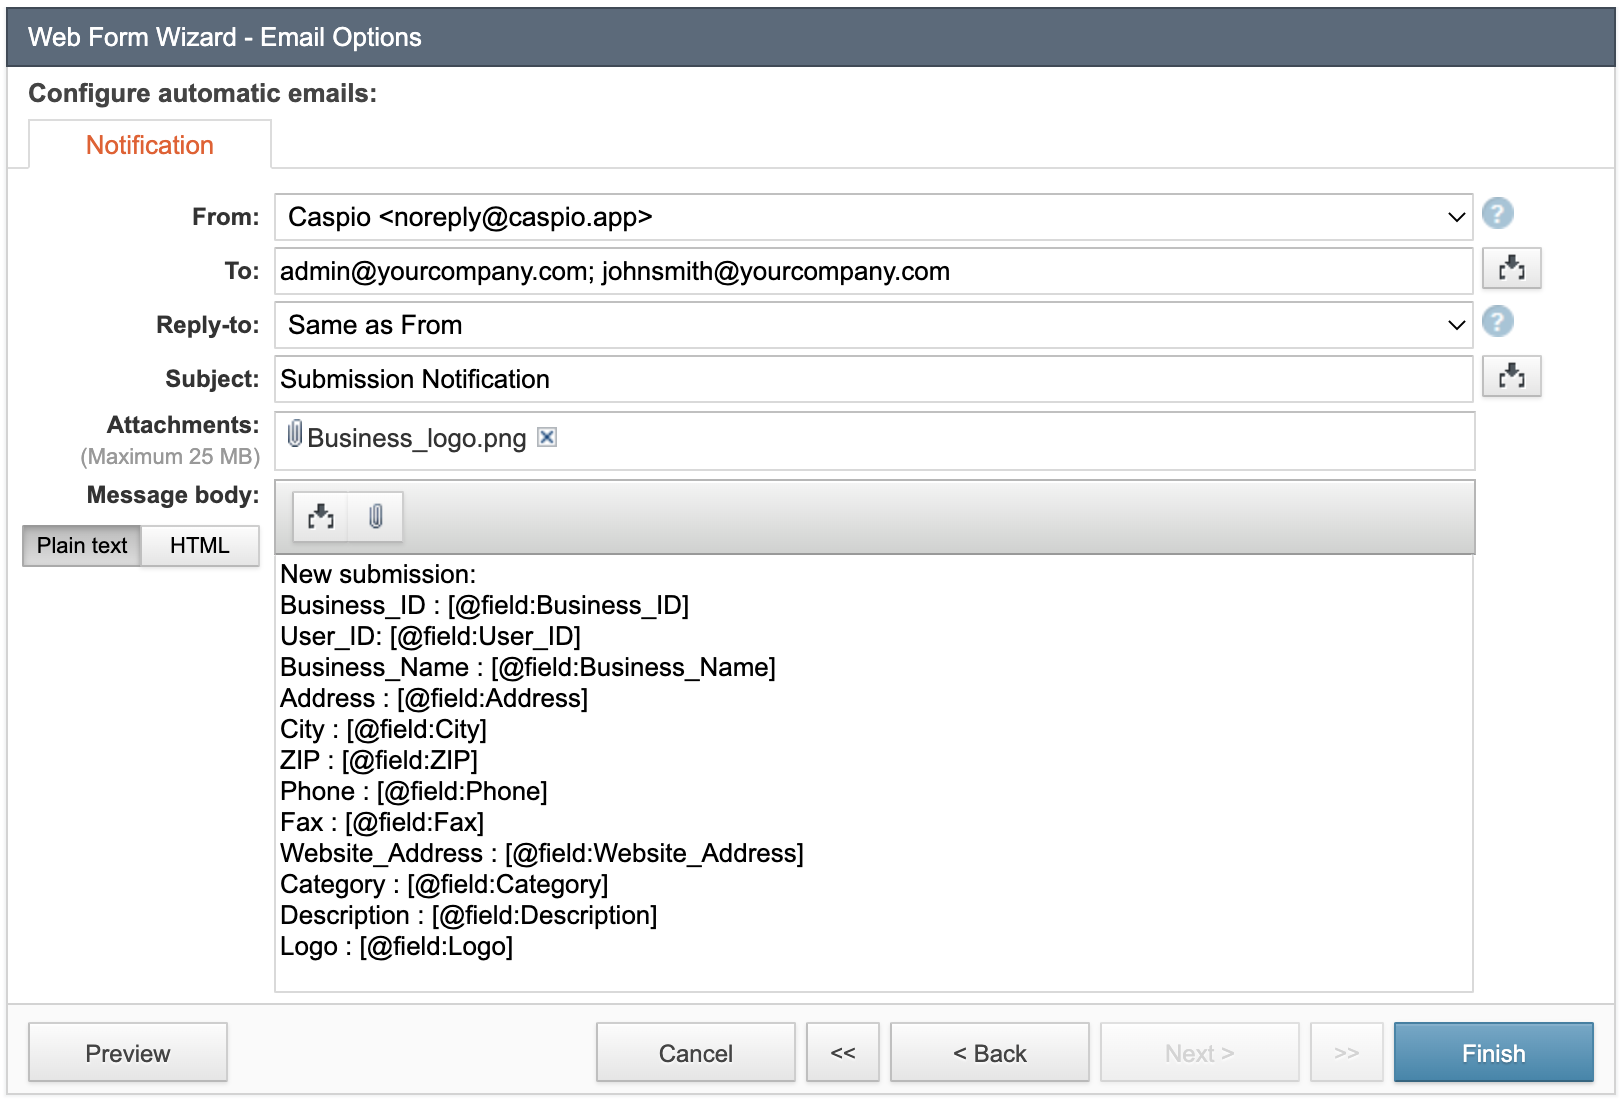
This screen will appear if the options to trigger automatic acknowledgement and/or notification emails have been checked in the previous screen. You can configure the email properties for each field:
- From – select a valid sender email address.
- To – this is the “To” line of your email with fixed email addresses. The notification emails will be sent to the address(es) entered. You can add one or more email addresses to notify multiple people of the arrival of new submissions. Use a semi-colon to separate email addresses. (This is available for Notification Emails only.)
- Reply-to address – this is the “Reply-to” line of your email. You can insert the same field as the “From” field or you can insert the field containing the recipient’s email address from the form. (This is available for Notification Emails only.)
- Subject – enter the subject title for the email. You can personalize the subject line for the user or scenario by entering text and inserting fields from the table.
- Message body – type the contents of your email message. You can also personalize the content with your text and inserting fields from the table.
- Email format – display the email message in plain text or HTML.
- File Attachment – attach a file to the notification or acknowledgement email. This option only displays if your DataPage includes one or more file fields.
To insert a field in Subject or Message body, select a field from the Insert fields drop-down at the bottom and click Insert.
In this scenario, a notification email is enabled. Sample email addresses are added in From and To fields. When configuring notification emails, default content in the Message body field is displayed. Click Finish.
You have successfully created a Submission Form. Click Preview to view your Submission Form DataPage.
For more details, you can watch the recording of our live session:

