Self-Join Views
2 minutes to read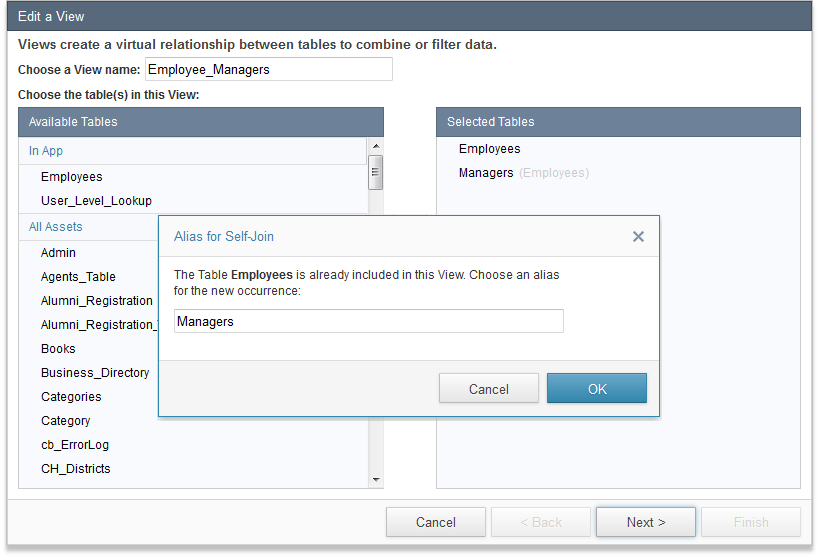
Views typically involve multiple tables, but there are some cases when you need to join a single table to itself or have the same table repeated in a multi-table View. Using the same table more than once in a View is called a “self-join”.
A common example of a self-join is an Employees table where some employees are also managers of other employees. To establish a relationship between employees and their managers within the same table, you can create a self-join to relate the Employee ID field to the corresponding Manager ID field. The View will join the data so that the managers’ information is displayed on the same row of each employee’s record (as shown below in this article).
To create a self-join, you start by selecting the tables to include in the View on the first screen of the View wizard. When the same table is selected multiple times, a pop-up screen prompts you to enter an alias for each new inclusion of the table.
You can edit the alias name later by selecting the alias on the left panel and clicking on the edit icon.
The alias will uniquely represent the table for the self-join relationship, and can be configured on the following screens the same way you configure multi-table Views.
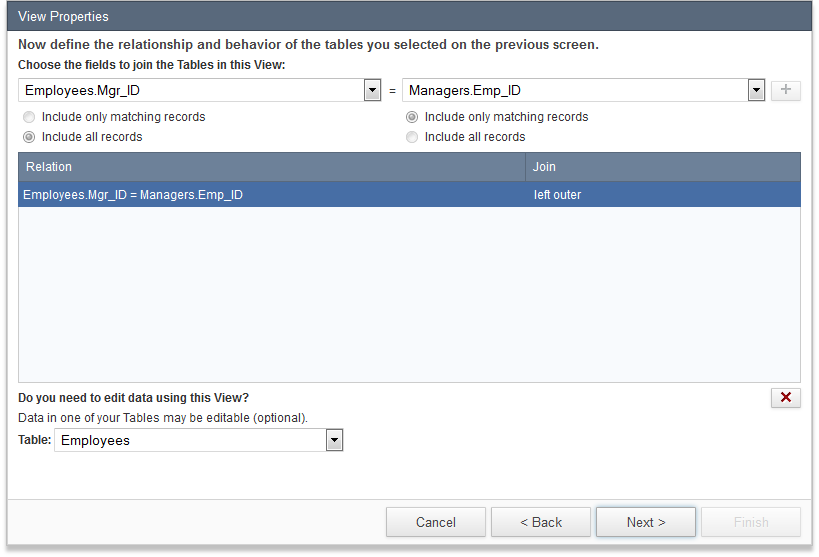
In this particular example, we chose to use a left outer join to include all records regardless whether they have a corresponding manager (for example, the CEO will show in the View even though he does not have a manager).
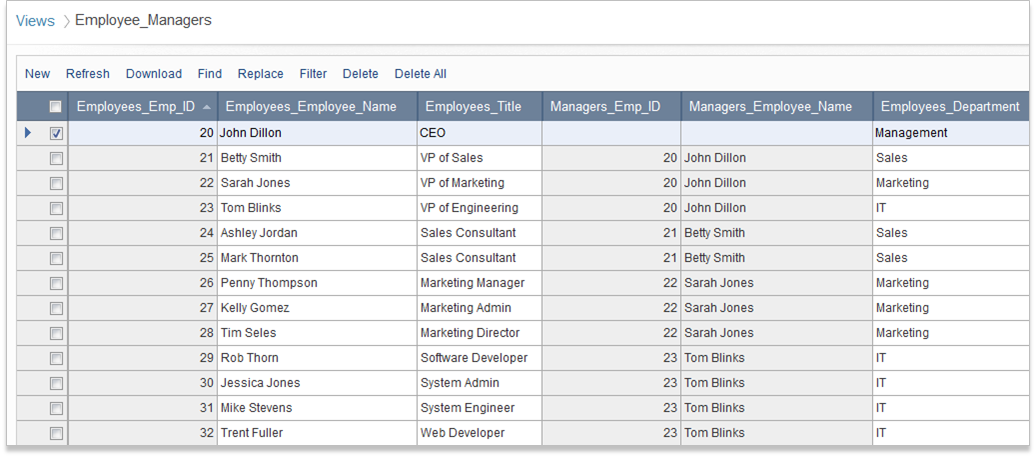
When you are finished selecting the fields to include in your View, open the View to see how the data from the same table has been joined or filtered. The example below shows a self-join applied to the Employees table, where the corresponding manager is displayed for each employee record.
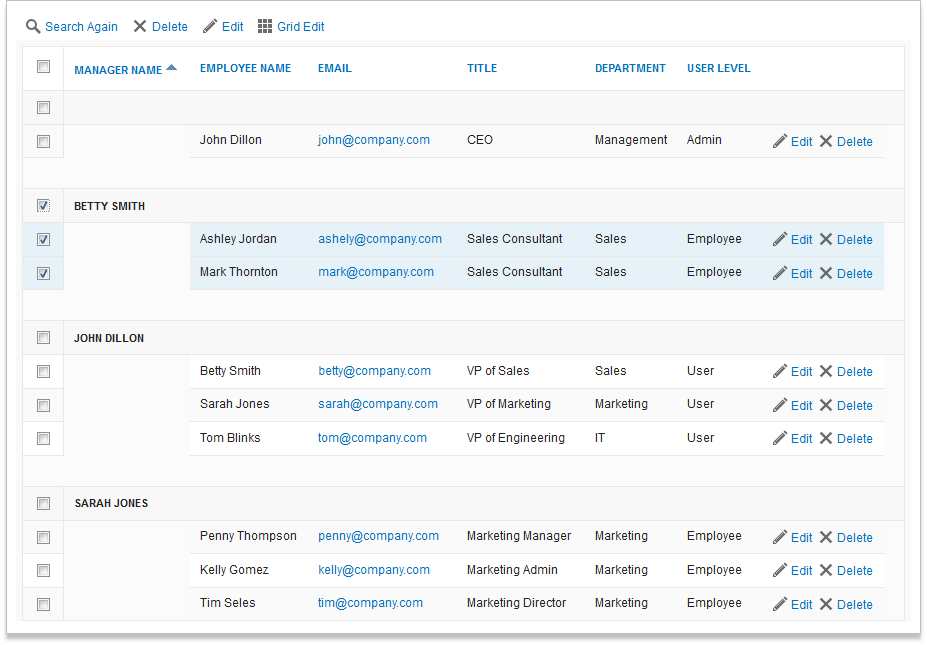
By creating the self-join to include the corresponding manager for all employees, you can now create a DataPage to group and manage this data based on the hierarchy.
Caspio is the world’s leading cloud platform for building online database applications without coding.
Start a free trial today and experience the power of no-code.

© 2025 Caspio, Inc. Sunnyvale, California. All rights reserved.