Stamp a Record with User Profile Data
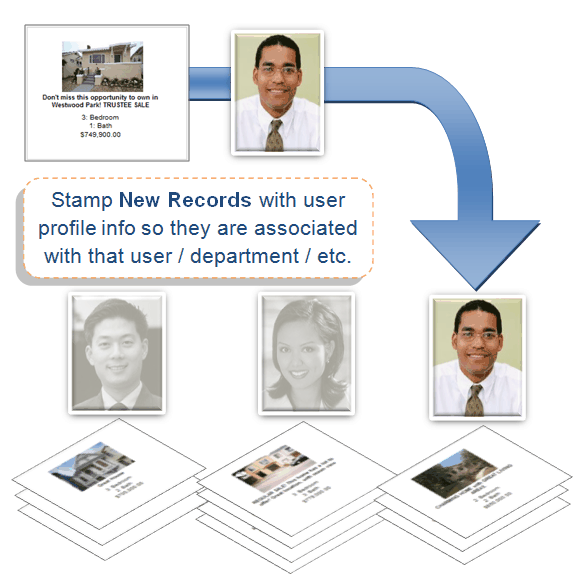
2 minutes to readAfter you have restricted access to the Datapage via Authentication or a Connection, you can stamp new or modified records with user profile data from the authentication table. This is often the first step to creating Record Level Security because all new records will be automatically associated with a user or group.

In this article, you configure an existing DataPage to stamp records with user profile data. Ensure an Authentication or Connection has been created before proceeding. In our example we use a Submission form to stamp new records. Similar steps can be taken for Update and Details DataPages to stamp modified records.
- In Caspio home page, on App Overview page, click DataPages on the sidebar menu. Select the DataPage that will stamp records and click Edit.
- On the DataPage DataSource screen, restrict access to the DataPage via Authentication or Connection.
- On the Select Fields screen, select the field where you want to store the user profile data by moving it from the left panel to the right-hand panel using the arrow button.
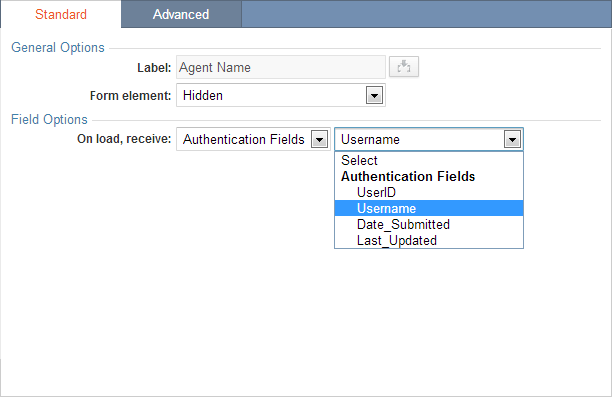
- On the Configure Fields screen, select the field where you want to store the user profile data. Using the Form element dropdown, select Hidden. In the Field Options, select Authentication Fields from On load dropdown. In the next dropdown, Authenticated or Connection Fields are available depending on your selection in Step 2. You will see all of the available fields from the authentication table or the Connection. If the authentication or the connection fields and the base table field’s data types are not compatible, then those fields will not be visible in this dropdown. Select the field you would like to save.

- Click Finish to save your DataPage. Now when a record is created by this DataPage (or edited in the case of details pages) this hidden field will be automatically stamped with the user profile data you selected.

