Creating Thumbnails with the Image Resizer
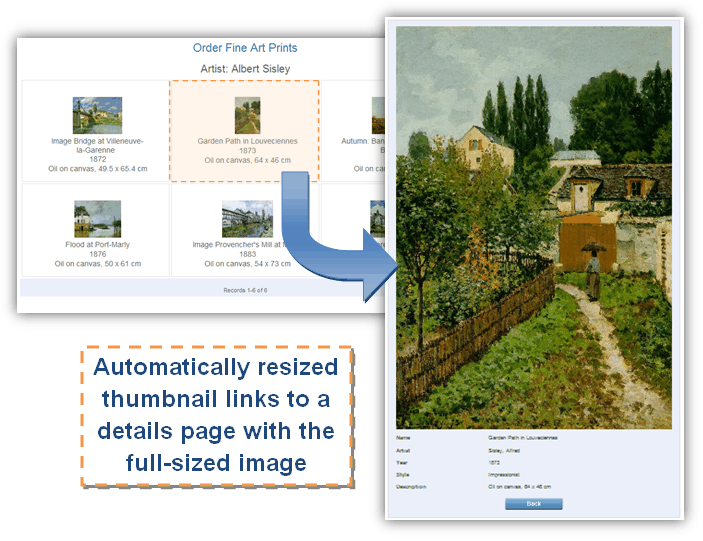
2 minutes to readThe Caspio Image Resizer creates thumbnail versions of your images automatically when they are submitted to a table through a File field. This can be an efficient way to reduce your monthly data transfer when you have image intensive results pages. This article shows how to record both the original image, and a thumbnail sized version of the image in another field.
The Image Resizer Option is currently available as a standard feature in Caspio. If you don’t have Image Resizer option in your DataPage, your plan may not include the feature. For more information you can contact your Account Manager, or select Change Plan from the Account menu to take advantage of the feature.

In this article, you add an extra file field to your table and configure this file field in the DataPage wizard.
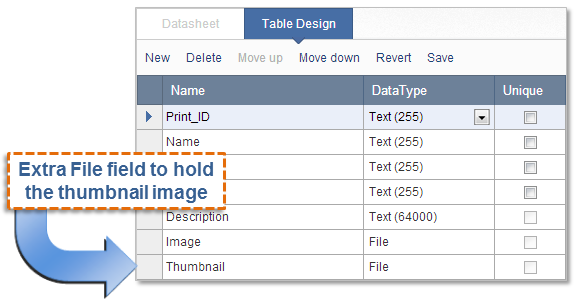
- Select the table where the resized images will be stored. You can overwrite the uploaded image with a resized version. In this example, create an extra File field to hold the thumbnail image in addition to the original. Navigate to the Tables listing in an existing app in Caspio. Select a table of where your images will be stored and click Design. Add an extra Field, name it, and set the data type to File. The table design is displayed:

- Next, navigate to the DataPages listings. Select any DataPage type that is a Submission Form, Update Form, or editable details pages of a report. Click Edit.
- Proceed to the Select Fields screen. Do not include the thumbnail File field in the selected fields.
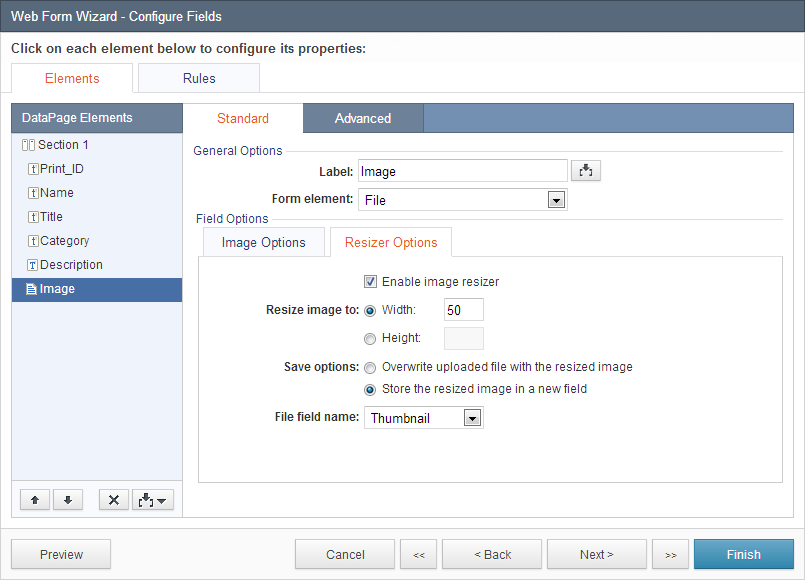
- You can now configure the image resizer to save a thumbnail version of the submitted image. In the Configure Fields screen, select the Image field from the DataPage Elements panel. In the Field Options section, configure the image options as normal.
- Click the Resizer Options tab and check Enable image resizer. Set either the height or the width size. Only one option is available so as to not distort the image by changing the aspect ratio.
- Under Save options, select Store the resized image in a new field. Select the Thumbnail field from the File field name dropdown.

Finish creating the Form or Report as normal. Click Finish to save your DataPage. Try to submit an image and view the results. Creation of the thumbnail version may take several minutes.

