Using Localization Feature to Improve Usability
2 minutes to readLocalizations let you customize the language your application communicates in. In addition to regional settings for numerical, currency and time display formats, all default messages in Caspio can be customized using both plain text and HTML.
Not only can you change the default wording, but also add graphics and links to further improve the overall user experience (UX).
Localizations can be used to:
- Increase user stimulation with graphics
- Avoid dead-ends – a page or interface that forces the user to press the back button.
- Provide a clear usage path such as an “Add Record” link when no records are found.
How to customize a Localization:
Navigate to the Localizations listing and select a Localization you wish to customize. Make a copy of your default localization to keep in case you would like to revert back to that version later. Click Copy, enter a new name, and click Save.
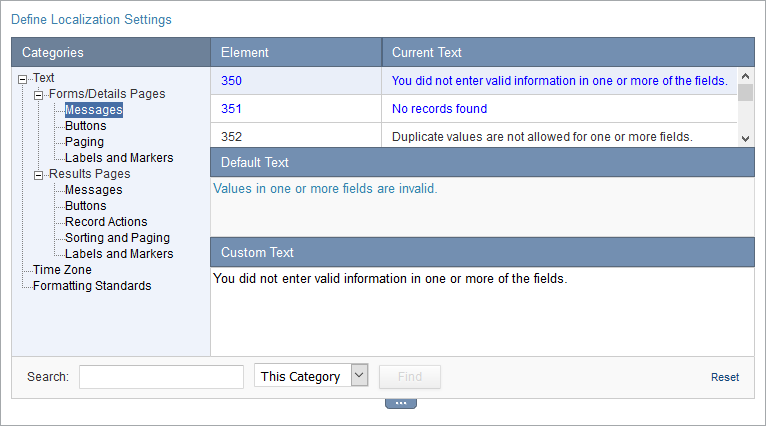
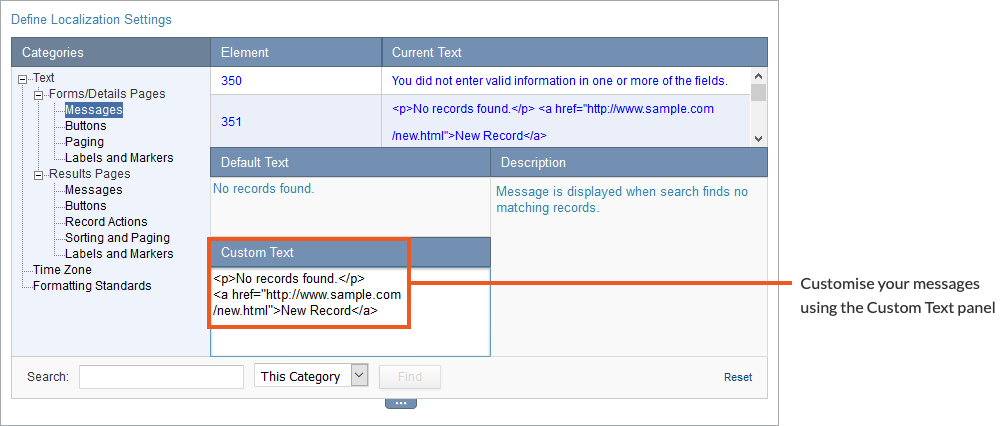
The first section allows you to customize individual messages. Select the message you would like to customize and enter a custom text in the Custom Text area. In the custom text panel you can insert text and HTML (and inline JavaScript).
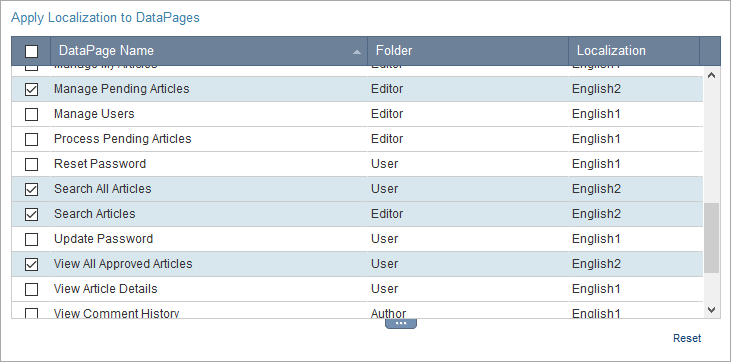
The second section allows you to see which DataPages are assigned to the current Localization. Using this screen you can change the localization of multiple DataPages at one time using the checkbox column at the far left.
Here are some ideas that have proven helpful.
Add links and images to messages:
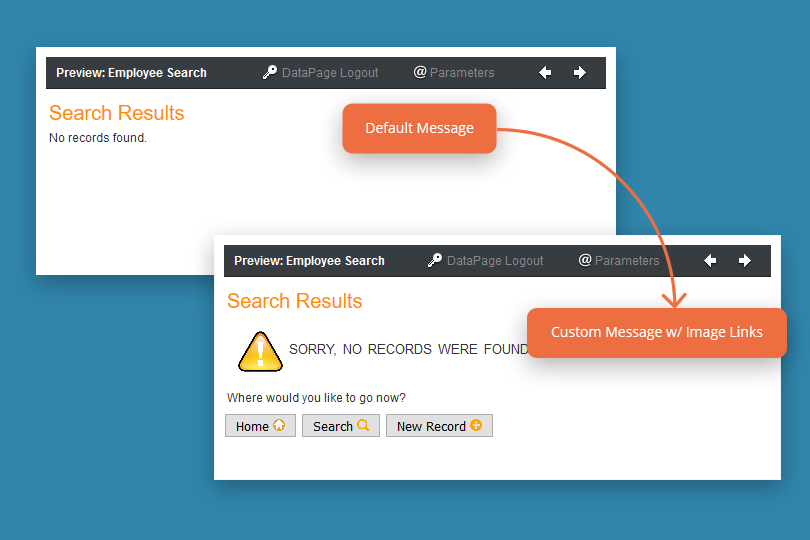
View live example.
Add a popup alert to error messages
Popup alert messages are very effective for getting your user’s attention to pass on information. However, they can become irritating if used too often because there is no way to disable them in most browsers. Use them sparingly.
Automatically redirect a user instead of displaying a message
Occasionally the best option is to redirect the user’s browser. This can be especially useful if you have a personalized link to a Single Record Update Form. If the record no longer exists, you can redirect your user directly to a form to create a new one.
code1
<h1>Sorry, no records were found</h1><p>Where would you like to go now?</p>
<div>
<a href="">Option 1</a>
<a href="">Option 2</a>
<a href="">Option 3</a>
</div>
code2
<script>
alert("Alert Text");
</script>
code3
<script>
window.location.href = "http://URL of Redirect Location";
</script>

