Extension for Slack
3 minutes to readWith the Extension for Slack, you can generate notifications using data from your tables and send them to your Slack workspace channels. This feature allows you to keep your team informed about updates, alerts, or milestones directly from your application. Whether notifying teams about case updates, order statuses, or task completions, this integration streamlines communication by delivering real-time messages to the appropriate Slack channels.
Note:
- This extension is currently being approved by Slack. You might encounter a message indicating that the app has not yet been approved. The extension remains fully functional and you can use it as intended while the approval is in progress.
- If you used the Extension for Slack before May 8, 2025, you might need to reinstall it to authorize Caspio’s updated access and take advantage of the new channel selection feature. For details, see 60.0 Release Notes.
Using the Extension for Slack
Prerequisites: Install the extension. During the installation, allow Caspio to access your Slack workspace by clicking Allow on the Slack authentication page.
- On the list of extensions, click Open next to Slack.
- On the Agents screen, click Create agent.
- In the Details step, enter the name of your agent. Click Next.
- In the Trigger step, select the data source that you want to send messages to Slack. Choose the type of event that will trigger the extension action. Click Next.
- In the Outgoing data items step, select the channel and enter the message content. You can insert parameters that the extension should use when processing the notification.
Click Next. - In the Incoming data items step, select the field of the table where you want to store the message delivery status.
- Click Create.
Outgoing Data Item Types
- Channel: The Slack channel (e.g., general, marketing) where the message will be posted.
- Message: The content of the message to be posted, which can include dynamic data (e.g., names, dates) and formatting.
Incoming Data Item Types
- Message Delivery Status: Store the Slack response in the table field. Possible values and statuses:
- “Message sent to Slack.” – Message delivered to the Slack channel.
- “Failed to send message to Slack. Channel ‘{channel}’ not found.” – Channel not found or app not integrated with private channel.
- “Failed to send message to Slack. The channel cannot be empty.” – This might happen if you are using a data source field to provide the channel name and the field value is missing.
- “Failed to send message to Slack. Message cannot be empty.” – This might happen if you are using a data source field to provide the message, and the field value is missing.
- “Failed to authenticate with Slack. Please reinstall the extension and grant the necessary permissions.” – App uninstalled from the Slack workspace.
Basic Message Formatting Options
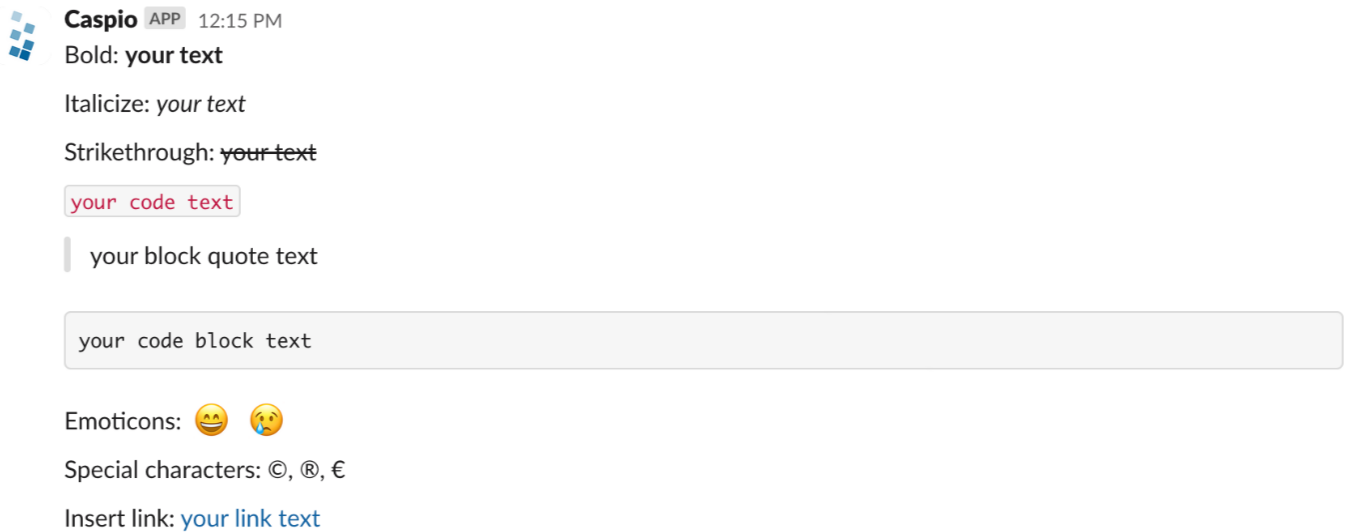
For information on formatting message text, refer to Slack’s formatting reference and help article. Here is an example of some formatted output:
Example:
Limitations
- Character limit: Messages exceeding 4,000 characters will be automatically divided by Slack into multiple parts and sent in separate chunks.
- Interactive elements such as buttons or dropdown menus are not supported.
- Attachments are not supported.
- Sender names and App names are limited to 50 characters.
- Private Channels: If an app is not part of a private channel, it will be restricted from sending messages or performing any actions within that channel.
Resource Usage
This extension uses two types of resources:
- Credits: Each post uses 0.4 Credits. See Caspio Credits.
- Integrations calls: Each request uses three integrations calls: for sending, receiving, and logging.

