Restrict Access to Data by User or Role
4 minutes to readYou can use Record Level Security to restrict access to records based on the current end-user’s profile data in Search and Report DataPages. This gives your end-user access only to records that they have authored, that have been assigned to them, that pertain to their department, etc.
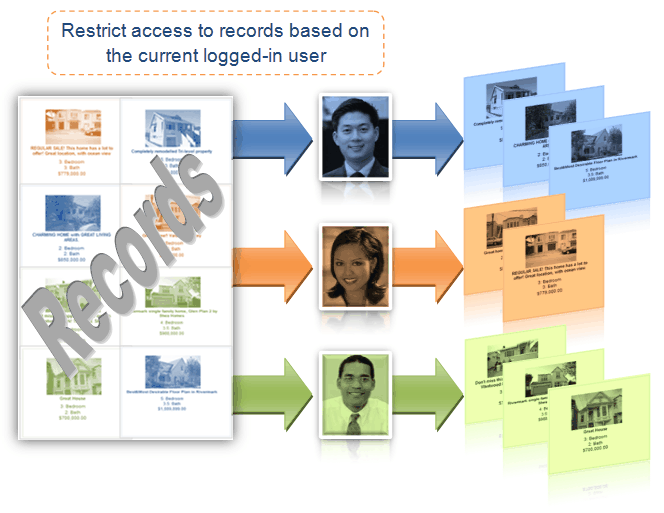
In this article, you create two tables, an Authentication, and a Search and Report DataPage. These instructions show how property agents can only access their own listings. First, create an authentication table of user profile information. In this scenario, the table name is Property_Agents. It may appear like this:
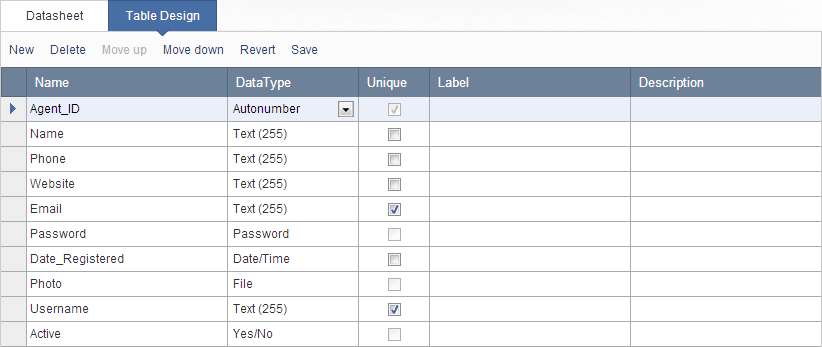
The Agent_ID field is considered the key that will later reference a related field in the DataPage data source.
Next, create a second table for the Search and Report DataPage. This base table must include a field that indicates who owns each record. This field can be used to indicate any ownership information that is applicable to your app, but must reference your authentication table data.
Some examples include:
- The person currently in charge of the record (Name or Employee_ID)
- The department to which the record pertains (Department_Name)
- The original author of the record (Name or Employee_ID)
You can think of this field as the receiving address; when a user signs in, they will only see the records addressed to them. In database terms, this data is referred to as a foreign key.
When you are creating new records, it is best to add data to this field from a dropdown with a lookup table or by stamping the record with the current logged-in user data, as opposed to typing it in manually which may lead to typographical errors.
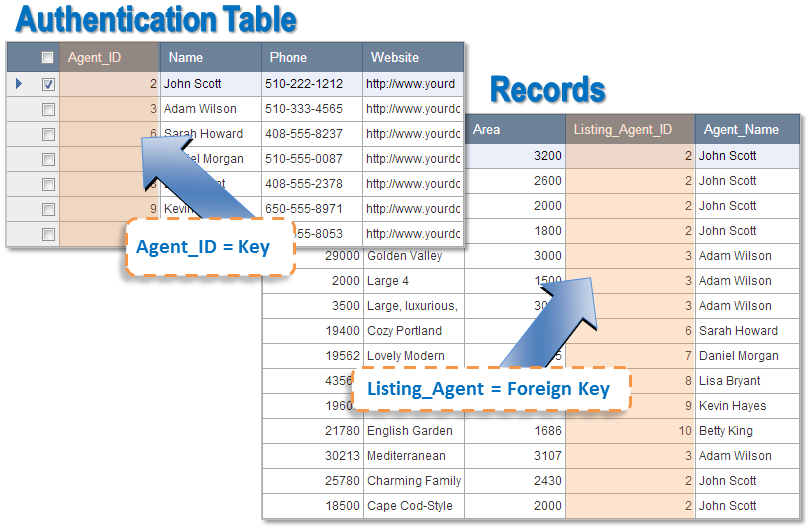
In this case, this table lists records of multiple property listings for each agent. The table name is Property_Listings. The table design is displayed:
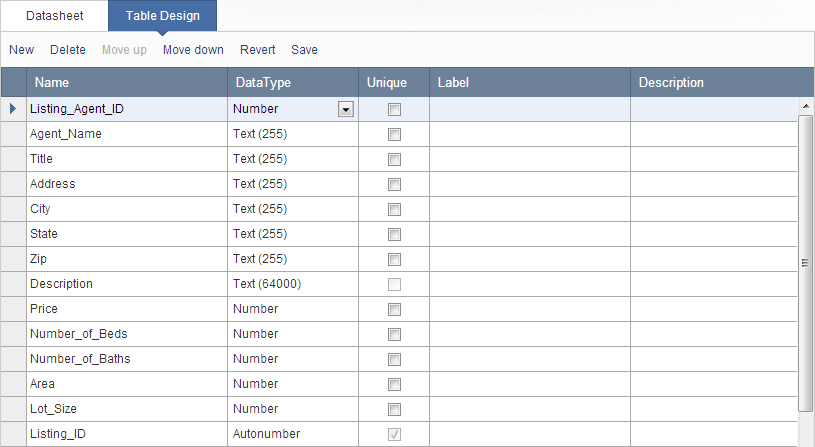
The Listing_Agent_ID field is considered the foreign key that will be matched to the Agent_ID from the authentication table.
Next, create an Authentication with the new authentication table data.
- In the Caspio homepage, select and open an existing app. In the App Overview page, click Authentications on the sidebar menu and click New Authentication.
- In the Authentication table or view drop-down, select an existing table or view as an authentication data source. In this scenario, the Property_Agents table is selected. Click Express.

- Select a unique username field in the Username field drop-down and a password data type field in the Password field drop-down. In this case, Username and Password fields are selected from the drop-down. Click Create.
- Next, enter a new Authentication name or use the default name in the pop-up dialog box. In this case, the Authentication is named Active_Property_Agents. Click OK.
- In the same app, click DataPages on the sidebar menu and click New DataPage.
- By default, the cursor selects Submission Form as the first DataPage type. Select Reports on the left menu and click Tabular.
- On the DataPage DataSource screen, you can now set the DataPage properties with the base table and Authentication you created earlier.
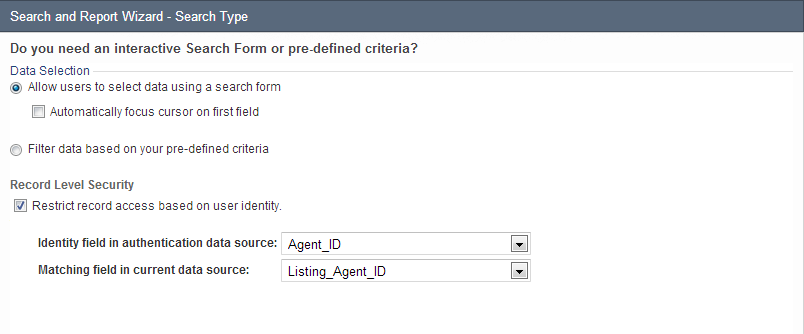
After you enabled Record Level Security, you can now continue configuring the DataPage as normal.
You have successfully created an application with Record Level Security and can apply these instructions to your own application design. The Record Level Security will be applied as an additional filter limiting access to only the table records associated with the current end-user. Be sure to create a user account to test that you have implemented Record Level Security correctly.
