Configuring SMS
5 minutes to readIn this article we will guide you on how to configure Acknowledgement and Notification SMS messages in DataPages, Triggered Actions and Tasks.
Note: SMS notifications are available in select plans and their cost is counted in Caspio Credits based on the recipient country.
Configuring SMS in DataPages
Acknowledgement SMS
When enabled, Acknowledgement SMS messages are sent upon data submission, modification, or deletion to a phone number from a given field. For example, you can set up an acknowledgement SMS to app users who make an appointment or register to a new service.
To send acknowledgement SMS messages:
- In your app, navigate to DataPages and edit a selected DataPage. Proceed to the Destination and Messaging screen.
- Click the Messaging tab. In the Acknowledgements section, select the SMS checkbox.
- In the phone field, select the recipient phone number field.
- Select your preferred country code handling:
-
- All my numbers contain proper country code in +n format, or +1 is assumed
- Append country code from this field – select a field from a data source to append the phone number with.
- Append fixed country code – enter a fixed country code that will be appended to all phone numbers from your phone number field.
- Configure the SMS message content.
- Select Finish.
Notification SMS
Notification SMS messages are sent upon the data submission, modification, or deletion to the specified phone numbers. For example, you can send a notification SMS to a system administrator when an app user makes an appointment or registers to a new service.
To send notification SMS messages:
- In your app, navigate to DataPages, and edit a selected DataPage. Proceed to the Destination and Messaging.
- Click the Messaging tab. In the Notifications section, select the SMS checkbox.
- Enter a valid receiver phone number and configure the message content.
- Select Finish.
Configuring SMS in Triggered Actions
Triggered Actions allow sending automatic SMS notifications upon addition, modification, or deletion of a record in DataPages. They can be executed by building an application logic using the visual interface.
Sending SMS messages with Triggered Actions
- From the Triggered Actions tab of the table you want to base the trigger on, click New Triggered Action.
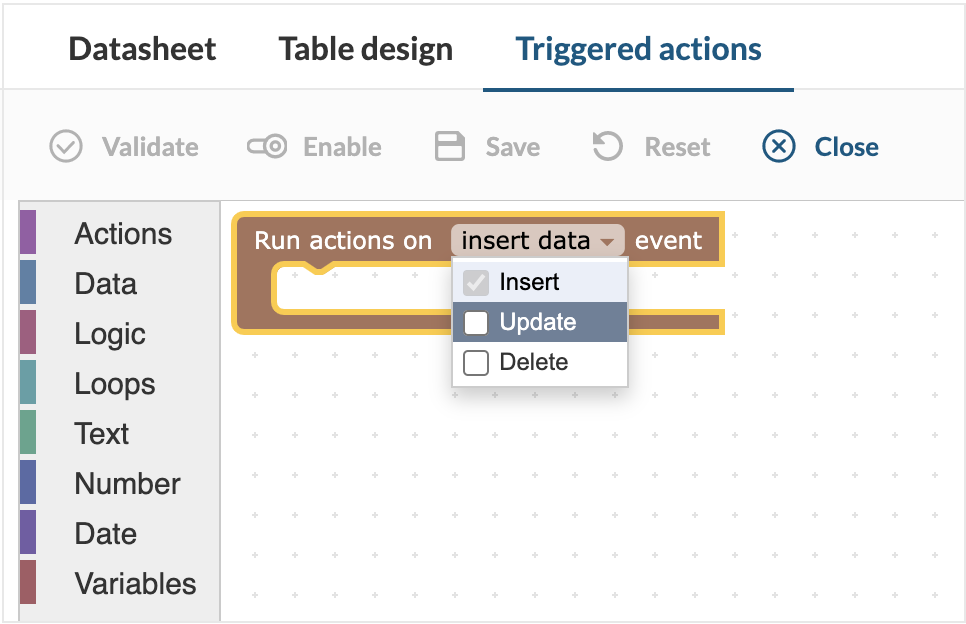
- Select events on a table that will trigger your action. You can choose between Insert, Update, and/or Delete.
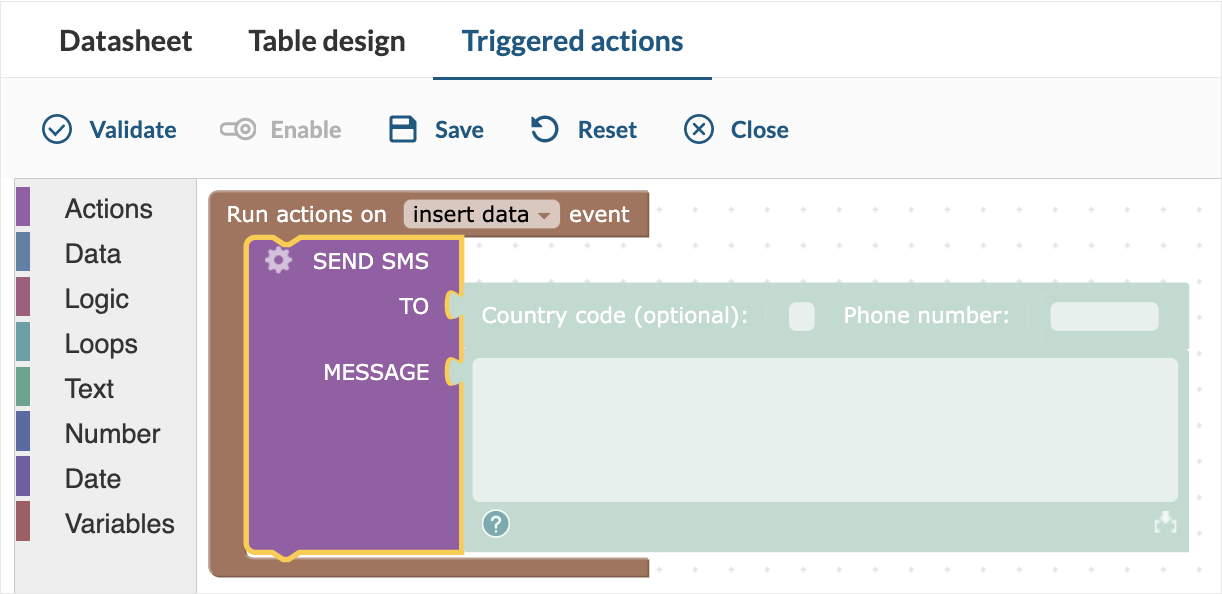
- From the left-hand menu, select Send SMS as an action that should run when a trigger executes. Click or drag this action block.
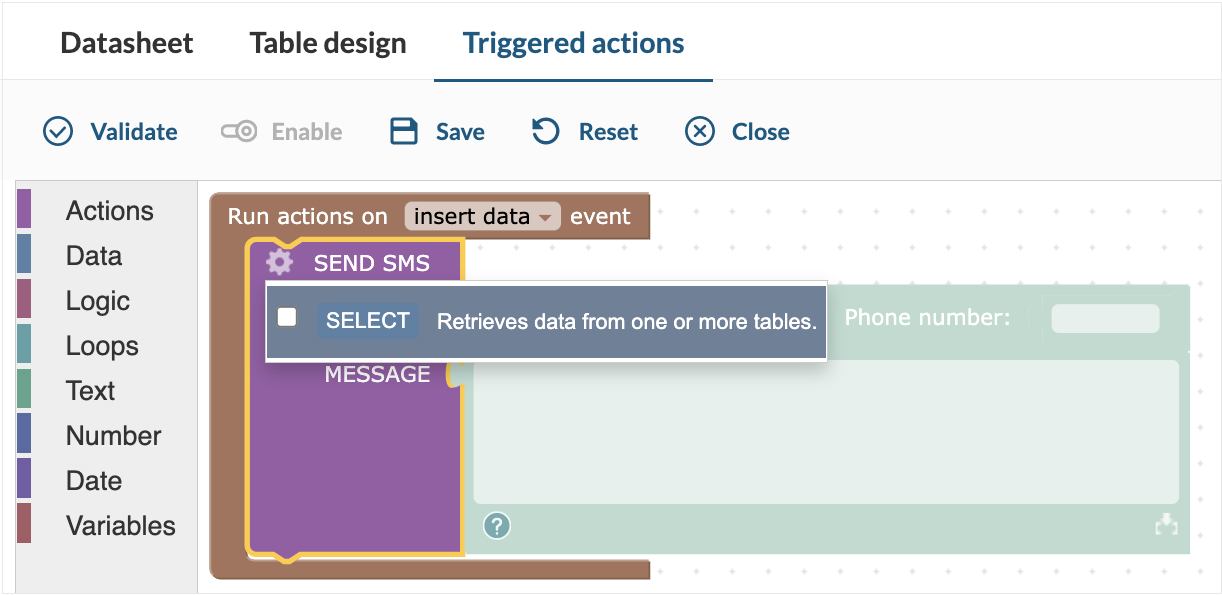
- By clicking the gear icon in the notification Action block, you retrieve data from tables to use in the subject or message body.
- In the TO field, insert the country code and phone number. If no country code is entered, it will be auto-filled with +1. You can also use an international phone number format with the code included in the Phone field.
- By clicking the
 picker icon you can insert a field value in the message body or subject line. This is available only when SELECT statement is used to retrieve data from tables.
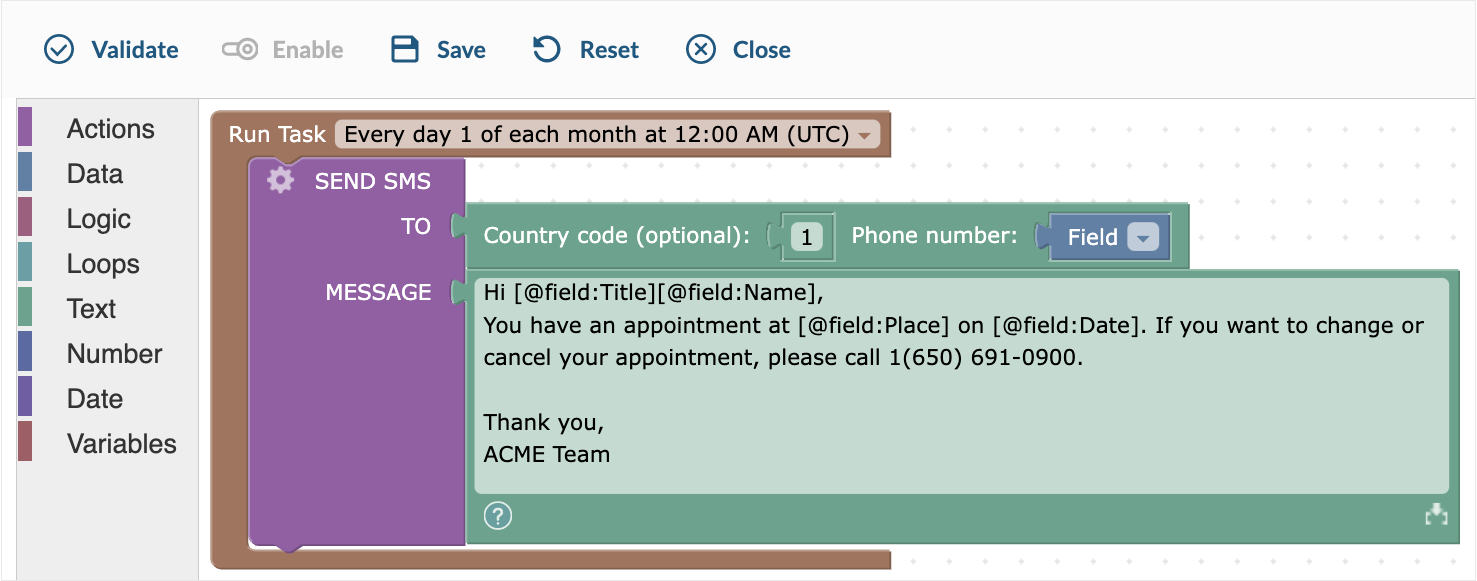
- By clicking the gear icon in the notification Action block, you retrieve data from tables to use in the subject or message body.
Note: The message body can contain a maximum of 160 characters. For non-GSM characters, the limit is 70.
- You can click the Validate button in the upper menu to check if there are no errors in the trigger.
- Select Save from the top menu.
- Name your trigger and then select either Save or Save & Enable.
Configuring SMS in Tasks
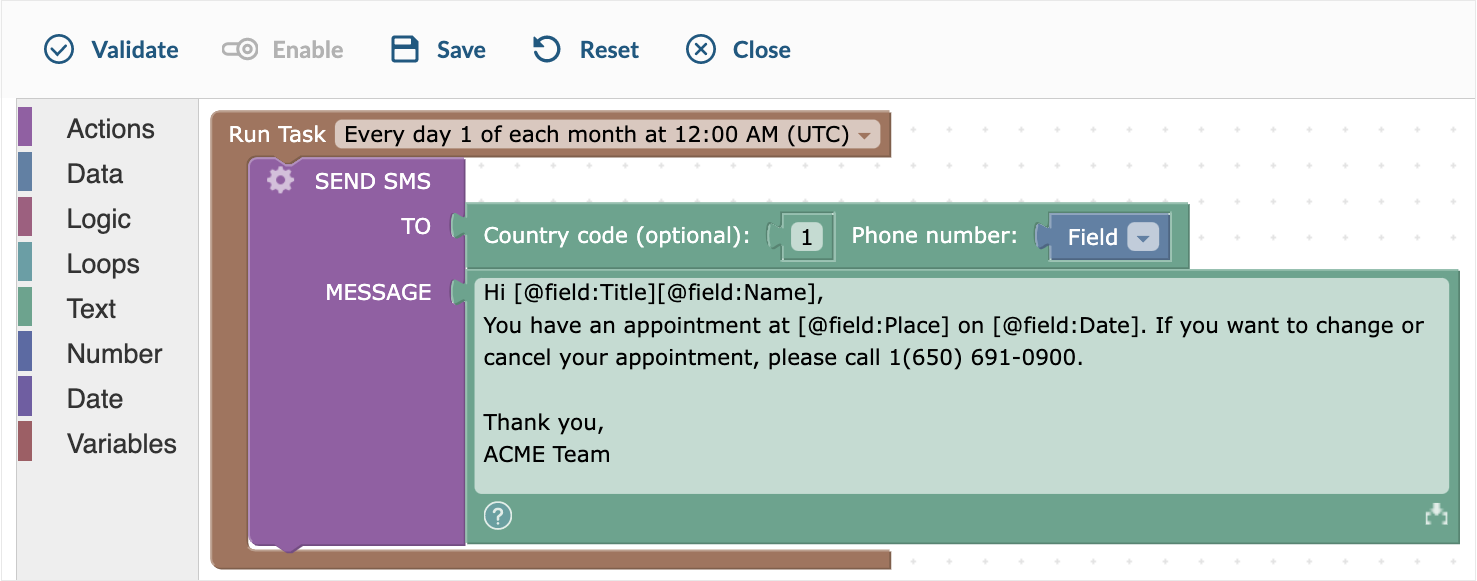
Tasks are operations that you can create in your application and run them manually or automatically based on a predefined schedule. You can use them, for instance, to send SMS messages with best wishes and special offers on your customers’ birthdays.
Sending SMS messages with Tasks
- On the sidebar of your application, click Tasks.
- Click New Task and build your task in the task editor.
- Click on the dropdown to set the frequency of your task runs.
- For manual tasks, select the On Demand option. For more information, see Running a task manually.
- For repetitive tasks, select Configure… and set the task schedule options as needed.
- From the left-hand menu, click or drag the Send SMS action block.
- In the TO field, insert the country code and phone number. If no country code is entered, it will be autofilled with +1. You can also use an international phone number format with the code included in the Phone field.
- By clicking the
 picker icon you can insert a field value in the message body or subject line. This is available only when SELECT statement is used to retrieve data from tables.
Note: The message body can contain a maximum of 160 characters. For non-GSM characters, the limit is 70.
- You can optionally test the correctness of your logic by clicking Validate. If there are errors, you must fix them before you can save the task.
- Click Save and name your task.
- Save your task. If you want to enable the task immediately, click Save & Enable.

