Multi-column and Sections
2 minutes to read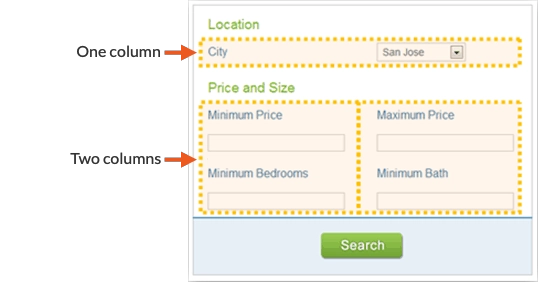
In this article, you edit a DataPage to include separate columns.
- In the Caspio homepage, select and open an app. In the App Overview page, select the DataPage you would like to adjust and click Edit to open the DataPage wizard.
- Proceed to a Configure Fields screen. In a Submission Form, there is only one Configure Fields screen, but in a Search and Report, you can configure fields in both the Configure Search Fields screen and the Configure Details Fields screen.
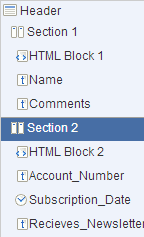
- For this example, create a New Section. At the lower right hand corner of the DataPage Elements panel, click the Insert button and click New Section.
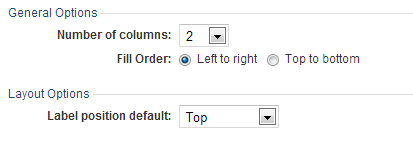
- Select the New Section you just created and configure the properties to match the image below. The first dropdown allows you to choose the number of columns you wish to have in the section. You can also select the fill order and default label position. In this example, select 2 in the Number of columns drop-down and set Label position default to Top. Move fields you wish to have multiple columns under this section.
- If you would like to change the number of columns more than once in a single DataPage, you can add as many extra sections as needed. Ensure sections and fields are organized to your preference.
- Click Finish.
