Accepting Payments in Your Application
4 minutes to readWhen you want to accept payments in your application, connect the application to a payment gateway like PayPal ExpressTM and StripeTM. First, you create a payment processor that connects Caspio to a payment gateway. Next, you add and configure the payment option in a Submission Form of your application.
Note: Payment Integration is available in select plans. For more information, see Caspio plans and pricing.
Creating a payment processor
To process payments in a Caspio application, connect the application with at least one payment gateway that Caspio supports. You can connect with PayPal Express and Stripe by creating a dedicated payment processor for each of them.
Note: Using payment gateways for processing financial transaction in a Caspio application requires accounts for the payment gateways. You need to obtain these accounts separately from your Caspio account. If you need more information, see the official documentation about the payment gateways that you want to use.
- On the main menu at the top, click Tools > Payment Processors.
- Click New Processor.
- Select a payment service and connect with it.
- Stripe
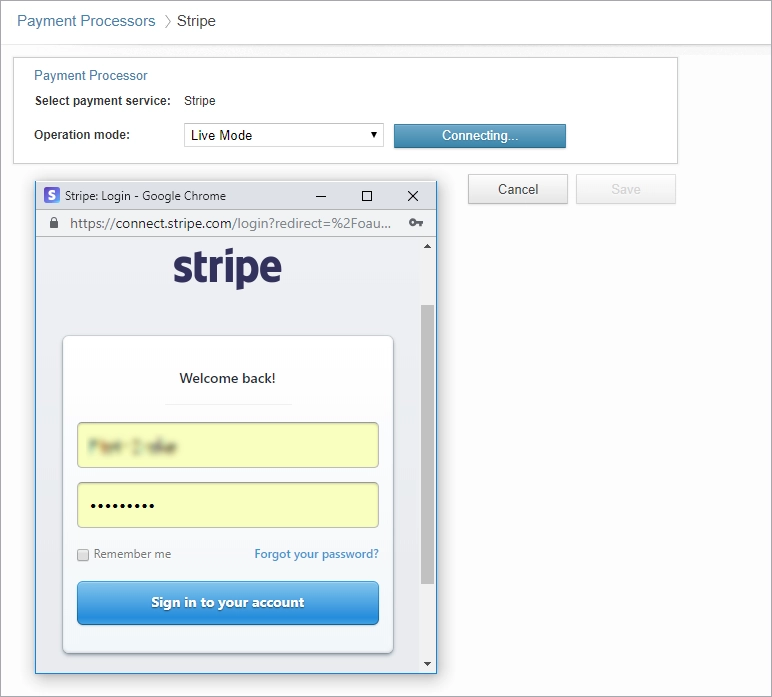
For more information about the Stripe configuration, see the official Stripe documentation.
- PayPal Express

For more information about the PayPal configuration, see the official PayPal Developer documentation.
- Stripe
- Click Create.
Adding payment options to a Submission Form
Select payment options that you want to use in your application. You can add more than one option and let your application users decide how they want to pay.
Prerequisites:
Before you add any payment options to a Submission Form, make sure that the Submission Form and its data source contain a numeric field for storing transaction amounts. The data type of the field must be Currency, Integer, or Number. You cannot add payment options when there is no such field in the Submission Form and its data source. For more information, see Data Types.
- Create or open an existing Submission Form. For more information, see Submission Forms.
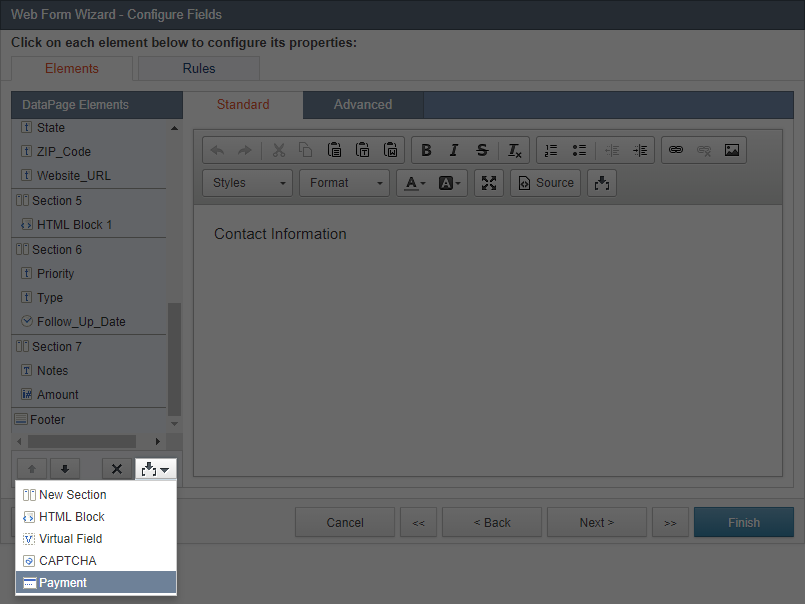
- In the Configure Fields screen, click the Insert icon and select Payment.
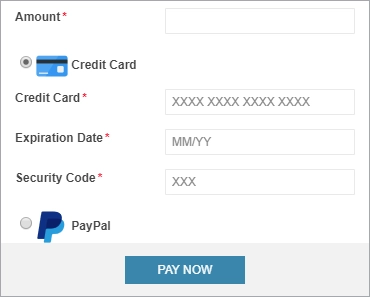
- In the Standard tab of the Payment element, select at least one payment option that you want to have in your application.
- In the Credit card processor field, select a payment processor that connects the application with Stripe.
- In the PayPal Express Checkout field, select a payment processor that connects the application with PayPal Express.

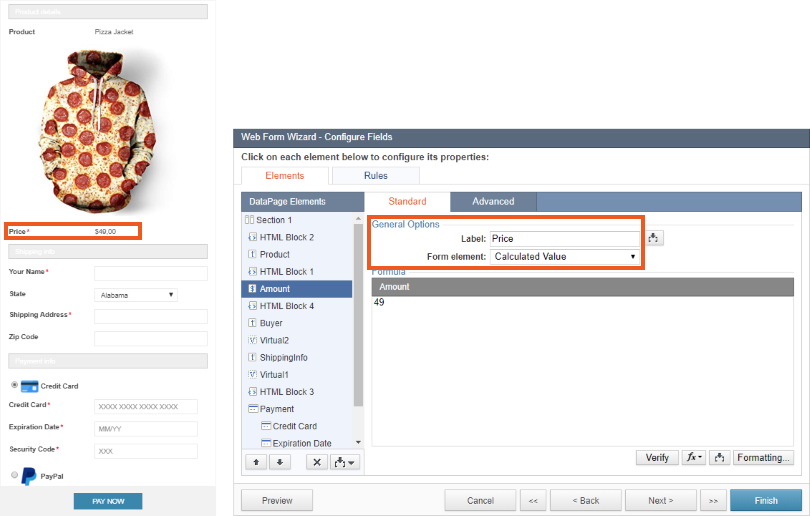
- Select the field where you want to store transaction amounts. In our example, it is the Amount field.
- Select the currency for the transaction.
- Optional: Store additional transaction details of each transaction.
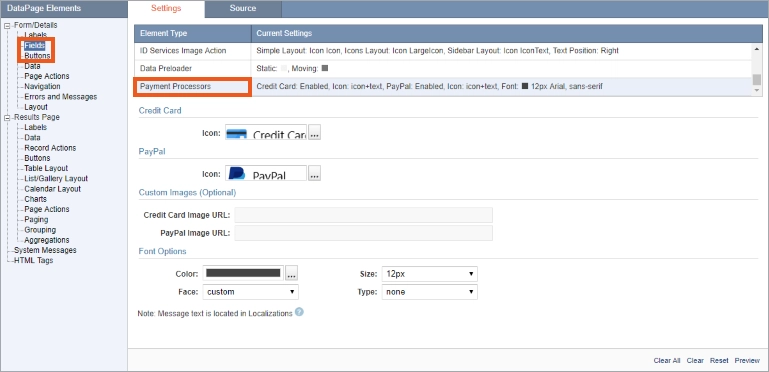
- Click the Advanced tab.
- Select a field for each transaction detail that you want to store in the record.
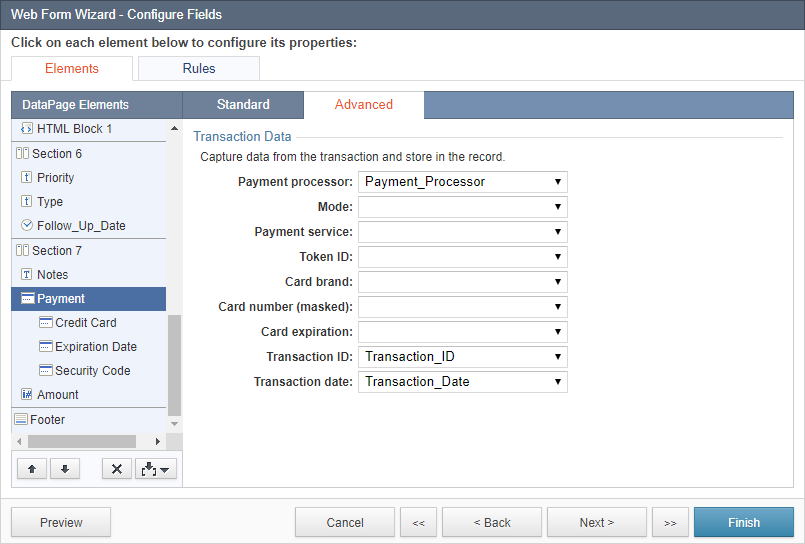
In this example, we want to know if it was a Stripe or PayPal transaction. We also want to store the date of each transaction and its ID.
- Optional: Click Preview to see how the payment options look on the Submission Form.
- Optional: Customize the styles for the Payment Processors field and the PayPal Express Checkout button.

For more information, see Customizing Styles.
- Optional: Localize Messages, Buttons, and Labels and Markers for the payment options. For more information, see Creating a New Localization Object.
- Click Finish.
Viewing transaction logs
When the users of your Caspio applications start making payments, you can view transaction logs. Transaction logs contain details of each transaction that the users made through the payment gateway or gateways that you configured.
- On the main menu at the top, click Tools > Logs to view available logs in your account.
- Open Payment log to view transaction log records for the payments.
Good to know
- Deploy a Submission Form with the payment options on a website that uses HTTPS. When you deploy the Submission Form on a website that uses HTTP, the payment options are not visible. A secure connection between your browser and the website is required to protect financial transactions. For more information, see Stripe Integration Security Guide and PayPal security guidelines and best practices.
- Set the form element of the Amount field to Calculated Value for all payment amounts that are fixed or calculated. Write the amount or the formula for the calculated amount in the Formula field. The Calculated Value field stores data in a secure manner and cannot be easily hacked.