Creating or Editing a Localization
2 minutes to readUse Localization to customize the language and culture of your app. The Localization Wizard offers all the text, formatting and time zone that can be customized. Multiple built-in Localizations are provided in your account. They can be customized or used as a basis for your own new Localization.
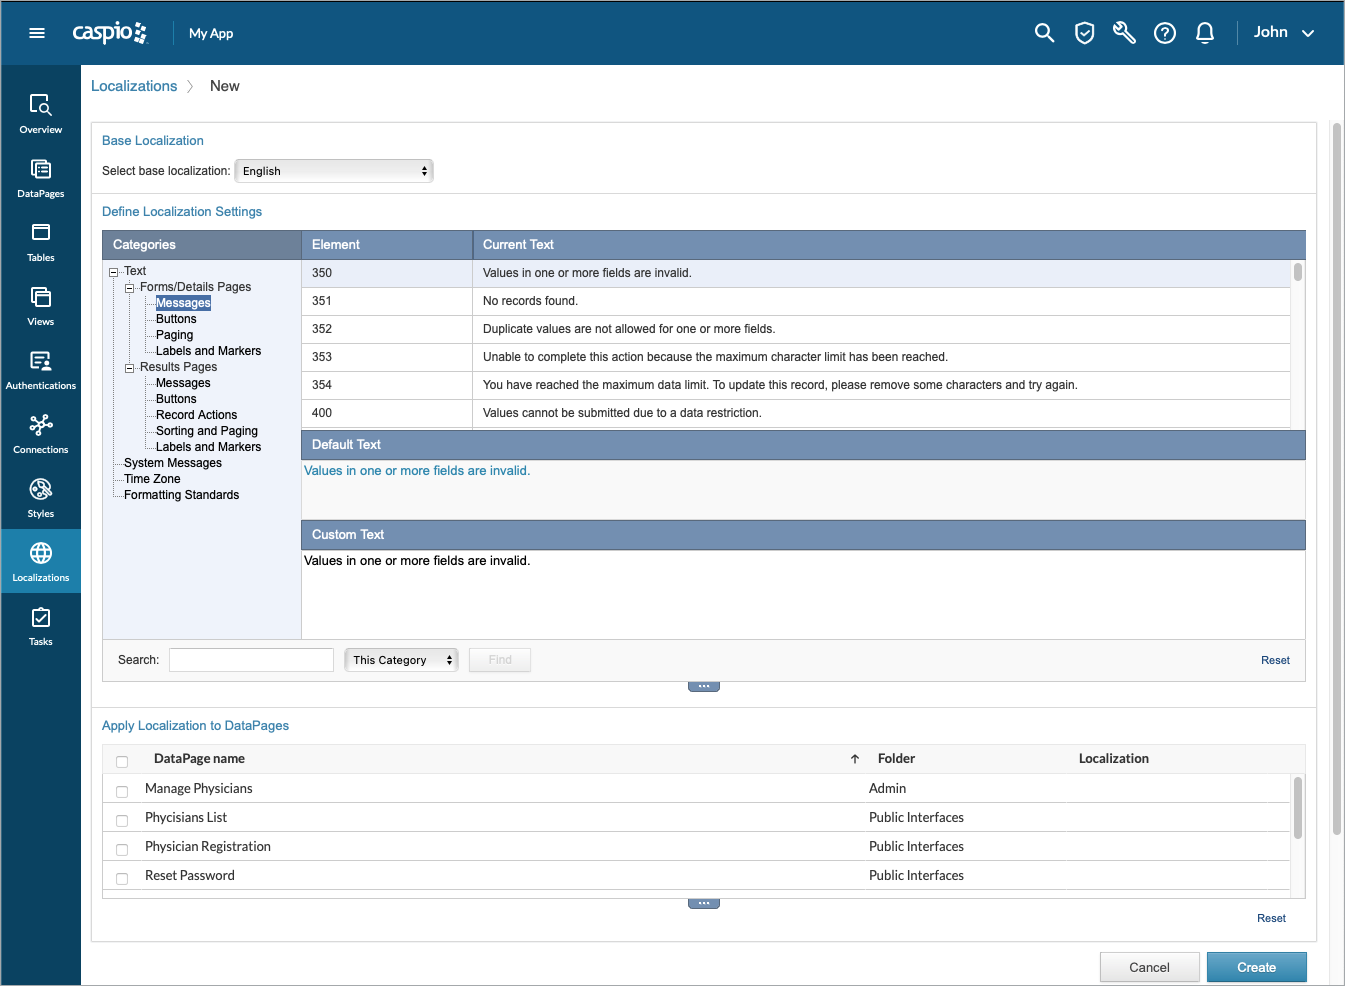
To change or create a Localization select Localizations tab on the side bar of your application.
- Click on New Localization link or click Edit on an existing Localization.
- In the Base Localization section, select a localization template that you want to use. This will specify the starting point for your Localization to potentially reduce your work, otherwise you can choose any language as base.
- In the Define Localization Settings section, select an element under Categories list to configure. The elements are arranged in multiple expandable categories.
- To customize an item, select it from the left bar. Its sub items appear in the table on the right. For text and formatting elements the current text is shown. You can select the element and in the Custom Text section provide your own language.
- To undo any edits you have made to the current element, click Reset.
- Use the Search to find an element in a specific category or across the entire Localization.
- In the Apply Localization to DataPages section you can select the DataPages to which you wish to apply this Localization.
- Click Create (or Save if editing).