Creating and Managing Webhooks
3 minutes to readYou can create webhooks that send messages to single services, as well as multicast webhooks that send data to multiple destination URLs.
Steps to create an outgoing webhook in Caspio platform
- In the left panel on the main screen, click Integrations and go to the Outgoing webhooks tab.
- In the upper-right corner, click Create outgoing webhook.
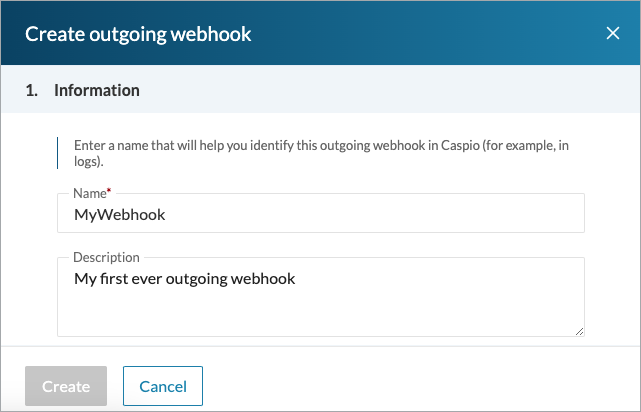
- In the Information section, enter the name and description for your webhook.
Entering meaningful information will help you recognize your webhook on the list.
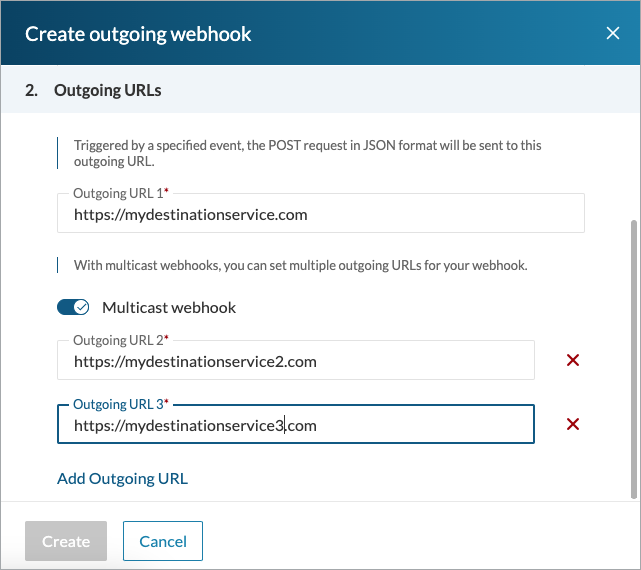
- In the Outgoing URLs section, paste the URL of the service you want to update by sending webhooks from Caspio.
- Optional: If you want this webhook to send data to multiple URLs, turn on the Multicast webhook toggle, and then paste additional URLs as required.
Note: Access to multicast webhooks depends on your plan.

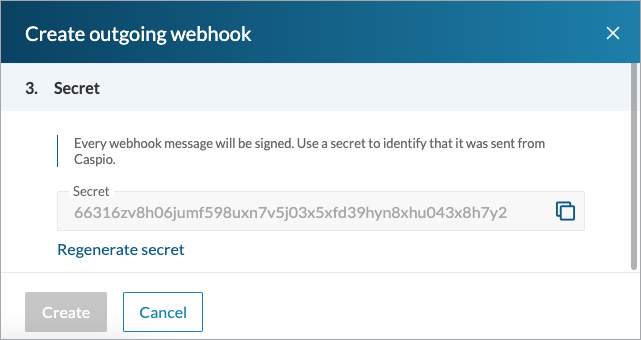
- From the Secret section, copy the client secret to paste in the destination service.
The secret key allows you to verify if webhook messages come from Caspio.
- Click Create.
Result: Your webhook definition is created and an empty list of events is displayed. You can now specify how many calls per second this webhook can make, and then create the events that will trigger this webhook to send messages to the outgoing URLs.
Steps to create and edit an outgoing webhook through REST API
Use the following operations to programmatically create and manage outgoing webhooks through Caspio REST API. For a full list of available operations, see our Swagger UI documentation.
- Check the list of available outgoing webhooks:
GET /v2/outgoingWebhooks - Create an outgoing webhook:
POST /v2/outgoingWebhooks - Check an outgoing webhook:
GET /v2/outgoingWebhooks/{webhookId} - Update an outgoing webhook:
PUT /v2/outgoingWebhooks/{webhookId} - Remove an outgoing webhook and its events:
DELETE /v2/outgoingWebhooks/{webhookId}
{"Name": "string","Description": "string","OutgoingUrls": [ "string", "string"],
"CallThrottling": 0}
| Parameter | Description | Required | Unique |
|---|---|---|---|
Name |
Meaningful label that identifies the webhook | Yes | Yes |
Description |
Optional background information for the webhook | No | No |
OutgoingUrls |
URLs of the target services where the webhook will be sent | Yes | Yes |
CallThrottling |
The maximum number of calls that the webhook sends per second | No | No |
Enabled |
Option that indicates whether the webhook starts checking for updates right away for all events. By default, the field is set to “true” and sets the Status parameter of all events to “Active”. |
No | No |
In this example, using a POST request, you create an outgoing webhook that sends messages to two URLs.
Request body:
{"Name": "MyTestWebhook",
"Description": "Send messages whenever changes in table MyCustomers occur",
"OutgoingUrls": [
"https://www.test.com/89lnuuy6999ss",
"https://www.test.com/79hjy76788hbk" ],
"CallThrottling": 8 }
Response:
{
"Id": "0994on",
"Name": "MyTestWebhook",
"Description": "Send messages whenever changes in table MyCustomers occur",
"OutgoingUrls": [
"https://www.test.com/89lnuuy6999ss",
"https://www.test.com/79hjy76788hbk"
],
"CallThrottling": 8,
"Secret": "96r8s33sz371oy8bpe9c86bcl17jt2iob2852xxxxxxxxxxxxx",
"DateCreated": "2023-05-17T12:27:53.9674307Z",
"CreatedBy": "John Doe (john.doe@acme.com)"
}

