Gradient Backgrounds for DataPages
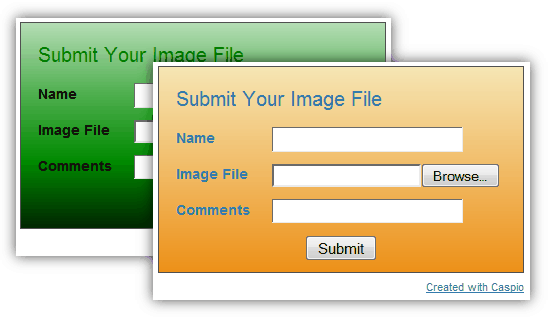
2 minutes to readYou can add a background gradient to your DataPages. This article shows how to configure your gradient CSS and adding the gradient code to your Style.

Steps to adding a background gradient:
Configure your gradient CSS
To create a gradient background, select either the horizontal gradient CSS or the vertical gradient CSS. Replace color1 with the gradient starting color (in hexadecimal) and color2 with the gradient ending color in the appropriate CSS snippet:
Horizontal gradient:
background: -moz-linear-gradient(top, #color1 0%, #color2 100%);
background: -webkit-gradient(linear, left top, left bottom, color-stop(0%,#color1), color-stop(100%,#color2));
Vertical gradient:
background: -moz-linear-gradient(left, #color1 0%, #color2 100%); /* firefox */
background: -webkit-gradient(linear, left top, right top, color-stop(0%,#color1), color-stop(100%,#color2));
Edit your Style
In Caspio, navigate to the Styles listing, select a Style where you would like to add a gradient background, and click Edit.
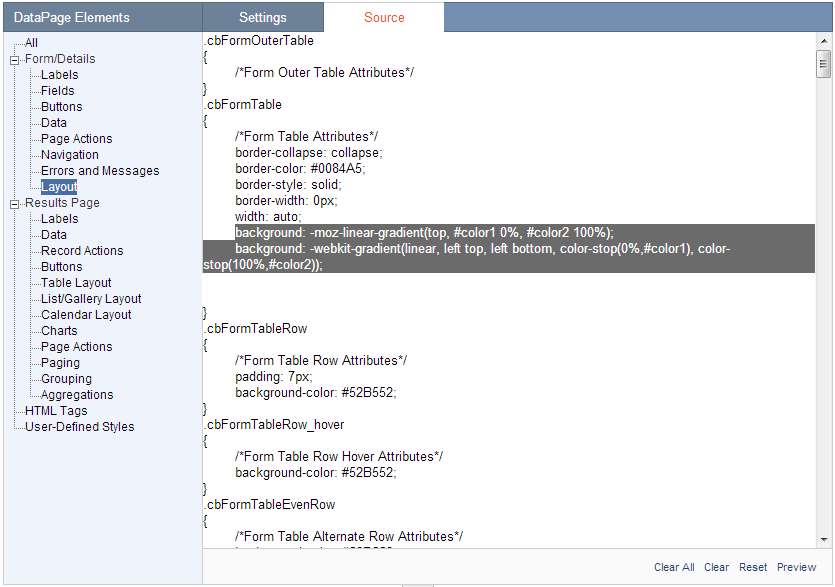
Click the Source tab to view the CSS source.

Add the gradient code to your style
For Submission Forms, add your gradient code to the .cbFormTable class. You can preview your form using the Preview button at the lower right.


If you still see a solid background color, be sure to remove all references to the background-color property in other CSS classes. Specifically, if the form rows or cells have a background color, this color will be displayed over the gradient. You can remove this formatting by locating instances of “background-color” in your CSS source tab, or by customizing properties in the Settings tab.
For Tabular Reports, you can add a gradient to the header row .cbResultSetTableHeader class.

You can also apply gradients to List/Gallery Reports by adding the CSS to .cbResultSetListViewTableOddCell and .cbResultSetListViewTableEvenCell giving you this result:
Click Save
Please note: This article uses external HTML, JavaScript, or third-party solutions to add functionality outside of Caspio standard feature set. These solutions are provided “as is” without warranty, support or guarantee. The code within this article is provided as a sample to assist you in the customization of your web applications. You may need a basic understanding of HTML and JavaScript to implement successfully.

