Creating Tables
4 minutes to readTables are the backbone of your Caspio apps. They hold all of your data and are the starting point for creating DataPages.
Tables are represented in rows and columns. Each row is called a ‘record’ and each column is called a ‘field’. When an app user submits a Web Form, the data is stored in the table as a new record.
Watch this video to learn how to build a database table:
Table Design
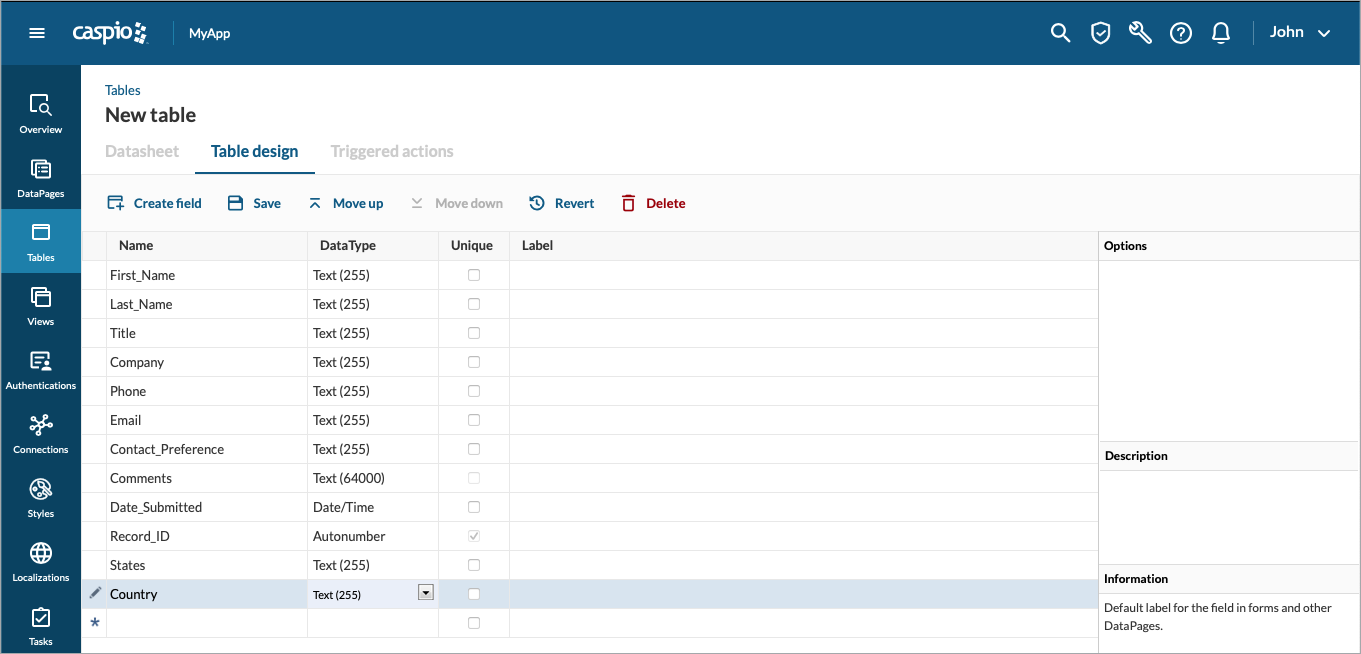
The Table Design screen consists of a work area, where you can create the fields for your table. The work area consists of the following fields:
- Name – Enter the name of the field (e.g., First_Name, Last_Name, State, etc.). Field names must follow the naming protocol below.
- Must be alphanumeric (a-Z, 0-9)
- Can be up to 32 characters long
- May include an underscore (_)
- Must begin with a letter
- Spaces are not allowed
- Name – Enter the name of the field (e.g., First_Name, Last_Name, State, etc.). Field names must follow the naming protocol below.
Note: A field name cannot contain words reserved for Microsoft SQL Server. To check the Reserved Keywords list, go to Reserved Keywords (Transact-SQL).
DataType – Use this dropdown to select the field’s data type. This indicates what type of information can be stored in the field (e.g., text, date, number, etc.). Some data types, such as Timestamp and Number, have additional options that can be configured in the Options section. (See Data Types for more information.)
- Unique – Select this checkbox to enforce the uniqueness of values entered in this field. This means that no two records can have the same value for the field.
Note: ID fields must be unique. For example, if you want to use email as the ID of your app users, you must set it as unique. Autonumber, Prefixed Autonumber, Random ID, and GUID data types are always unique.
- Label – Use this field to specify a label for the field that will be automatically used in your DataPages. You can enter up to 255 alphanumeric characters.
Note: If a label is not entered for a table field, the field name will be used as the default label. You can always change the field label in the DataPage wizard.
To the right of the work area is a panel that provides additional configuration options. It is divided into the following sections:
- Options – This section contains additional settings for some data types. The options in this area depend on your selection in the Data Type field.
- Description – Use this section to enter a short description for the currently selected field as a future reminder, comment, or note. This is helpful if more than one person will be developing apps using the same table. The content of the description field is not visible in your apps.
- Information – This section displays a brief description of the currently selected field in the work area. This tells you what you can do in the selected field
Complete the following steps to create a new table:
- Open the app in which to add a table and go to the Tables area.
- Click Create table to go to the Table Design screen.
- In the work area, enter or select the necessary information for each field. (See Table Design for more information about the work area fields.)
- To finish adding the field, click on another row or click New to add another field.
- Once you have added all your fields, click Save on the actions bar.
- On the New Table dialog box, enter a name for the table and click Finish.
Note: The naming protocol for table names is the same as table field names.
The table is now available in the Tables area and ready to store data. There are several ways that a table can receive data:
- To learn how to import data from files, see Importing Data.
- To learn how to manually add a new record to a table, see Managing Data in Datasheet.
- To learn how to create Web Forms where users can submit data, see Forms.
