Creating a View to Filter Data
3 minutes to readWhy filter a table?
Using a view to filter a table can have many usages. It is a good way to reduce the number of records and fields to only those essential to your current task. Another common use is to apply a filtered view to an Authentication. For instance, you can configure a view to remove records based on a set of criteria where app users are automatically removed from an authentication when set to inactive. Filtering views is an efficient way to display the data you want without making any changes to the tables.
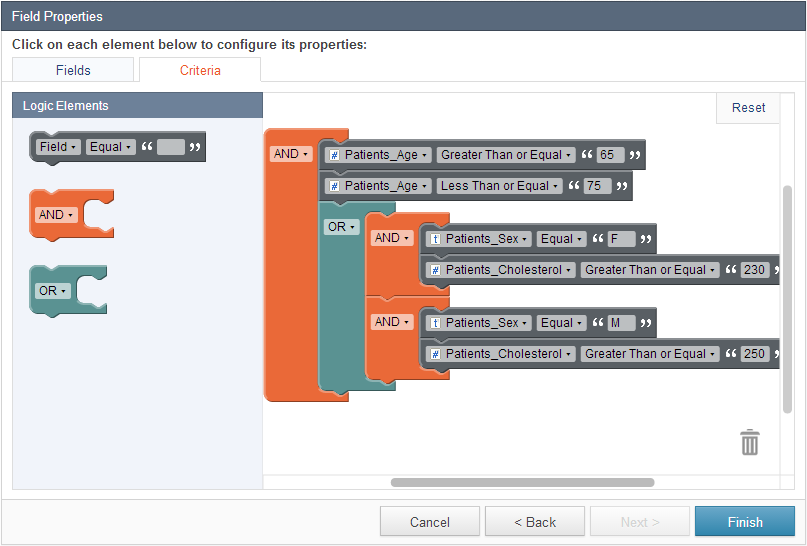
In this article, we show how to create a view to filter data. The example below shows how to filter Patient table to pull up female patients between 65 and 75 years old with cholesterol level higher than 230 and male patients between 65 and 75 years old with cholesterol level higher than 250.
Steps to creating a filtered view:
- On the home page, select an app in which you would like to create a view. You may also create tables and views in All Assets.
- Select Views on the sidebar menu and click New View.
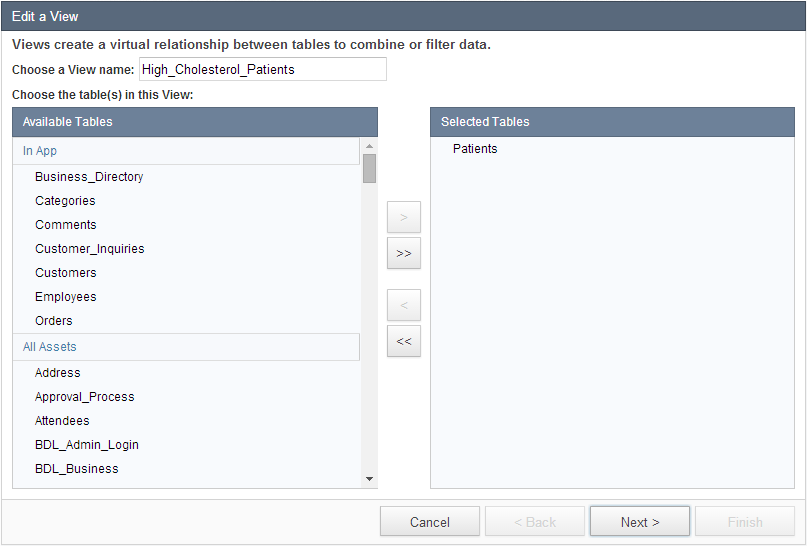
- The View wizard will open. On this screen, name your view. Only letters, numbers, and underscores are accepted (no special characters, spaces, or punctuation). In this example, the view name is “High_Cholesterol_Patients”. Select the base table, which is Patient table in our example and move the table from the Available Tables list to the Selected Tables list.

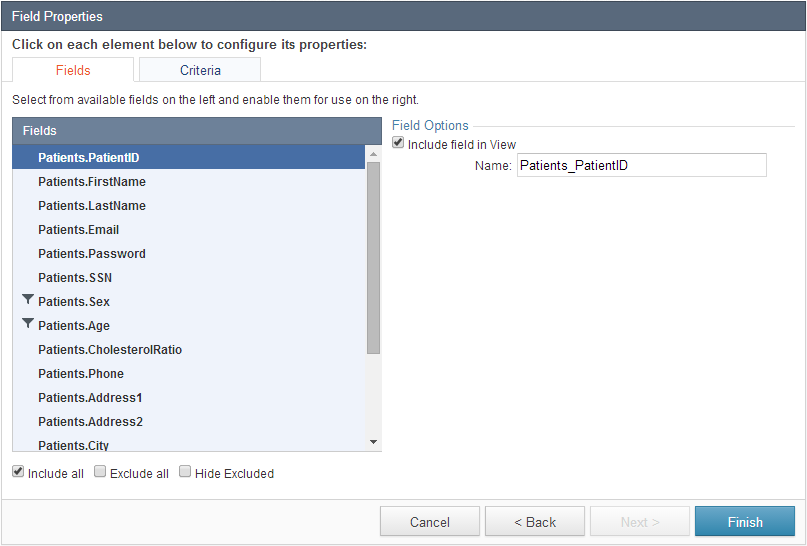
- Next, configure field properties. View fields are named by combining the name of your table, followed by a period and finished with the original field name but you can change them. By default, every field is set to be included in the view. To exclude a field, select a field on the left menu and uncheck Include field in View on the right.

- Go to Criteria tab to configure your filter. Select the logic elements from the left, drag and drop to the right panel. Select the field name, comparison type, and value to create a filter and select the appropriate logical operator AND or OR. You can combine the fields and logical operators in many ways to create complex filtering. The logical configuration of our High Cholesterol Patients example is displayed below.

Click Finish to save your view.
To see your filtered result, click Open on your newly created view. You can use this view as data source for a DataPage.

