Adding a Facebook “Like” Button to Your DataPage
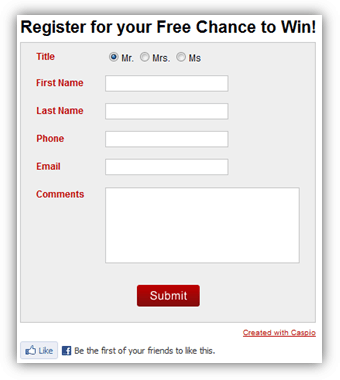
4 minutes to readThe Facebook “Like” button is perhaps the most iconic instrument of social networking. You can add a “Like” button easily to your Caspio apps and drive traffic to your site and directly to individual details pages in your apps.
There are two ways to implement a Facebook “Like” button:
- Iframe
- XFBML – Facebook XML
The iframe format can be used to like individual details pages. With the XFBML implementation you can also add meta data including a thumbnail image to further customize your apps “identity” on Facebook.
This article takes you through both implementations.
Steps to add an iframe “Like” button to search pages and forms:
In this section, you add an iframe “Like” button to the search pages and forms.
- Customize the iframe object.
- First, customize the following iframe object or have Facebook an iframe object for you. Facebook has a tool to generate an iframe “Like” button object automatically. Alternatively, you can customize the following object:
- Replace “URL” with the webpage URL that is hosting your DataPage. Do not include the protocol because it is already included (http://). Example: www.sitename.com
Note: Be sure to replace all slashes (/) with “%2F”. For example: www.sitename.com/sales/index.html becomes www.sitename.com%2Fsales%2Findex.html. Spaces should be replaced with plus signs (+). You can use an online URL decoder for this.
- Include the link in the DataPage footer.
- Edit your DataPage.
- In the Configure Fields screen, insert Header and Footer elements into your DataPage.
- Copy and paste the iframe object into your DataPage footer.
- Click Finish to save your DataPage.
The “Like” button is now available for your users. Test it by clicking Like and then going to your Facebook page and clicking the post that appears in your profile.

Steps to add an iframe “Like” button to details pages:
You can add a “Like” button on the details page of your Report DataPages so that users can like specific records. This can be useful, especially if your records represent specific products, articles, or services. Best of all, when new records are added, the “Like” button is included and immediately available to your end-users.
This method requires an understanding of query string parameters and using pre-defined criteria in a Report. Your base table must include a unique ID field such as an Autonumber. If you do not have an Autonumber field you can add one at any time in the table design view.
![]()
Note: To use this technique you must not add Open Graph meta data to your web page.
Steps to add an iframe “Like” button to details pages:
- Create a Details Report.
- On the DataPage Data Source screen, select your data source, style and localization. Be sure to enable advanced options and parameters.
- On the Search Type screen, select Filter data based on your pre-defined criteria.
- On the Select Filtering Fields screen, move your unique ID field to the right-hand panel.
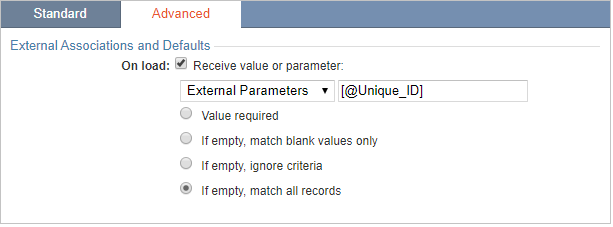
- Include your Unique ID field and configure it to receive the parameter from the “Like” button link. Apply the following configurations:
- On the Configure Filtering Fields screen, select the Advanced Tab.
- Check Receive value or parameter, select External Parameter from the dropdown, and enter the parameter name.
- Select If empty, match all records. This will avoid the “no records found” message in the event that no parameter is received.

- Format your details page as normal and save your DataPage.
- Deploy the Details Report using the embedded method and note the URL of the host webpage. Remember that this webpage might be the first-contact page for Facebook users. Be sure to include navigation options to easily access other areas of your site.
code1
<iframe src="http://www.facebook.com/plugins/like.php?href=http://URL&layout=standard&show_faces=true&width=450&action=like&colorscheme=light&height=80" scrolling="no" frameborder="0" style="border:none; overflow:hidden; width:450px; height:80px;" allowTransparency="true"></iframe>

