Dynamically Adding Options to Dropdowns or Listboxes
5 minutes to readDropdowns are a great way to standardize input in DataPages. However, for new submissions it is sometimes necessary to allow your users to dynamically add extra options. This article shows you how you can create a popup DataPage window that will add an item to a dropdown. You can also use this process for cascading dropdowns and listboxes. The added option will be visible immediately for all users. If you would like an approval process for new items see: Add an Option to a Public Facing Dropdown.
In this article, you create an add dropdown item popup.
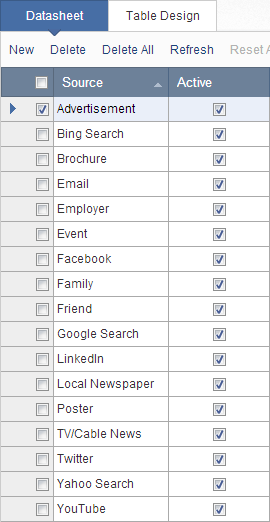
Base all of your dropdowns on a lookup table
This technique requires using a lookup table as the base reference for your dropdowns. Lookup table based dropdowns have several advantages over using custom values. If you do not currently use a lookup table you can find steps to create one here.
Create a Submission Form to your lookup table
First, we are going to create a Submission Form DataPage so users can submit new records directly to the lookup table.- Click New DataPage. By default, the cursor selects Submission Form as the first DataPage type. Click Next.
- Select your lookup table as the data source. Click Next.
- You can select which fields to be used in your submission form. To select fields, move the fields from the Available Fields list to the Selected Fields list. Because you are submitting to a lookup table, it is likely that there will only be one (or very few) fields. Click Next.
- Format the Field as needed and click Next again. Now on the last page, replace the success message with a short JavaScript. This JavaScript will close the popup window and refresh the parent page so the new dropdown items will be visible. Go to the Source mode and insert the following JavaScript into the message panel:
<script> window.close(); if (window.opener && !window.opener.closed) { window.opener.location.reload(); } </script> - Click Finish to Save Your DataPage.
Deploy Submission Form
- Select the Submission Form again and click the Deploy button. In order to refresh the original form, both DataPages must be embedded in webpages with the same domain name. You can make an empty webpage containing only the following HTML:
<!DOCTYPE HTML PUBLIC "-//W3C//DTD HTML 4.01 Transitional//EN"
"http://www.w3.org/TR/html4/loose.dtd">
<html>
<body>
CASPIO DEPLOY CODE
</body>
</html>
- Replace “CASPIO DEPLOY CODE” with the deploy code of your submission form. If your original form is deployed using the URL deployment method you can deploy the submission form using the same method.
- Copy the URL of the submission form and save it for use in the next step.
Create a link in your original DataPage
Now in your original form, you add a link that will display a popup window containing the Submission Form from the previous step.- Select the DataPage where you would like to add the link and open the DataPage Wizard by clicking Edit. On the second screen be sure to enable advanced options.
- Proceed to the Configure Fields screen. Using the Insert button at the lower right of the DataPage Elements panel, add an HTML block. Go to the Source mode and insert the following link code into the HTML panel:
<a onclick="window.open('DataPageURL','popup','width=307,height=341,scrollbars=no,resizable=no,toolbar=no,directories=no,location=no,menubar=no,status=no,left=0,top=0'); return false">Add Option</a> - Replace the DataPage URL portion with the URL of the first Submission Form. Update the other options in this hyperlink as needed.
- To move the link to the same line as the dropdown, select the dropdown DataPage element and go to the Advanced tab. Click the Checkbox for Continue next element on same line.
- Click Finish to save your DataPage

Testing and other considerations
When testing in Caspio the popup window will appear, however, the original form will not refresh when a new item is submitted. To properly test this feature you will need to deploy the original form and view it outside of Caspio.
In Internet Explorer, if you are using this method in a submission form, after submitting a new dropdown option any information in the original form will be cleared, for that reason it is a good idea to add a dynamic dropdown link as close to the top of the form as possible. Another option would be to have the user submit the form then provide an “Add an Option” link in an Update Form.
If you find a mistake in a newly submitted lookup table record you can change it directly in the lookup table and the referencing dropdowns will automatically be updated. If records have already been creating using the inaccurate dropdown option, you can use find and replace to update that data accordingly.
In the Tables listing, open your table in the datasheet view by clicking Open. The find/replace windows can be accessed by clicking Find or Replace.

Note: This article uses external HTML, JavaScript, or third-party solutions to add functionality outside of Caspio standard feature set. These solutions are provided “as is” without warranty, support or guarantee. The code within this article is provided as a sample to assist you in the customization of your web applications. You may need a basic understanding of HTML and JavaScript to implement successfully.
For assistance with further customization based on your specific application requirements, please contact our Professional Services team.
