Rendering Date Range in Calendar DataPage
2 minutes to readIn this article, we will guide you how to configure calendar DataPages to display events based on a specific date range.
Steps:
- Create a table (Table 1) with basic fields as shown below. This table will be used to store the date range values entered by users.
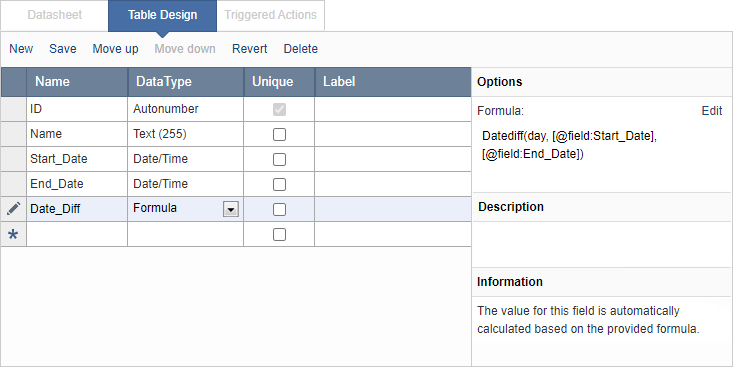
- Use the following formula for Date_Diff field
Datediff(day, [@field:Start_Date], [@field:End_Date])
Note: Update the field names in the formula with the date fields’ names in your table. You can also add additional fields for other information you may want to collect from the users.
- Create a Submission Form DataPage based on the Table 1. This form will allow your users to enter a specific date range for an event.
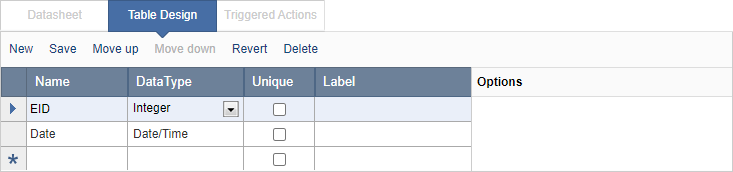
- Create a second table (Table 2) as shown below. This table will store dates based on the entered date range in the Table 1.
- Create a View to join the Table 1 and Table 2 based on ID field in the Table 1 and EID in the Table 2.
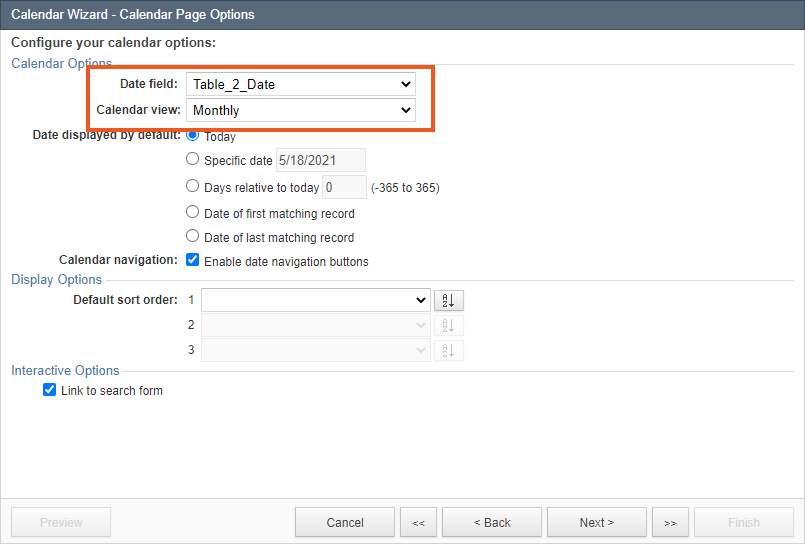
- Create a Calendar DataPage based on the View and use Date field in Table 2 in the Calendar DataPage.
- Create a trigger on the Table 1 to convert the date range to dates and to auto-populate the values into the Table 2 as shown below.
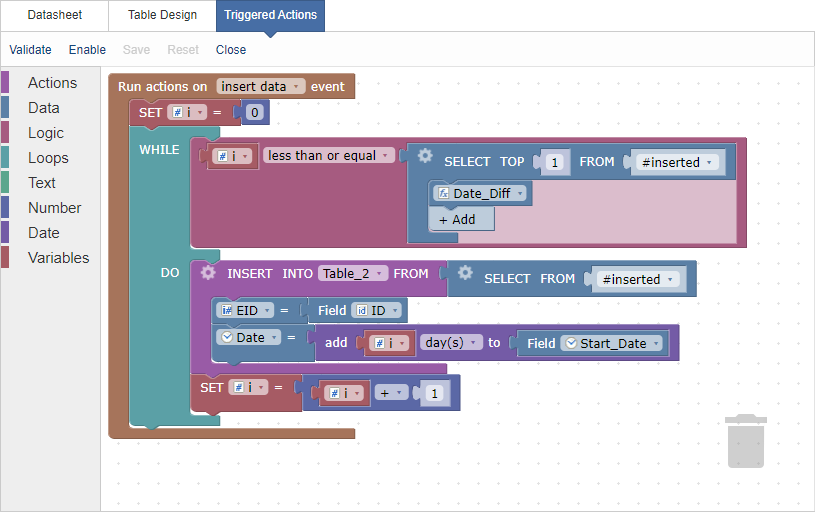
- Save and enable the triggered action.
Note: This article uses external HTML, JavaScript, or third-party solutions to add functionality outside of Caspio standard feature set. These solutions are provided “as is” without warranty, support or guarantee. The code within this article is provided as a sample to assist you in the customization of your web applications. You may need a basic understanding of HTML and JavaScript to implement successfully.
For assistance with further customization based on your specific application requirements, please contact our Professional Services team.
