This article includes step-by-step instructions to create multi-page forms using Update Forms.  Using this option, you can separate very long forms into manageable steps. The example in this article is a renters’ information form that will be saved to a real estate company’s database.

In our example, ach page of a multi-page form will be a separate DataPage.  Each DataPage will have a group of fields that will contribute to the data of a single record.  The first DataPage of the series is a Web Form.  The following DataPages are all Update Forms. The Web Form will include some of your fields and also create a new record. The Update Forms will locate the new record and continue to fill in data in sections. The Update Forms locate the new record by receiving the new record’s unique ID from the previous form. 

Steps:

Plan your form

  1. Create a table that captures renters’ information as shown below. This table will store all information related to renters’ data. You can add your own fields to capture additional information if needed. To create a multi-page form, your table must include at least one unique field.  In this example, the unique ID field is called Application_ID.
  1. Think about how you would divide the fields into groups.  These groups of fields will become the separate pages of your multi-page form.  For this example, the table is divided into three sections.
    • Contact information
    • Current residence and pets
    • Co-applicant information

    Form Completion Flag – The last field in the table above is called Application_Complete.  This will serve as a control field and has a Yes/No data type.  This field will be hidden from the end-user.  On the last section of the multi-page form this value will be switched to “Yes” indicating the multi-page form is entirely complete.  This way we can easily see if the customer has fully completed all of the sections, or if they navigated away in the middle, leaving the record incomplete.

  • Web Pages – prepare the web pages where the DataPages will be hosted.  Take note of each web page’s URL as they will be needed during the form design process.

Create the first Web Form

  1. Create a Submission Form with the above table as a data source. Apply the following configurations:
    • In Select Fields screen of the DataPage wizard, move the contact information fields from Available Fields panel to Selected Fields.
    • Select the On exit, pass ID and formula fields as parameters checkbox so that Autonumber will be passed to the next.
    • Configure your fields as normal. If you are using a random unique ID field (that is not an Autonumber), follow the steps here to pass the value to the next form.
    • On Destination and Emails page, click Go to a new page for destination after record submit. Enter the URL for the web page that is hosting the following DataPage of your multi-page form, and save the changes.

Create the Update Forms

  1. Create a Single Record Update form.
  2. On DataPage Data Source screen, select the same data source.
  3. Configure this form to receive the unique ID from the Web Form. On Record Identification screen,  select Find record through unique ID. Choose your unique ID field from the drop-down field.

    In this example the only unique field is the Application_ID with an Autonumber data type. The parameter name needs to be changed slightly. Add “InsertRecord” after the @ symbol and before the field name. This change in syntax tells the update form that the parameter being received is an Autonumber from a newly created record.
    Note: The InsertRecord prefix applies for other ID field types (Random ID, Prefixed Autonumber and GUID).
  1. Select the fields to include in the second section of the multi-page form.
    In this example, the second section prompts the end-user to provide information about the applicant’s current residence and pets. Move these fields from the Available Fields panel to the Selected Fields panel using the arrow button.
  1. By default, all Update Form fields are set to Display Only. To allow end-user to input data, change the form elements to an input format such as Text Field.
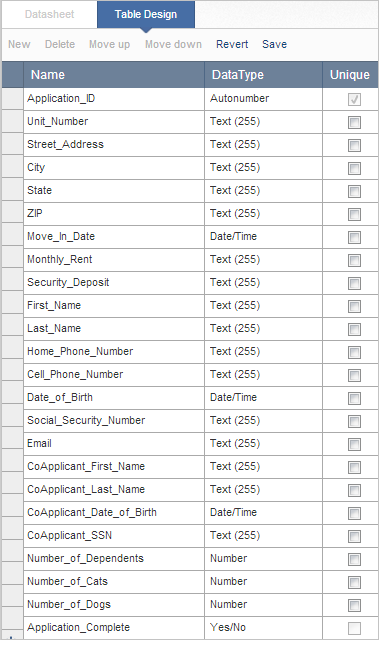
  1. On the Destination and Emails screen of the DataPage wizard, click Go to a new page for destination after record submit. Enter the URL of the web page where the next DataPage will be hosted.
  2. Save the changes.
  3. Optional: If needed, create additional update forms for the remaining sections. The same steps apply for each additional Update Form of the multi-page form.
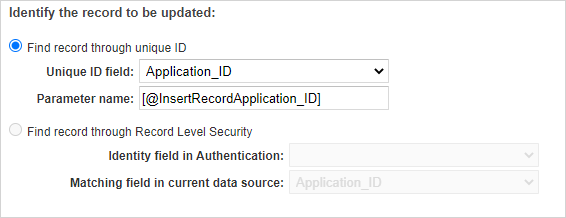
    1. Receive the Autonumber.
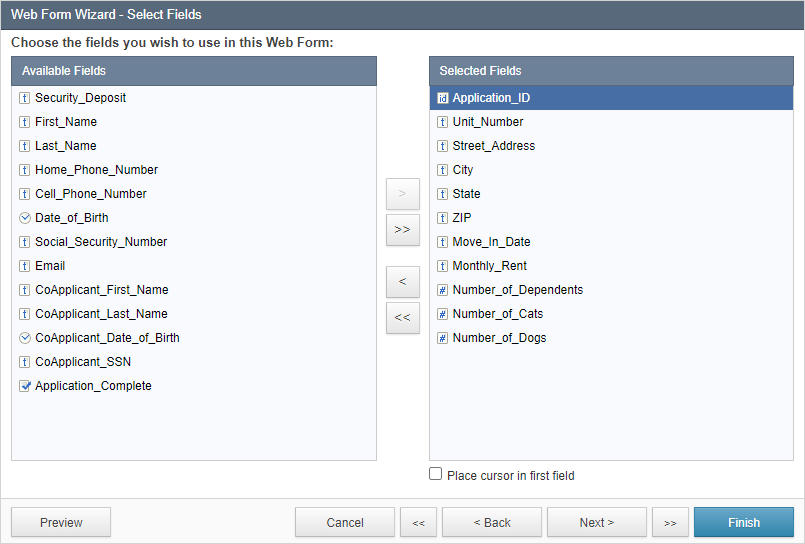
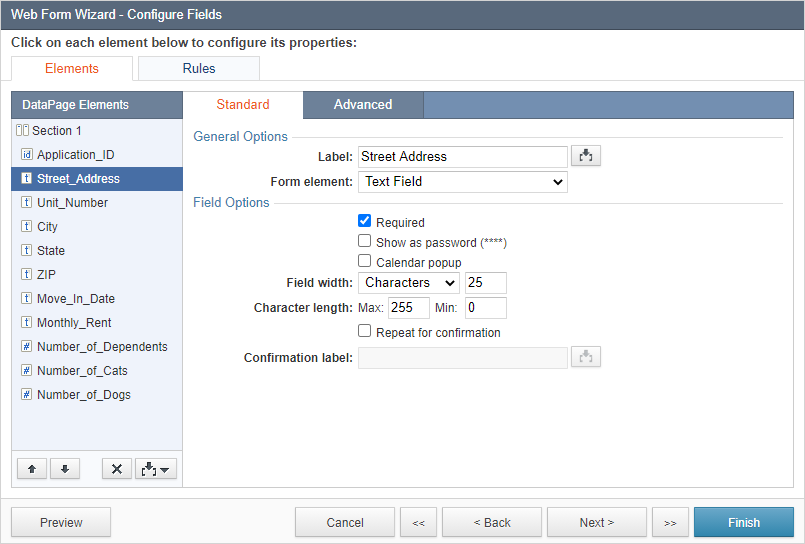
    2. Select and configure the fields.
    3. Redirect the end-user to the next page after submission.


    Once all update forms have been completed, proceed to the configuration of the last form.
  1. Add the control field to the last form as follows:
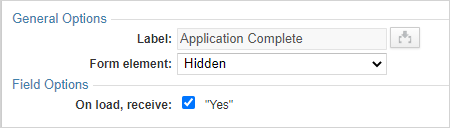
      1. Add the Application_Complete control field to the last Update Form.
      2. On the Configure Fields screen of the DataPage wizard, select this element and select Hidden from the Form element dropdown.
      3. Set the default value to “Yes” by selecting the default value checkbox. Now when this final form is submitted the field value will automatically be switched to “Yes”.


Configure the final destination

The very last page of the multi-page form does not go to another URL. In this example, the standard confirmation message has been customized to include a link back to the homepage. You could also direct the end-user directly to a confirmation webpage on the Destination and Emails screen.

Deploy the DataPages

Deploy each of the DataPages to their respective web pages.

After the forms have been deployed the end-user will go through the sections in the following order to complete the multi-page form:

Personal Information → Current residence and pet → Co-applicant information

Test and format

Now that the pages are deployed we can go through and test to make sure that the multi-page form is working correctly.

In case of difficulties with connecting the forms, verify if:

  • The Autonumber parameter is spelled correctly
  • You are using the correct Autonumber parameter format with the InsertRecord prefix[@InsertRecordxxxx]
  • The passed field is marked as unique in the table Design view

Once you’re satisfied with the functionality of your multi-page form, you can modify the look and feel so that all of the pages match perfectly with your host website. 

To see a use case, watch Creating User Registration video.

For more details, you can watch the recording of our live session: