Tracking Data Changes in Tables Using Triggered Actions
4 minutes to readSteps:
- Create a new table that will store a log of the changes in your primary table.
This table will hold the data about the inserted, updated, or deleted records. For example:
- Project ID: The ID of the record being modified
- Project_Name: The name of the project being modified
- Project_Description: The description of the project being modified
- Date_of_Modification: The date and time the action occurred (timestamp)
- Action: Insert, update, or delete action types.
- Open the new table and go to the Triggered actions tab.
- Create individual triggered actions, mapping the relevant primary table fields to the target fields. For each of: insert, update, and delete actions in your table, perform the following steps:
- In the trigger editor, in the left panel, click Actions and drag the INSERT INTO block to the trigger editor area.

- From the Run actions on dropdown list, select the event type: Insert, Update, or Delete.
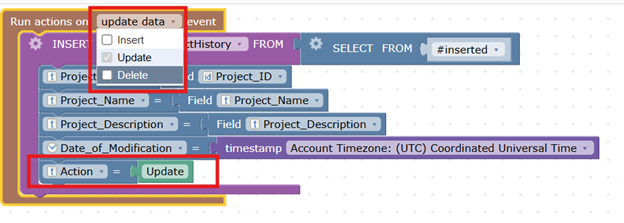
- In the INSERT INTO block, click the settings gear icon and check the SELECT option. In the SELECT block settings, remove the WHERE condition by clearing its checkbox.
For Delete action only: Change the SELECT FROM setting to #deleted.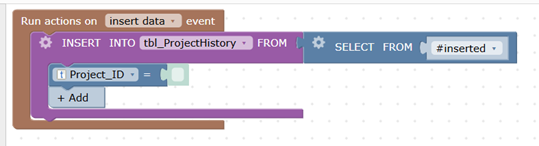
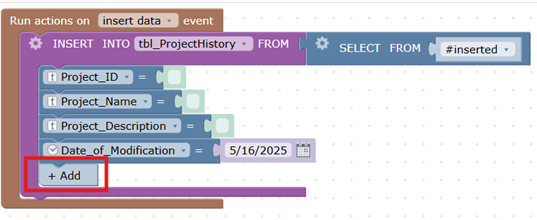
- In the INSERT INTO block, add the fields that you want to include in your change tracking by clicking Add.
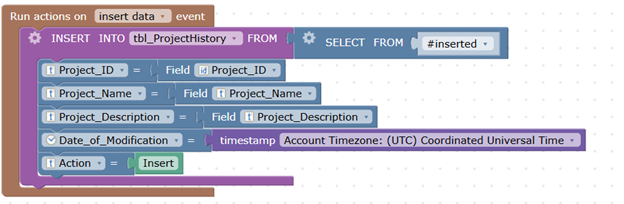
- Map the fields in the change tracking table to the fields in your primary table. In the trigger editor left panel, click Data and drag the Field blocks to the trigger editor area inside the INSERT INTO block.
- To include the modification date, in the trigger editor left panel click Date and drag the Timestamp block into the editor area within the INSERT INTO section, mapping it to the selected field.
- To include the action type, in the trigger editor left panel click Text and drag a text block to the editor area within the INSERT INTO section, mapping it to the selected field. Enter the text to reflect the action type in the target table: “Insert”, “Update”, or “Delete”, depending on the selection in substep b.
- Perform these substeps again for the remaining action types, so that you have three Run action on blocks: one each for insert, update, and delete.
- In the trigger editor, in the left panel, click Actions and drag the INSERT INTO block to the trigger editor area.
- Test the change tracking setup by performing insert, update, and delete actions on your primary table. In the change tracking table, verify that the correct actions are being logged, and that all relevant fields are populated with accurate data.
Result:
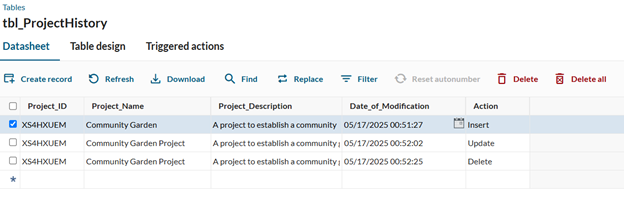
Tips for using your change log effectively:
- Optimize the change tracking table: The log may grow quickly, especially if a large number of changes occur. Implement periodic clean-up strategies or data archiving procedures if necessary to avoid performance issues.
- Regularly review the tracked changes: Regularly monitor your history records to ensure that your app’s data is updated appropriately, especially for apps that handle sensitive data.
