Verifying Email and Domain
7 minutes to readConfiguring and verifying email
Caspio requires users to verify their email addresses to prove that they indeed own an email address used in the “From” field of the messages sent from their apps.
Users can use both private domain emails as well as public domain emails such as Gmail, Yahoo or Hotmail in the “From” field of the emails outgoing from their apps. Yet, we strongly discourage our users from using public email domains as they can’t be verified, which imposes significant limitations on the email deliverability and may cause the malpractice called spoofing.
Additionally, Caspio proposes a default email address hosted on the pre-verified Caspio domain: noreply@caspio.app for all who don’t want to use their own email addresses in the “From” field. This ready-to-use email address enables an easy and quick start without the need to edit any advanced settings like DNS records.
Note: To ensure uninterrupted business operation, all new email addresses need to be verified. When used to send emails, any existing unverified addresses are replaced with noreply@caspio.app. Learn more.
Steps to configure and verify an email address:
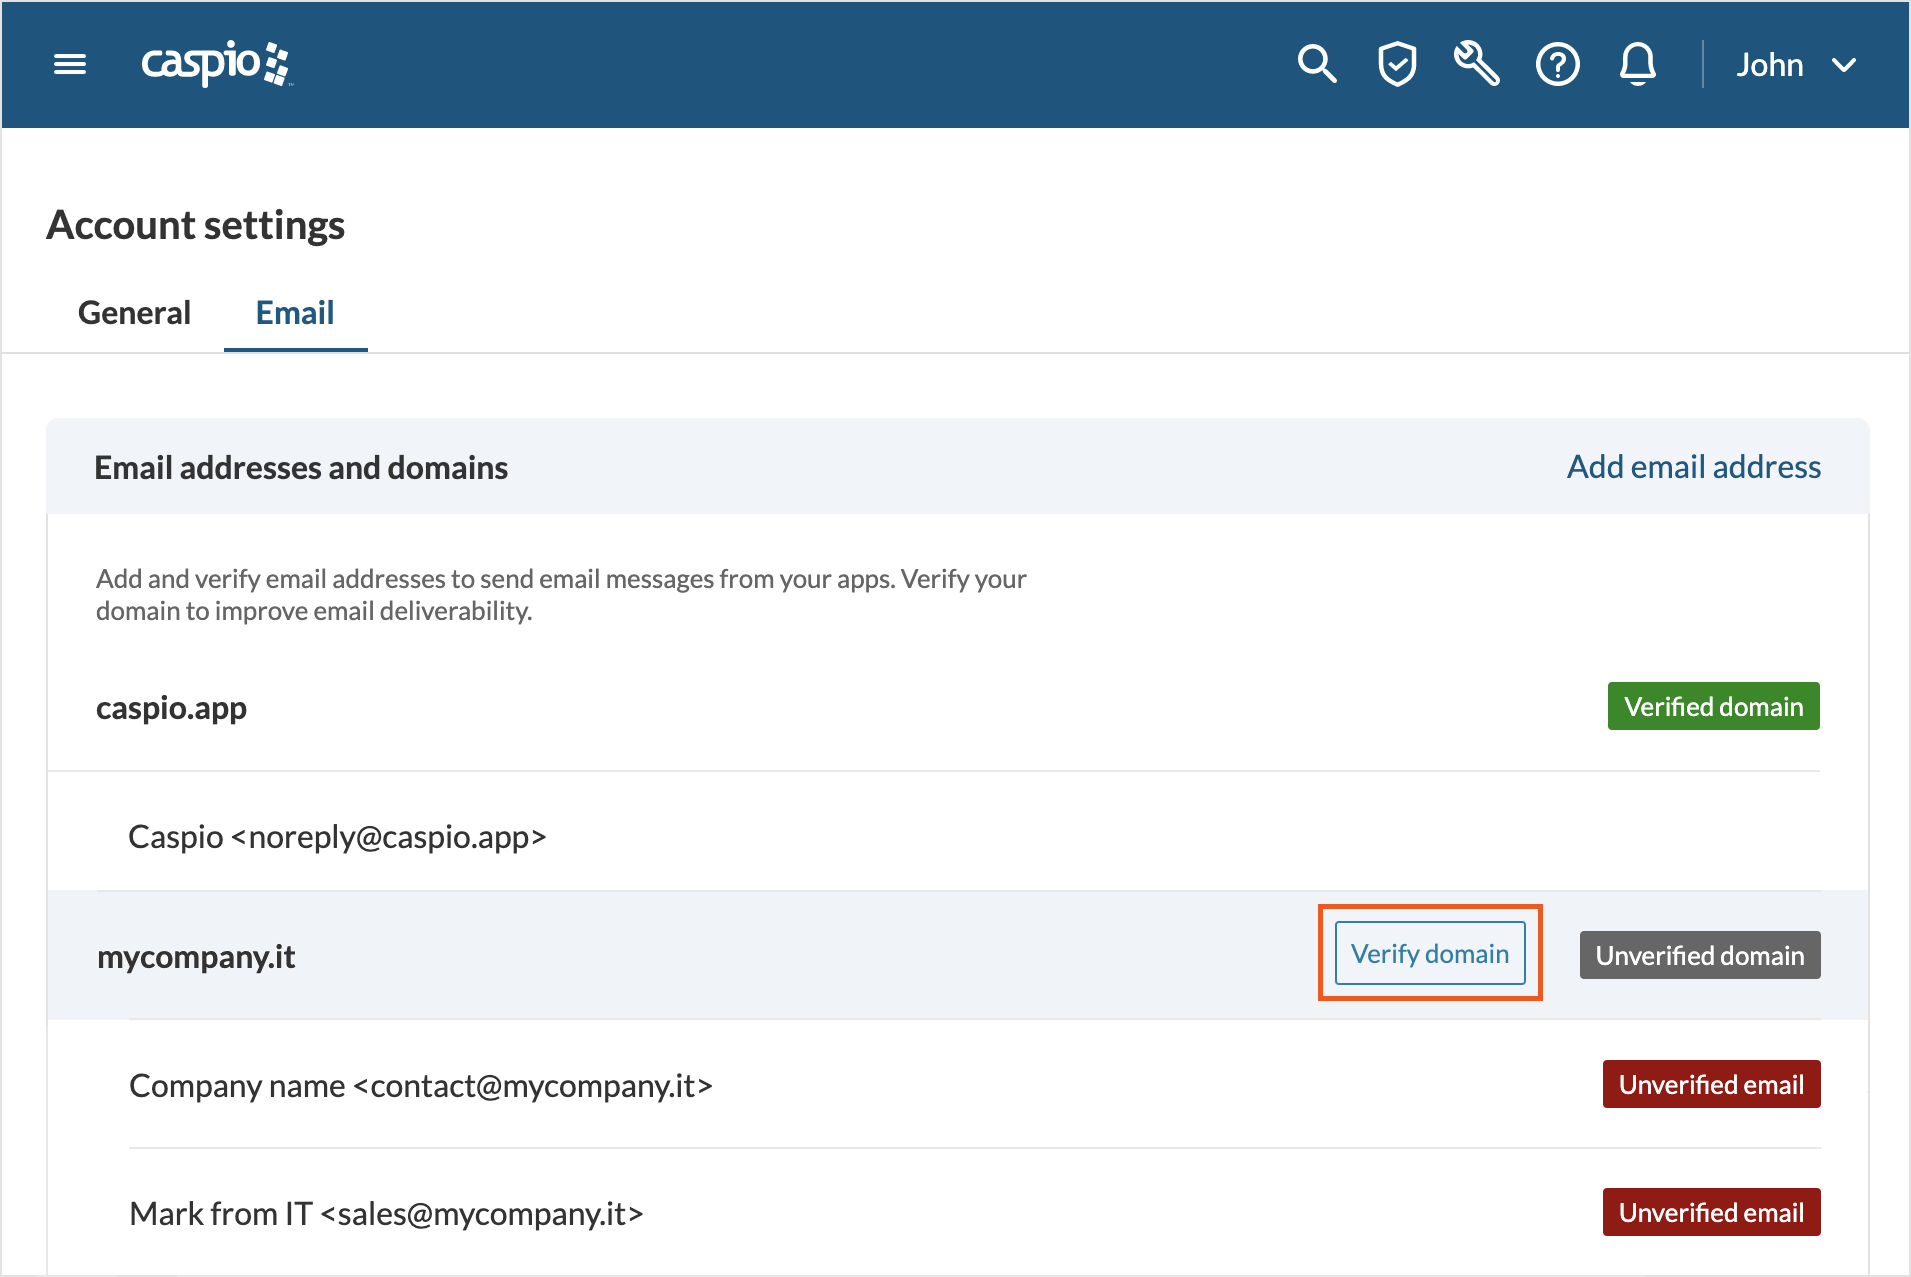
- Select Account > Account settings from the top menu bar of your Caspio account.
- Select the Email tab to view the list of all email addresses and domains used in your apps.
- On the list of Email addresses and domains, select Add email address.

- Enter an email address and optionally a display name. Click Send verification code.
Note: We strongly encourage users to use private domains in the “From” field of the email messages to be able to verify a domain, therefore assuring the best email deliverability and preventing email spoofing.
- Enter the verification code sent to your email address and click Verify email address.
- After verifying your email address, you can proceed to verifying domain to improve email deliverability.
Verifying domain
Domain verification is an optional step that enables account administrators to sign the email messages outgoing from their applications with DKIM (DomainKeys Identified Mail) – a digital signature added to the message header and secured with encryption. It improves email deliverability proving that an email was indeed sent and verified by the owner of the domain.
Additionally, you can still use free email providers like Gmail, Yahoo or Hotmail in the “From” field of your outgoing emails.
We strongly discourage the users from using public email domains as they can’t be verified and signed with DKIM, which imposes significant limitations on email deliverability.
Note: Domain verification should be performed by an administrator with relevant knowledge as it requires changes in the domain’s DNS records.
Steps to verify a domain:
Before verifying a domain, you must verify an email address. To learn more, see Configure and verify email.
- On the list of Email addresses and domains, hover over a domain and select Verify domain.
- Add TXT and CNAME records to your domain’s DNS settings.
- Copy and paste the TXT and CNAME entries into the DNS records of your email address domain.
- Select Verify on the domain verification dialog window.
- Wait until DNS settings are propagated to other DNS.
Note: The DNS propagation may take up to 72 hours. However, it usually takes effect within a few hours depending on the domain’s service provider.
- You can monitor the verification process by checking the statuses on the Email addresses and domains list.
- Unverified domain – the domain is not verified.
- Pending verification – the verification process has been started but it’s not completed yet.
- Verified domain – a domain is verified, which means the email messages outgoing from the “From” email address of this domain are signed with DKIM from now on.
For domains that are pending verification, you can check the verification status for each DNS entry by selecting the Check details button.
Adding SPF record
Optionally, you can add an SPF record to your domain DNS settings. SPF is a standard email authentication method that specifies the servers and domains allowed to send emails on your behalf. Similarly to DKIM, SPF helps protect your domain against spoofing, and your outgoing messages from landing in spam folders.
Add the SPF record “v=spf1 include:_spf.caspiomail.com ~all” at your domain provider.
Example DNS set up
Depending on your DNS provider, the way of setting up DNS records may slightly differ. Below is an example of how to configure DNS records with GoDaddy.
Steps to set up records in GoDaddy
- In your GoDaddy account, select your domain to access the Domain Settings
- Select Manage DNS under Additional Settings.
- Select Add to add a new record.
- Select a record type – TXT or CNAME.
- Based on the record type, enter TXT and CNAME values.
- Select Add Record to save the changes. Most DNS updates take effect within an hour, but it could take up to 48 hours.
To learn more about configuring the DNS records in GoDaddy, visit GoDaddy.
Learn how to troubleshoot email delivery and domain verification problems.
Managing email addresses
To view and manage all available email addresses in your account, from the top menu in the Account Settings, select the Email tab. You can edit a display name of an email address, and delete or replace an email address.
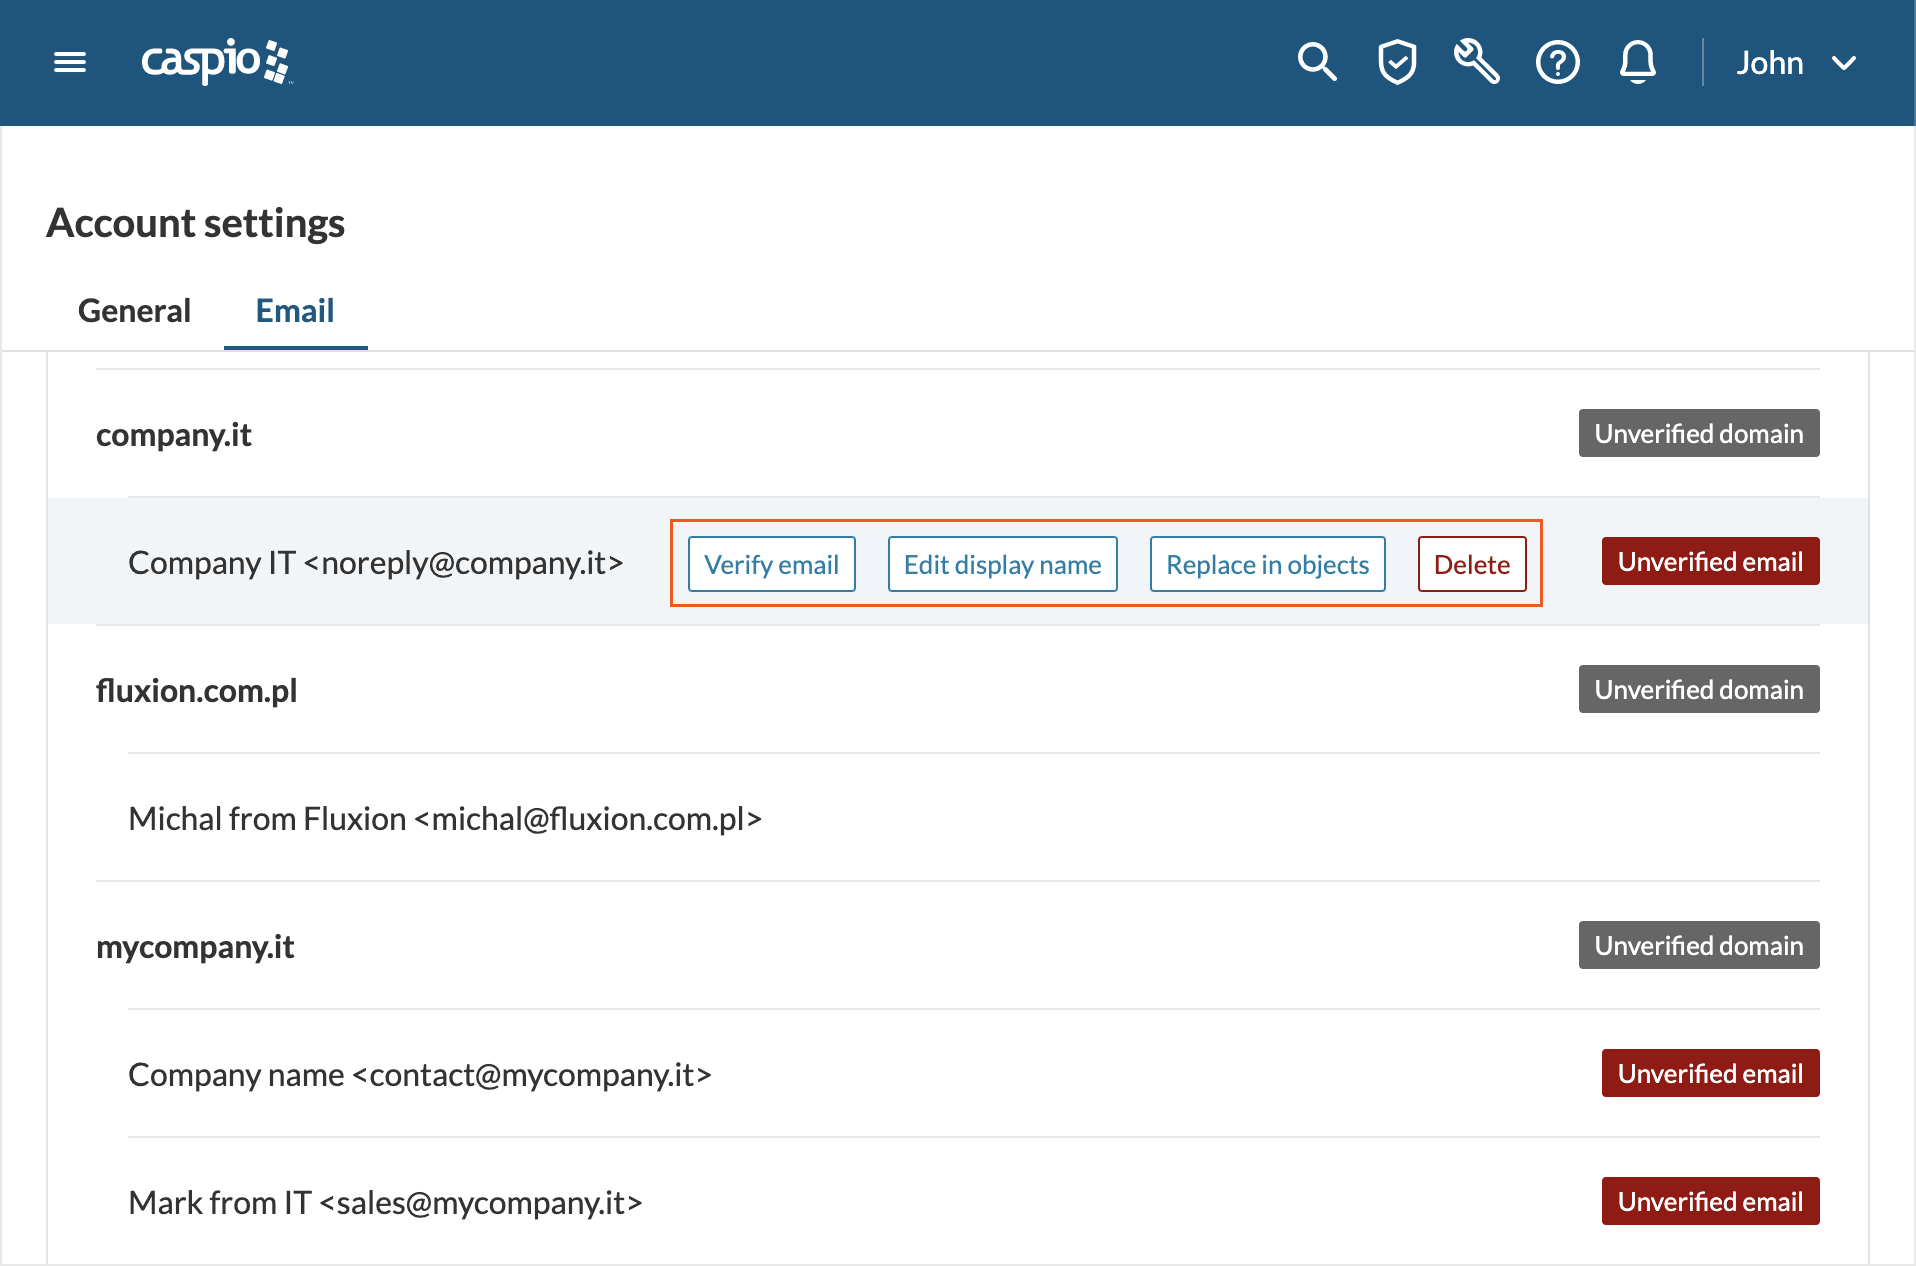
Editing display names
You can edit the display name of the email messages sent out from Triggered Actions and Tasks at the account settings level. To do that, click Edit display name and enter a new name. After saving the changes, email messages will be sent with a new display name.
Deleting email addresses
There are two possibilities for removing an email address from the list of Email addresses and domains:
- Delete – you can only delete an email address that is not used by any Triggered Actions or Tasks.
- Delete and replace – when you delete an email address that is already used by Triggered Actions or Tasks, you will be asked to select a replacement email address. All affected objects will be automatically updated with this email address so no manual action is required.
Replacing email addresses
You can replace an email address without deleting it from the list of email addresses and domains. To do so, click the Replace in objects button and select the email address you want to use in the From field of the listed objects.
