Data Import Tasks
4 minutes to readThis article provides instructions to create a Data import task to periodically import a file hosted from an outside server.
To create a Data import task, click Tools on the top menu bar and select Data import task. If you do not see Data import/export tasks in the Tools menu, your plan does not include this feature.
Note: Data import/export tasks are available in select plans. For more information, see Caspio Plans and Pricing.
On the main Data import/export tasks screen you see a list of all the existing Tasks in your account and an option to create a new Task or manage Sites. Sites are repositories such as an FTP server, and once defined can be used in multiple tasks.
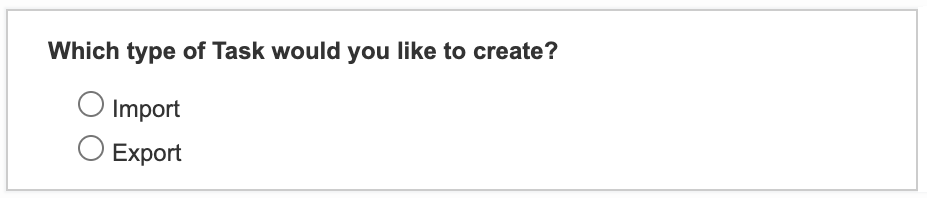
To create a new task, click New Task and select Import.
In the Source section, we will be configuring the location of our import file. The first item is the site or repository. You can select a preconfigured site or create a new repository site.

Note: The maximum file size for a scheduled import task is 50 MB.
Provide the path and the name of the file that you are trying to import. Click Next.
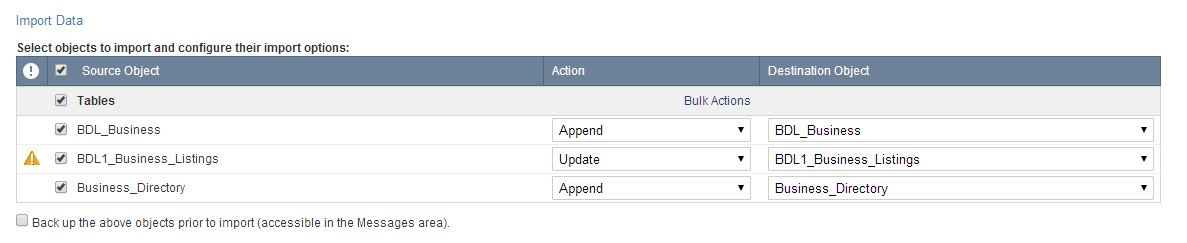
The next screen allows you to specify how the table(s) in your import file should be handled. The following columns are displayed:
- Source Object. Select or unselect the objects to import.
- Action. Choose the appropriate import handling, such as new, replace, etc.
- Destination Object. This is the object in your account that will be affected by the Action.
Import Types:
- Append: Adds data to the end of an existing Caspio table. If the table no longer exists, the task will fail.
- Replace: Replaces the data of the destination table with the data from the import. If the table no longer exists, the task will fail.
- New (Append): Appends to an existing table, or creates a new table if no table with the destination name is found.
- New (Replace): Replaces the data of an existing table, or creates a new table if no table with the destination name is found.
- Update: Requires defining a matching unique field. Updates the data of the existing table with the imported data. Matching data is overwritten. New, non-matching data is appended. Existing non-matching data remains unchanged.
Check Back up the above objects prior to import (accessible in the Messages area) to create a backup file of the existing objects, in case you want to save and export existing objects before you replace them with the imported ones. If checked, your backup file of the existing objects will be available in Messages for a short period. Click Next.
On the Configure Fields screen, you configure the imported fields.
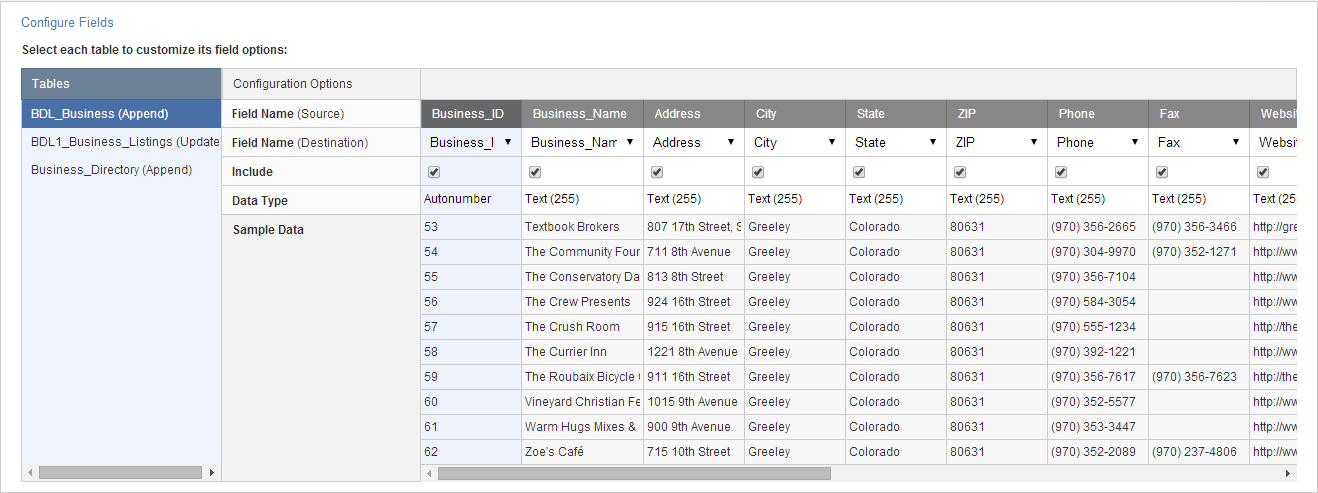
The fields in the table are described below:
- Tables: List of each individual imported table.
- Configuration Options: This section allows you to configure table options, exclude or include a field, rename a field, and change a field’s data type.
- For importing with the Update option, Match by column is used to define the matching source and destination fields.
- Field Name (Source): The field names in the imported data source.
- Field Name (Destination): The field names in the destination data source. If the data source field name contains characters not allowed in a field name, the destination field name will be automatically adjusted. Field names must be alphanumeric (a-Z, 0-9), may include an underscore symbol (_) and must start with a letter. It must begin with a letter and up to 32 characters can be entered. The following characters are not allowed: < > \ / % ;& ” + : * . # ? | ,
- Include: Check to include the field in your import. To exclude a field, uncheck this option.
- For importing with the Update option, Ignore Blank Fields can be enabled to skip overwriting the existing value if the source value is blank.
- Data Type: The current data type of a field. You can change the data type for any field. However, if the new data type raises an issue an icon will appear in the Field Name (Source) field. If an icon displays, hover over the icon to view details.
- Sample Data: The first 10 records of your import data are displayed from the data source.
If you changed the field name or a field’s data type, the text color will be changed to a bright blue color to indicate a modification was made. Click Next.
On the Schedule screen, you can set the frequency of the import task.
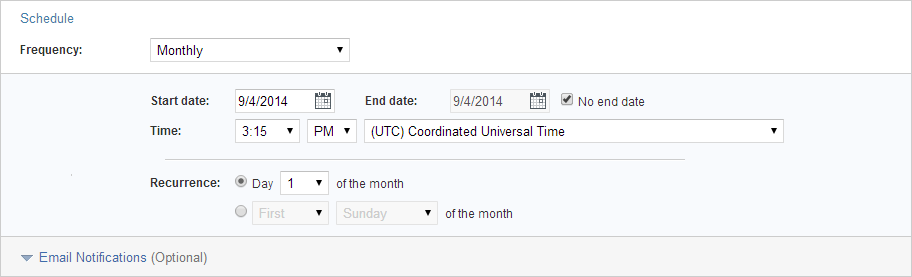
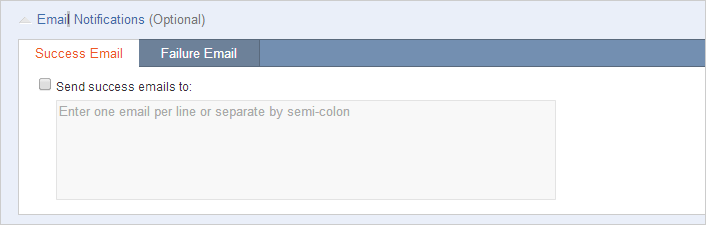
Click Email Notifications to send notification emails when the task is completed successfully or when the task has an error, warning or fails to complete. Click Finish and save your task.