Enforcing Options From Autocomplete Fields
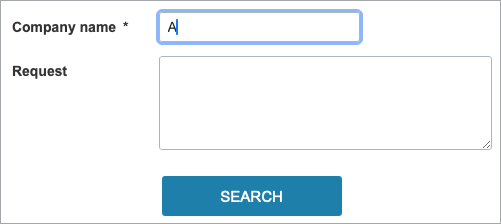
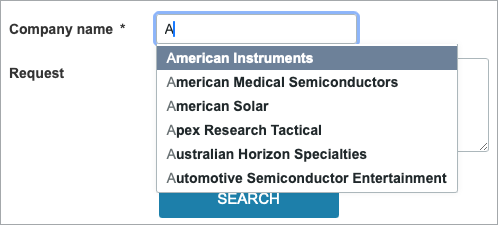
3 minutes to readBefore
After
Steps:
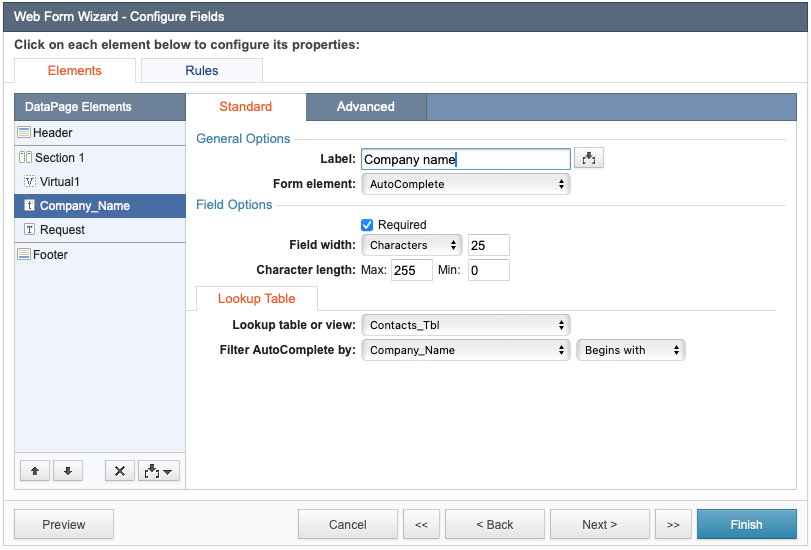
- On your Submission Form DataPage, create and configure an autocomplete form element:
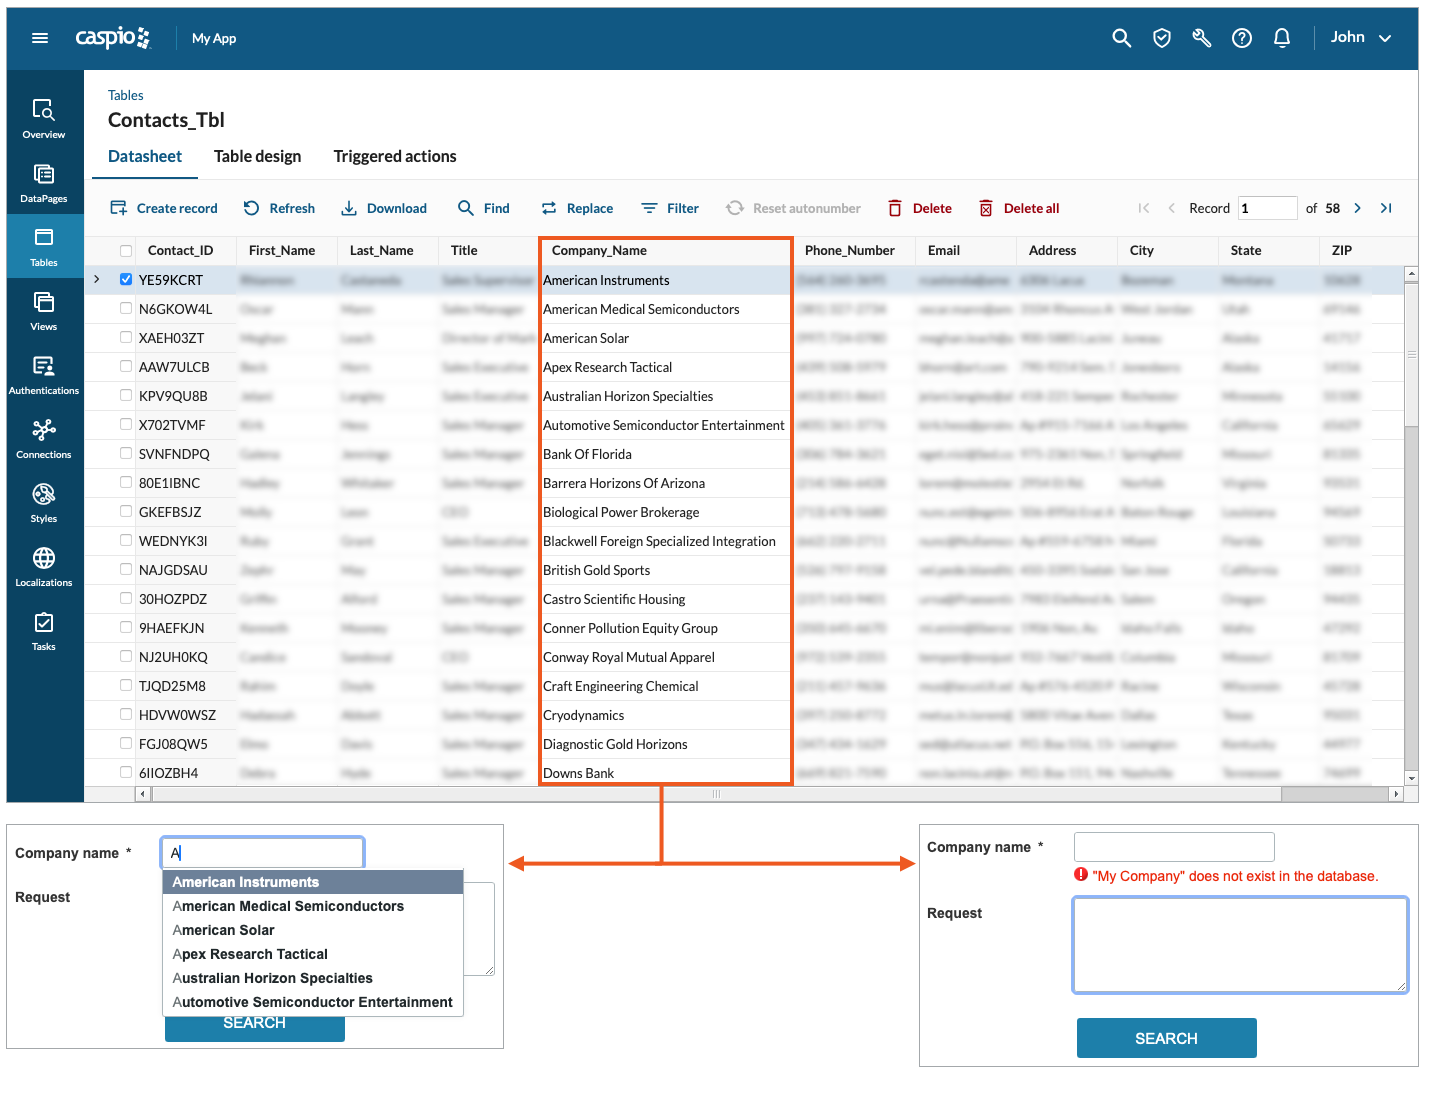
- Select the Required checkbox. If you do not set the field as required and the entered value does not match any value in the source lookup table, a record will be submitted with an empty value.
- In the Lookup table or view list, select the table that contains the values that you want to display in the field, for example, Contacts_Tbl.
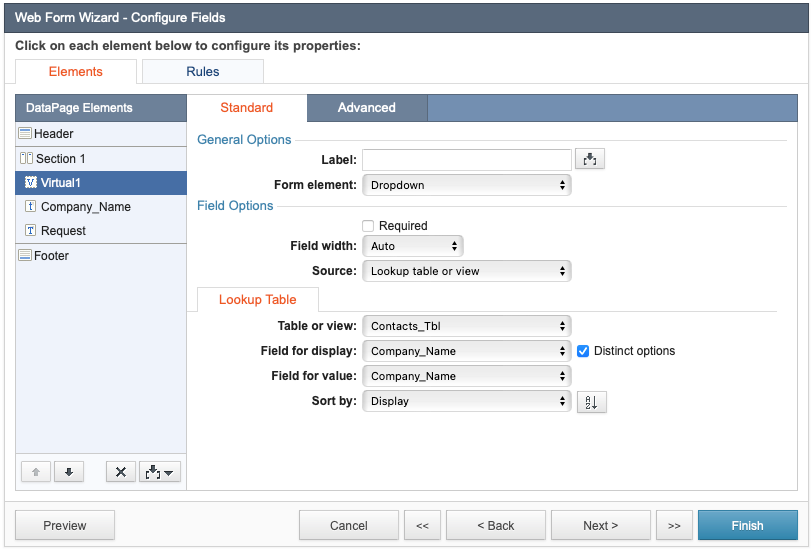
- Add and configure a virtual field:
- Leave the Label field empty.
- In the Form element list, select Dropdown.
- In the Source list, select Lookup table or view.
- In the Lookup table section, in the Table or view list, select the same source table as for the autocomplete field, for example, Contacts_Tbl.
- In the Field for display and Field for value lists, select the same source field as in the Filter Autocomplete by setting of the autocomplete field, for example, Company_Name.
- Add a Header & Footer.
- In the footer of the DataPage, disable the HTML editor, and then add the following JavaScript code, changing the values of the
const virtualFieldandconst autoCompletevariables to match the corresponding names of virtual and autocomplete fields: - In the header of the DataPage, enter the following code, replacing the number in the
#cbParamVirtualvariable to match the order number of the virtual field if there are more than one such fields: - Optional: If you want to change the text of the error message, you can customize the following code fragment:
The
${HTMLAutocomplete.value}is the placeholder of the entered value. You can enter it in any place in your code.
Note: This article uses external HTML, JavaScript, or third-party solutions to add functionality outside of Caspio Bridge’s standard feature set. These solutions are provided “as is” without warranty, support, or guarantee. The code within this article is provided as a sample to assist you in the customization of your web applications. You may need a basic understanding of HTML and JavaScript to implement successfully. For assistance with further customization based on your specific application requirements, please contact our Professional Services team.
