Creating a Web Services API Profile
2 minutes to readTo use Web Services API, you must have at least one Web services profile in your Caspio account. Similar to users, each Web services profiles may be given specific permissions to create and access tables, views, files and file folders in the corresponding Caspio account. However, unlike users, Web services profiles cannot log into Caspio interactively.
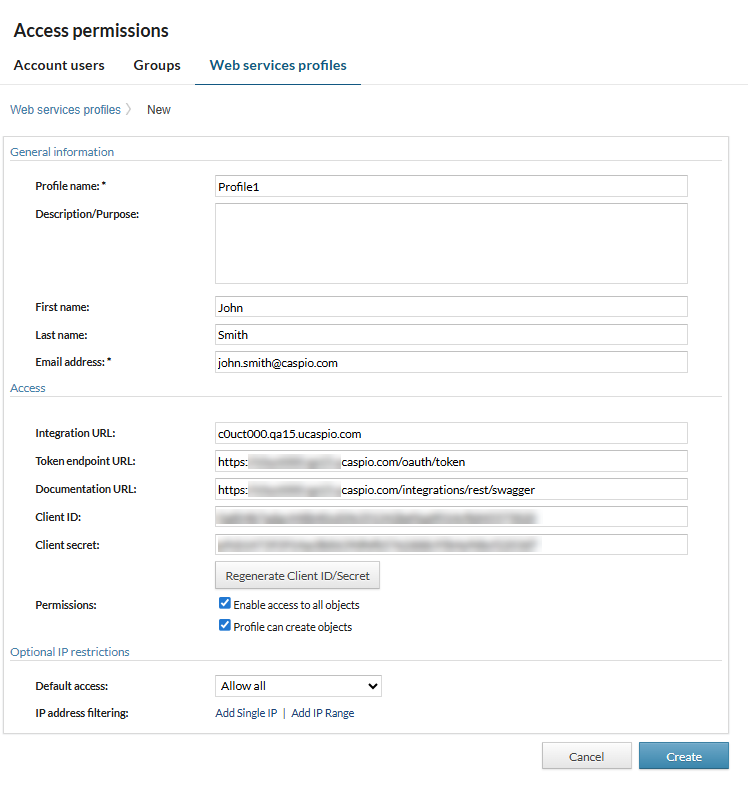
To create a Web services profile, select Account
from the top navigation bar and select Access Permissions, then click on New Profile. You will be redirected to a form in which you can create your Web services profile. Caspio supports REST protocol.

Creating a Web services profile
To create a Web services profile, you will need to provide the following information:
- Profile Name: Required – This is used to identify this profile in the Caspio platform user interface.
- Description/Purpose: Profile description.
- First Name: First Name of the person managing and using this REST profile.
- Last Name: Last Name of the person managing and using this REST profile.
- Email Address: Required – Email of the person managing and using this REST profile.
- Protocol: Should be set to REST.
- Integration URL: The base URL that external applications will use when connecting to your Caspio account through the Web Services API
- Token Endpoint URL: Caspio OAuth 2.0 Token Endpoint
- Documentation URL: Link to Swagger UI
- Client ID: REST API Profile’s username. It is generated automatically.
- Client Secret: REST API Profile’s password. It is generated automatically.
- Permissions:
- Enable access to all objects – Give the profile access to all Tables, Views, Files and File Folders in your Caspio account.
- Profile can create objects – Allow the profile to create Tables, Views, DataPages and upload Files.
- Default Access: Web Services profile access to Caspio can be limited based on client’s IP. Use this option to grant or deny access.
- IP Address Filtering: Insert or manage the IP address filtering.