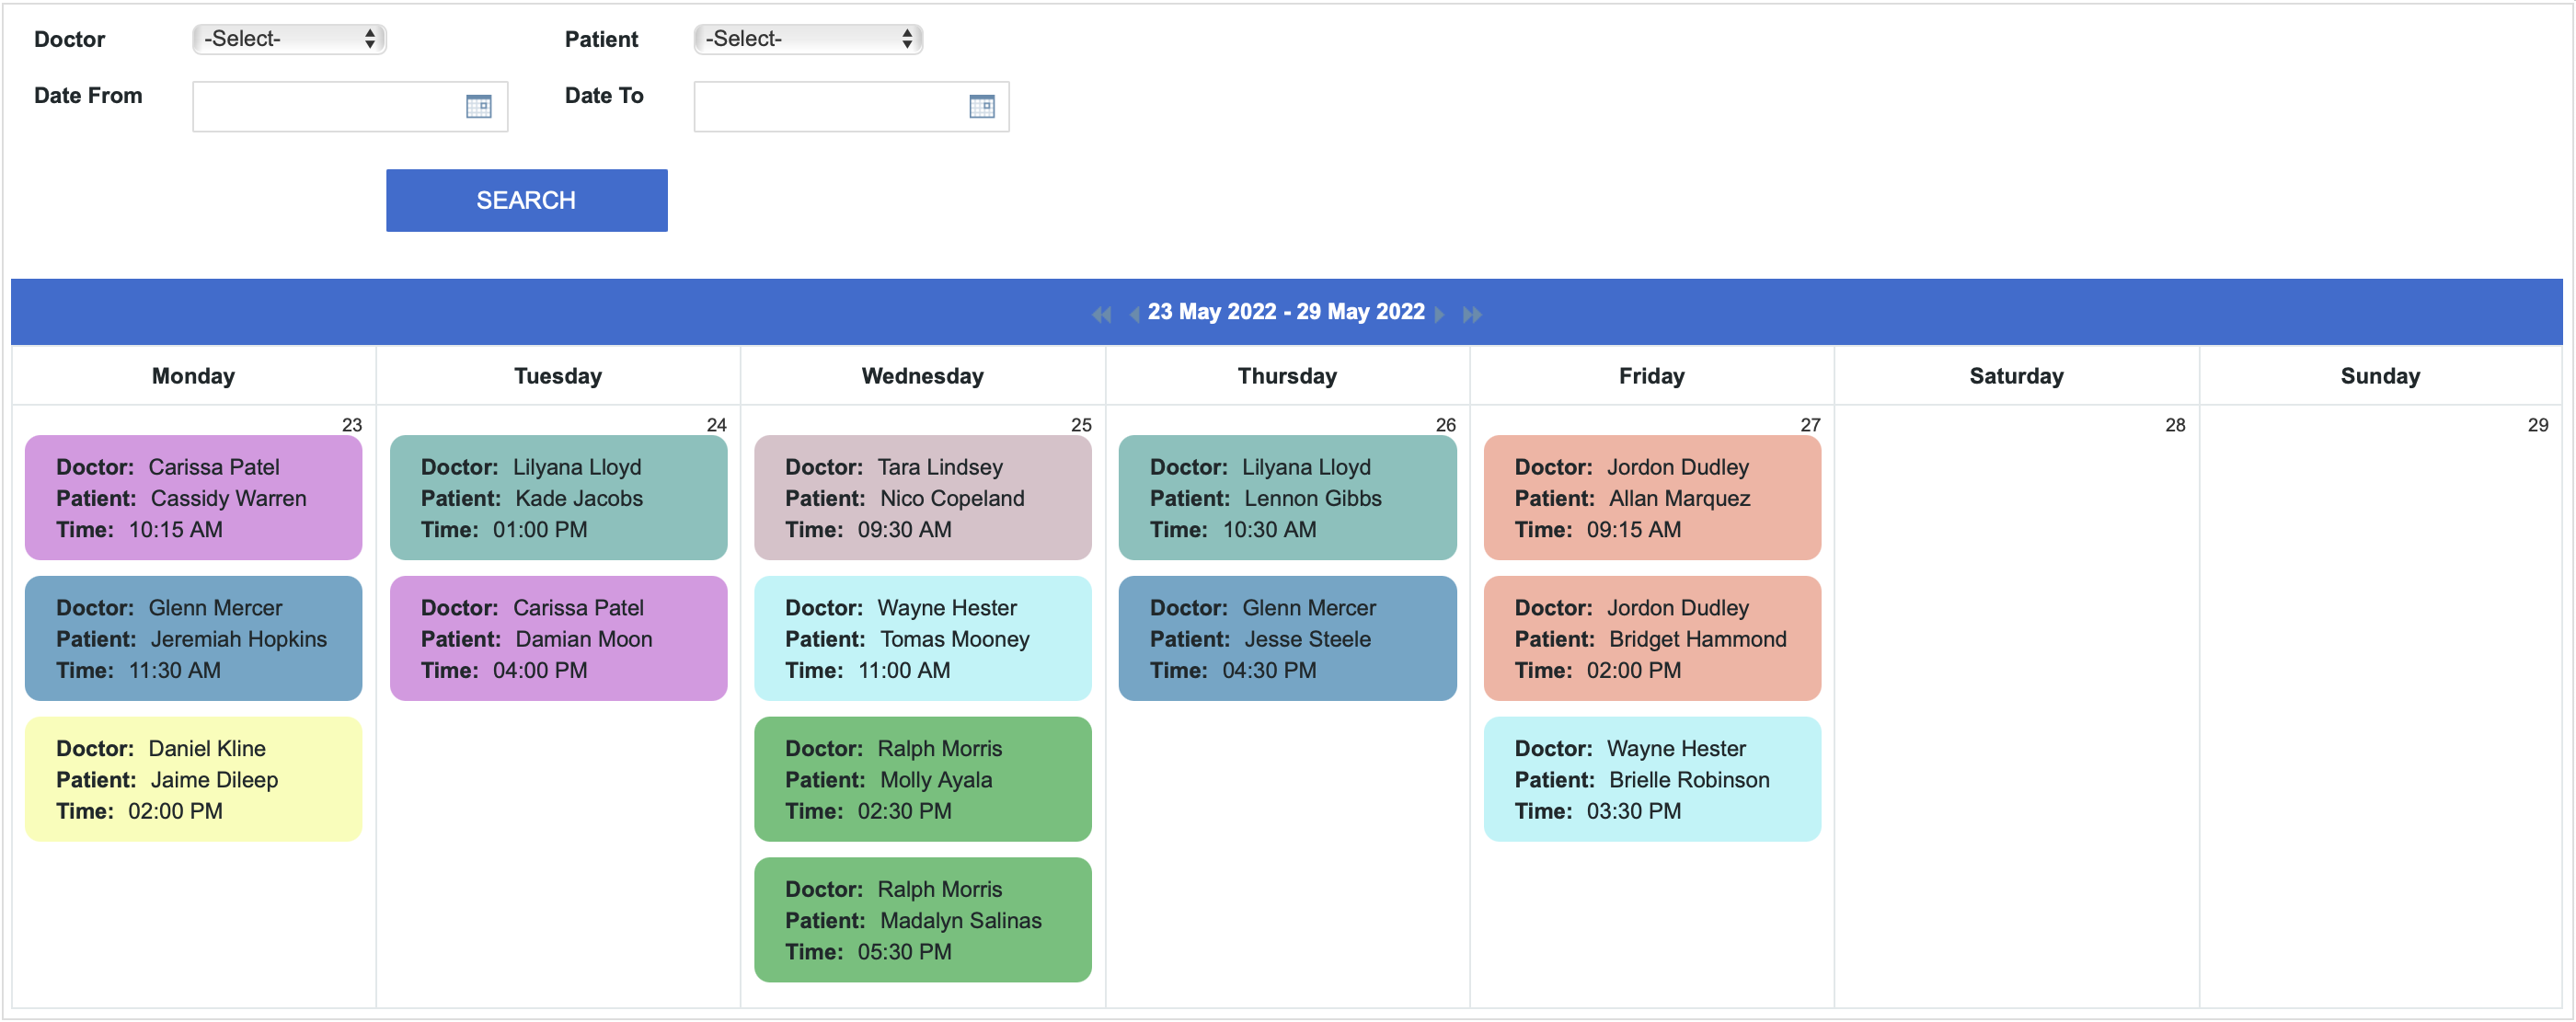
You can enhance user experience by applying color coding to your team calendar or customer appointments. In this article, we will show you how to color-code Caspio Calendar DataPages using HTML and JavaScript.
Prerequisites:
Ensure that:
- Your Calendar DataPage is responsive.
- Data source fields are added directly and not into an HTML block.
- Field values are rendered as text, not HTML.
Steps:
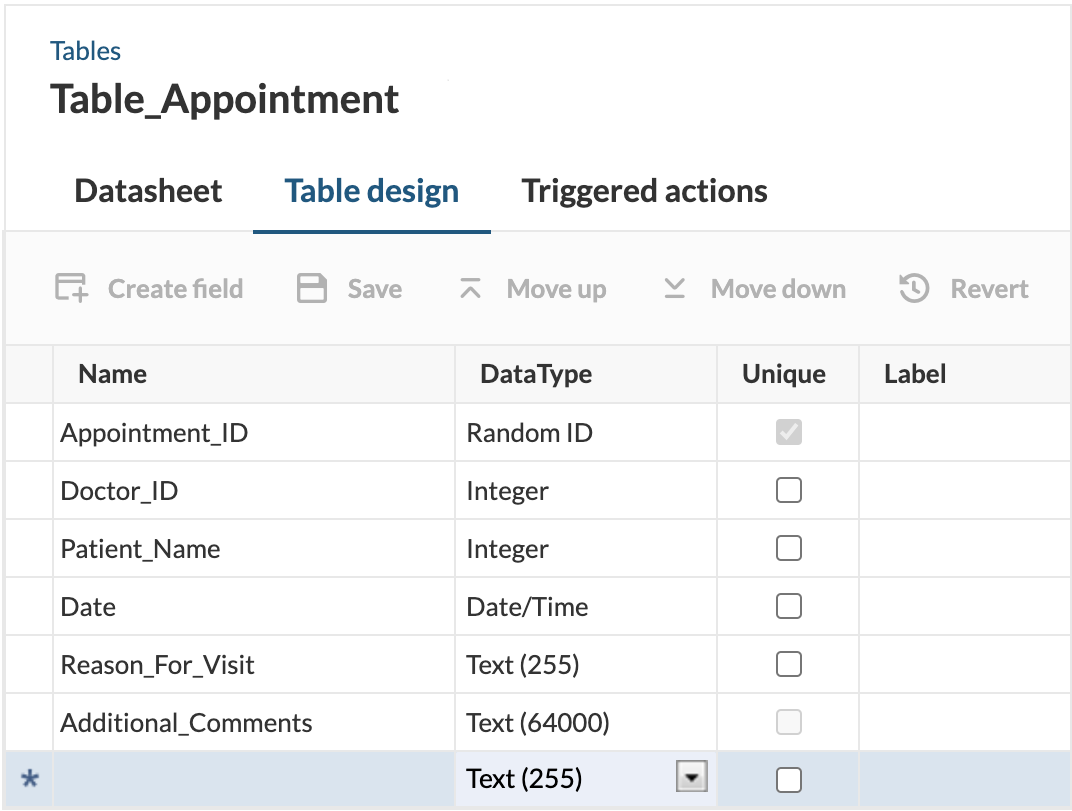
- Create a table or a view that stores appointment data. It must contain a Date/Time field. The table from this example includes the DoctorID, Patient_Name, and Date fields used for calendar appointments.
- Optional: For improved clarity, create a separate lookup table with the field used for color coding. In this example, appointment colors depend on the doctors' names from the Table_Appointment.

- Create a Calendar DataPage based on the same data source with appointments.
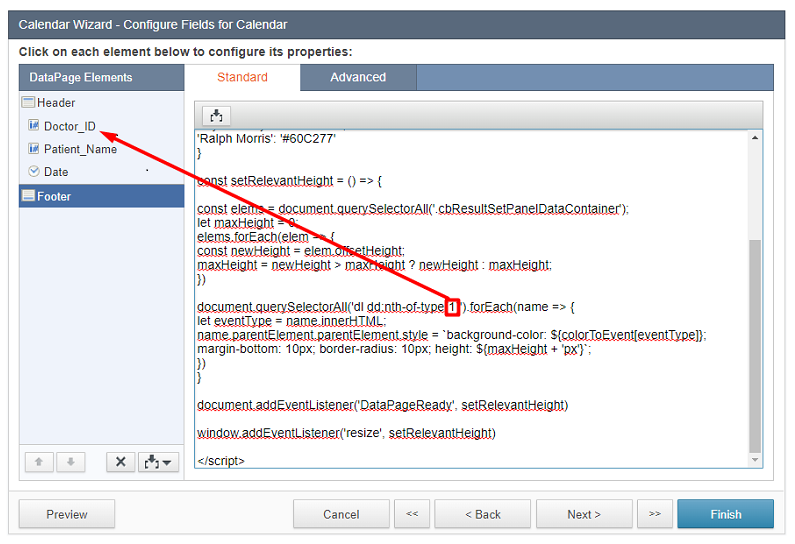
- On the “Calendar Wizard - Configure Fields for Calendar” screen, add Header and Footer elements. Disable the HTML Editor in the Footer section and paste the following code:
- Modify parts of the code that are highlighted in red using the following information:
- For the colorToEvent variable, enter a list of all the appointment types and the HTML colors applied for each type. Enter a comma after each line except the last line for that variable. The first part of the colorToEvent variable stands for the value from your appointment table (Glenn Mercer) and the second for the color coding (#6AA6C8) for this value.
Optional: You can replace the color codes (#6AA6C8) with the color names like blue or red.
- Replace 1 with the order number of the appointment type field on the list in the “Calendar Wizard - Configure Fields for Calendar” screen. In our example, the order number is 1 as Doctor_ID is the first field on the list.
- The following code applies to background color, bottom margin, and border radius properties of appointment containers. You can change the values for bottom margin and border radius, as well as add more styles separated by semi-colons.

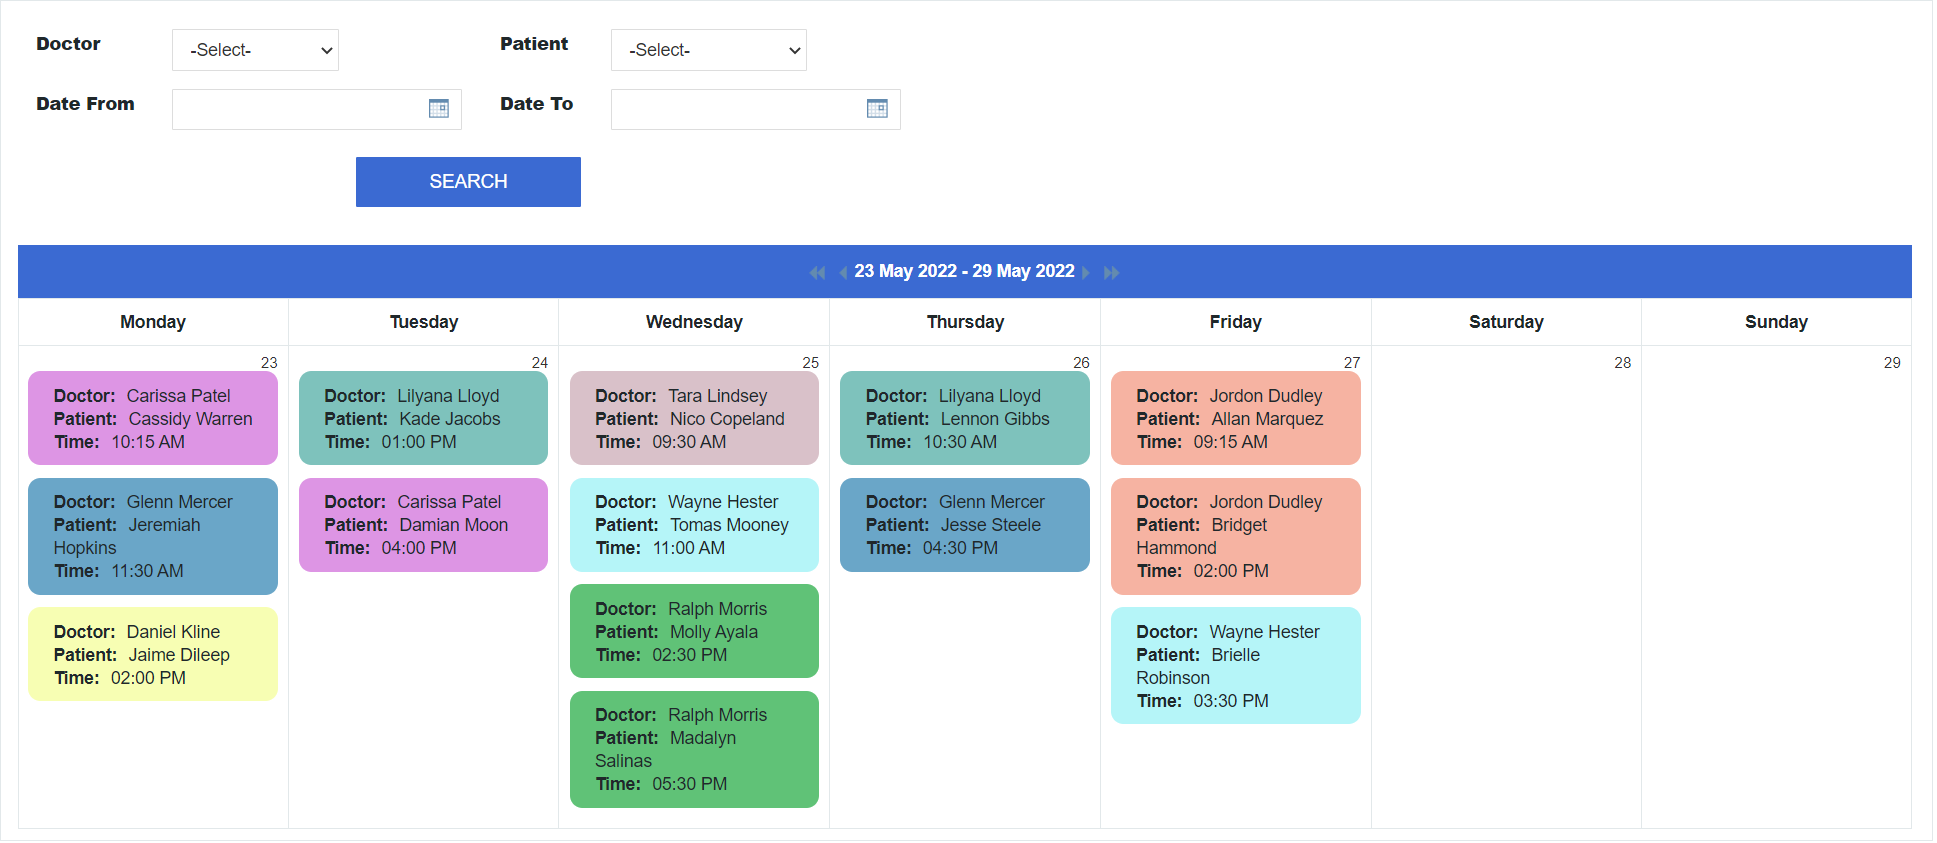
- To implement varying appointment container height, modify height value in to ‘auto’ as shown below:
- For the colorToEvent variable, enter a list of all the appointment types and the HTML colors applied for each type. Enter a comma after each line except the last line for that variable. The first part of the colorToEvent variable stands for the value from your appointment table (Glenn Mercer) and the second for the color coding (#6AA6C8) for this value.
Note: This article uses external HTML, JavaScript, or third-party solutions to add functionality outside of Caspio Bridge’s standard feature set. These solutions are provided “as is” without warranty, support or guarantee. The code within this article is provided as a sample to assist you in the customization of your web applications. You may need a basic understanding of HTML and JavaScript to implement successfully.
For assistance with further customization based on your specific application requirements, please contact our Professional Services team.