There are two methods for creating an app container:
- Start by importing data – Use this method if you already have data that you would like to import into your account and use it as the basis for your new application.
- Start with a blank app – Use this method to create an app from scratch. After you create the app container, you can start creating tables. You can then create DataPages and other necessary objects. You can also use objects currently existing in your account.

To use existing data to create a new app container:
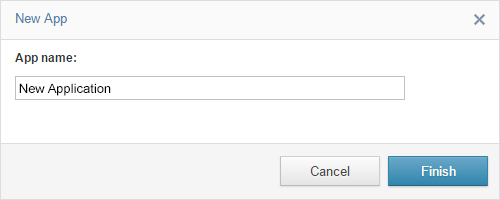
- On the home page, click Create app.
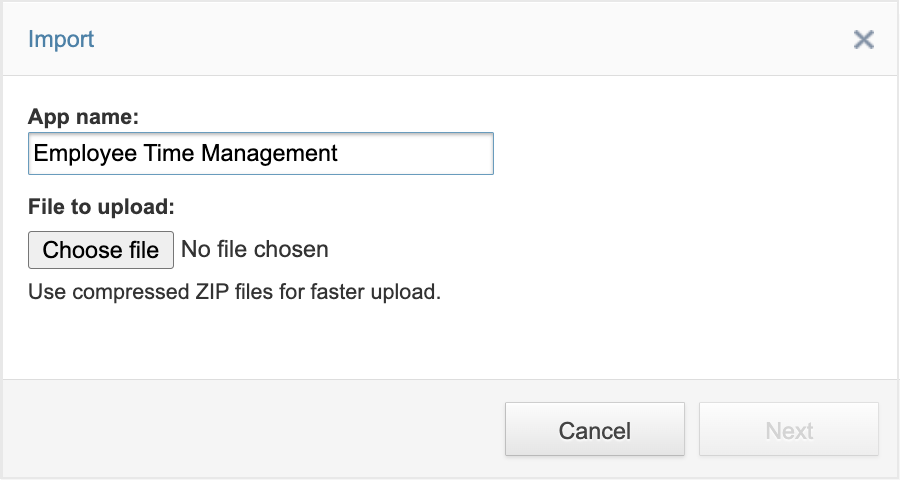
- In the New App dialog box, click the Start by importing data
- Enter a name for the app in the App name field.
- Locate and select the file you want to use. A confirmation message displays if the file is successfully imported.
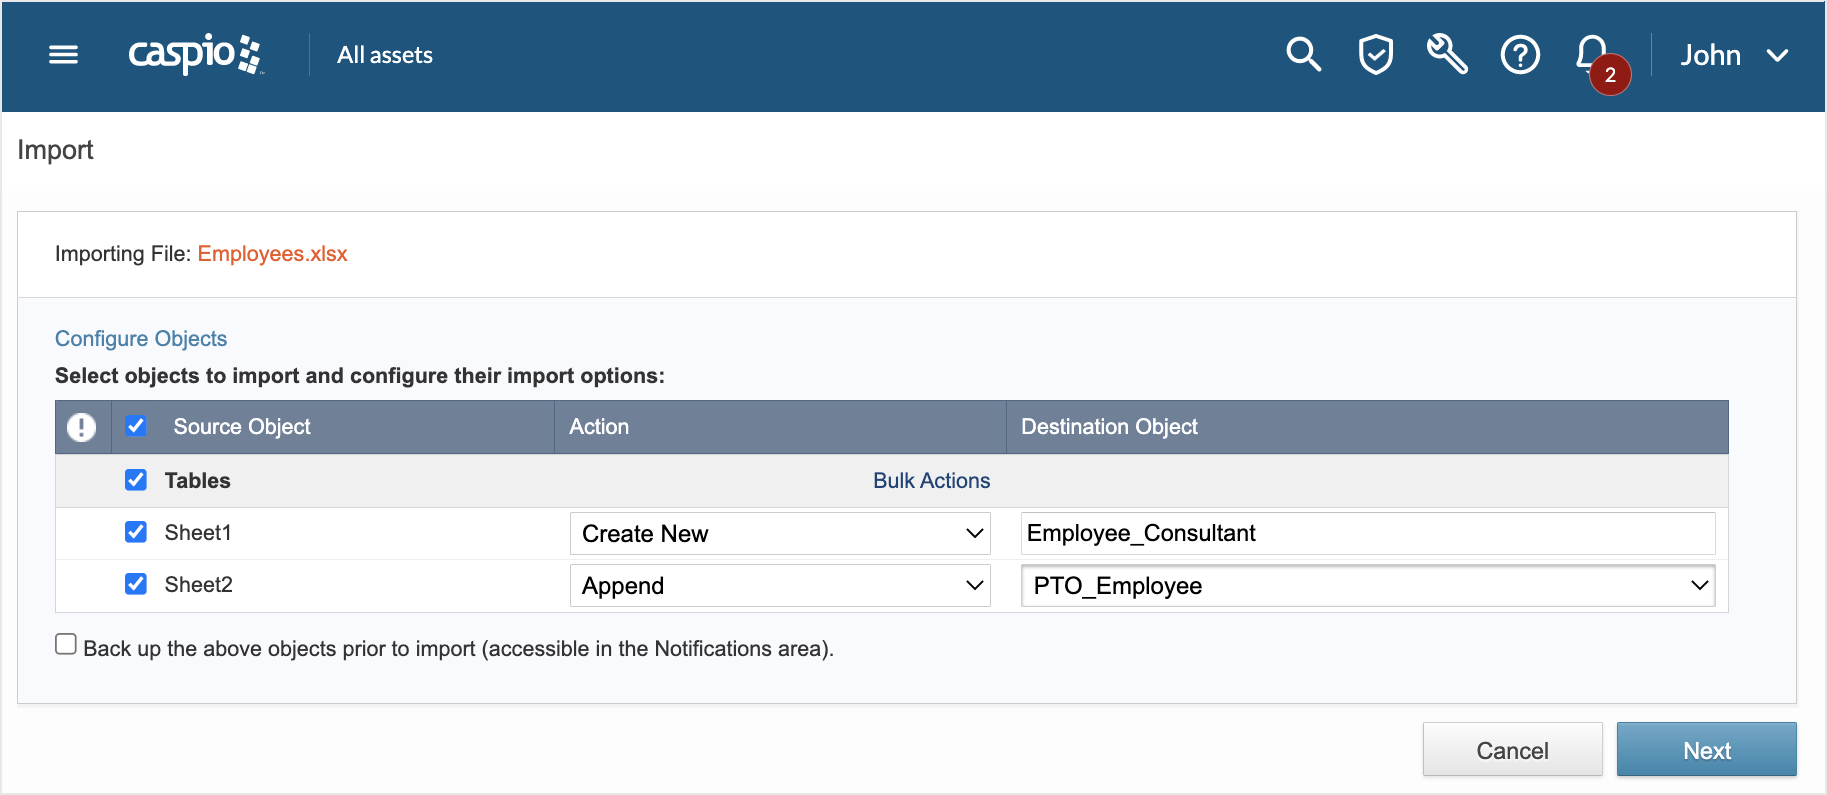
- Click Next. The Import screen displays the details of the imported file. You can select the datasheets you wish to import from the Source Object
- Select the method in which to import the selected datasheet from the Actions dropdown field. The following options are available:
- Create New – Select this method to import the datasheet as a new table object. Enter a name for the new table in the Destination Object
- Replace – Select this method to remove all data from an existing table and then add the records from the datasheet. Select the table to be replaced from the Destination Object dropdown field. A warning icon appears beside the datasheet to indicate that all the data in the existing table will be deleted when you continue with the import process.
- Append – Select this method to add the records in the datasheet to an existing table as new records. Select the table to update from the Destination Object dropdown field.
- Update – Select this method to use the records in the datasheet to update matching records in an existing table. Select the table to update from the Destination Object dropdown field.
- Update Design – Select this method to update only the structure of an existing table without adding new data or replacing existing data. Select the table to update from the Destination Object dropdown field.
Tips:
- When importing multiple datasheets, click Bulk Actions to specify the import method for all the datasheets on the list.
- Select the Back up the above objects prior to import to allow the import process to back up the affected tables before any changes are made.
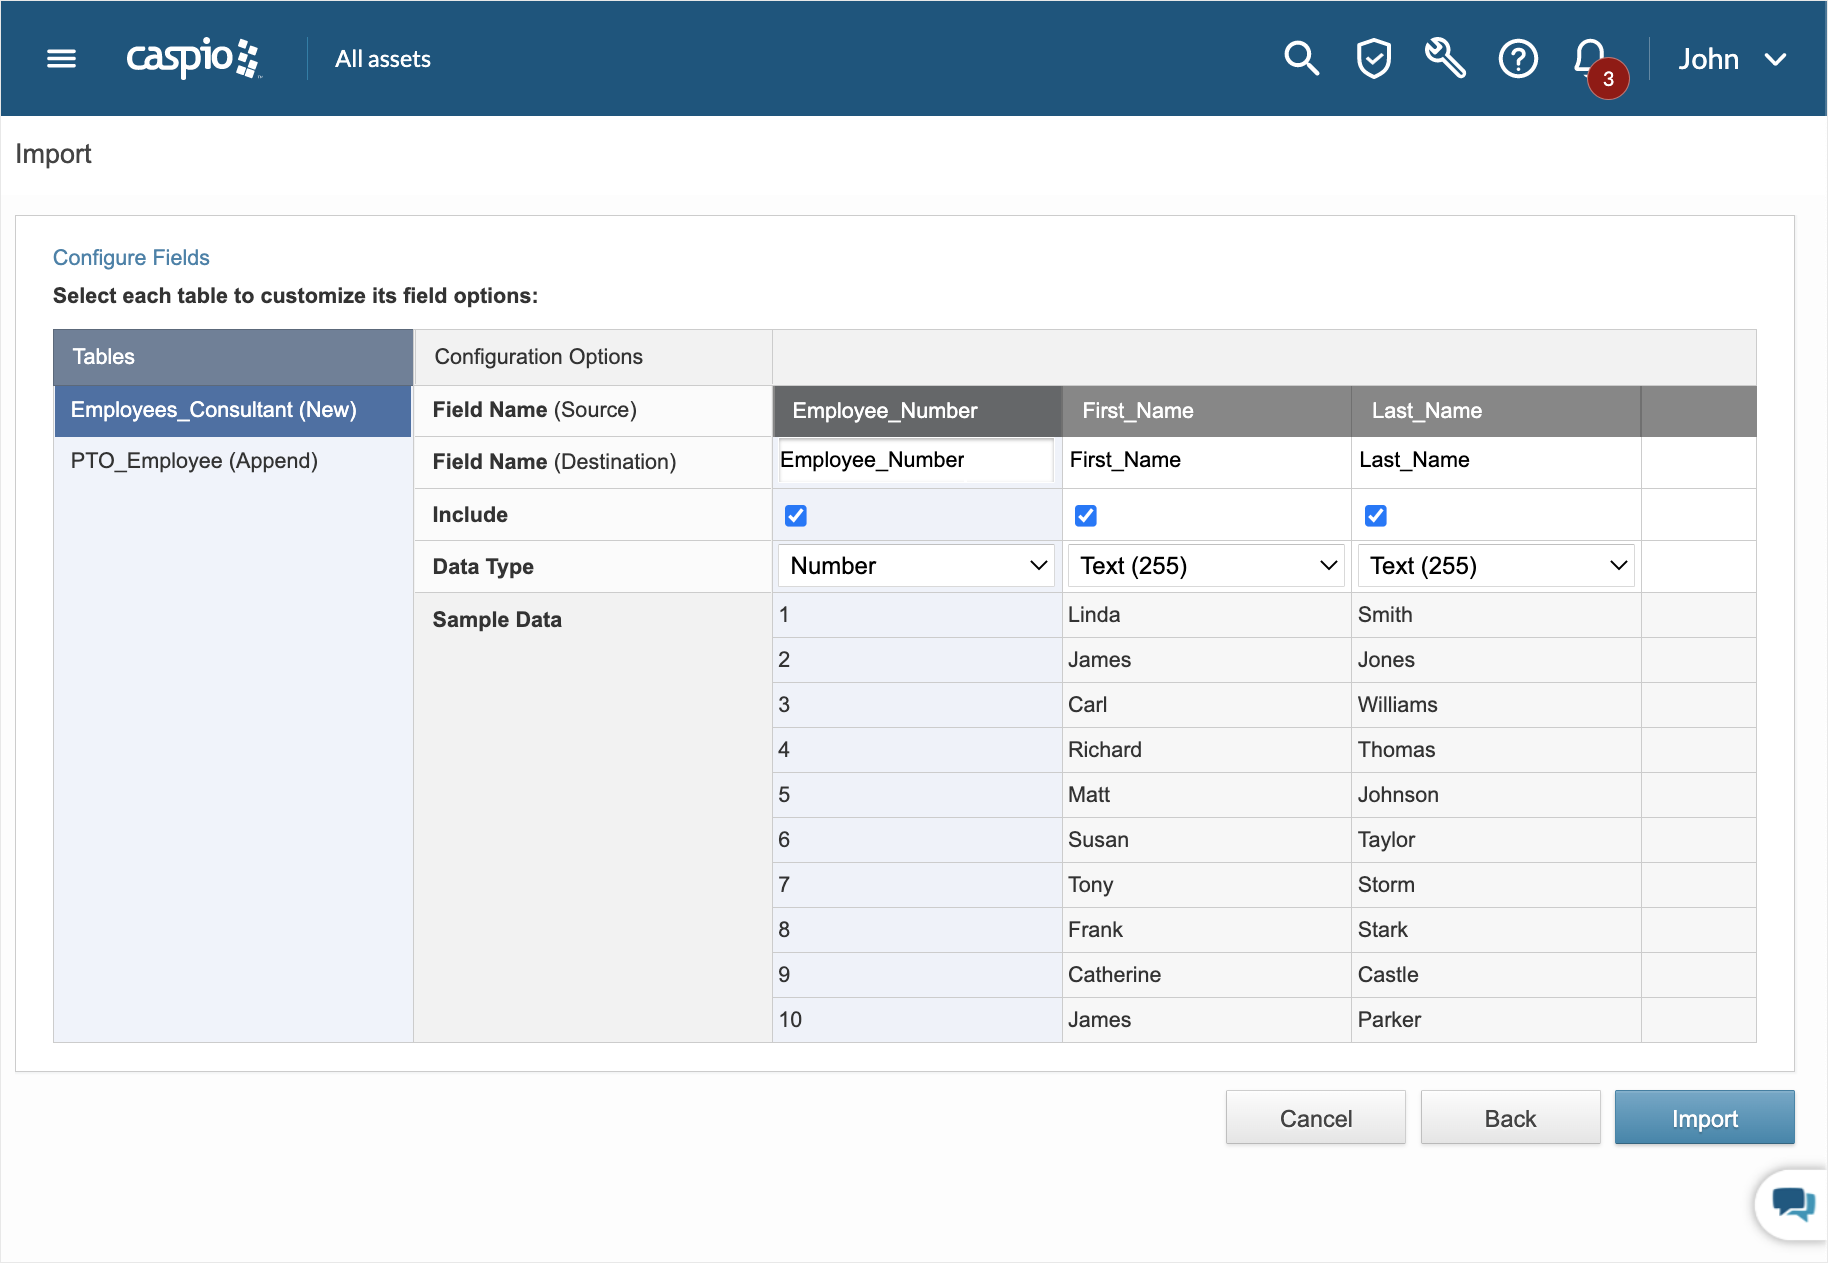
- Click Next. The Configure Objects section allows you to customize field options. The datasheets you selected for import are listed under the Tables Click a datasheet to display the following configuration options:
- Field Name (Source) – This row displays the field names contained in the selected datasheet.
- Field Name (Destination) – This row displays the fields of the destination table where records will be imported.
- Include – Select the check box in this row to enable customization for a field.
- Ignore Blank Fields – This option is only available for the Update import method. Select the check box in this row to allow blank fields to be ignored by the import process.
- Data Type – This row displays the current data type of the field.
- Sample Data – This row displays a preview of the records contained in the selected datasheet.
- Field customization options and actions depend on the import method you selected. Refer to the table below for more information.