After creating a webhook, you define the events in your application tables that will trigger this webhook to send data to another system. You can select which event sources (through DataPages, REST APIs, or Datasheets) will trigger webhook messages when they make data changes. For example, you can define an event in which the webhook will be sent every time a new record is added to a table through a DataPage (but not through REST API or the Datasheet). Learn how to do this with Caspio UI and REST API.
Note: If multiple changes occur, the webhook messages might be sent in different order than the sequence in which those changes happened. To capture the time when each of the changes occurred, use the
eventDateproperty in the event payload.
For information about the available events, see Event types.
Steps to create an event in Caspio platform
- In the left panel on the main screen, click Webhooks.
- In the list of webhooks, hover over a webhook for which you want to configure an event, and then click Open.
- In the upper-right corner of the Events tab, click Create event.
- In the Details section, in the Object field, select a table for which you want to trigger the webhook.
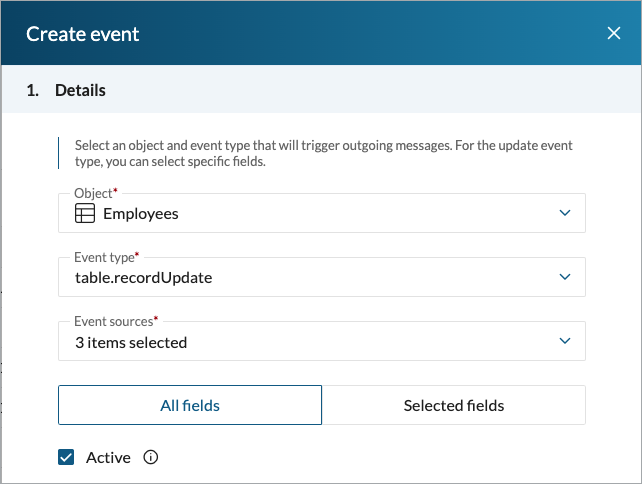
- In the Event type field, select the action in the source object that triggers the webhook.
- In the Event sources field, select the update methods that can trigger the webhook.
- For the table.recordUpdate event type, select the fields that you want to trigger the webhook:
- If you want changes in any table field to trigger the webhook, click All fields.
This option applies to all the fields that are currently in the table and any fields that you add to this table in the future. - If you want specific fields to trigger the webhook, click Selected fields, and then select the checkboxes for the specific fields.
For table.recordUpdate events, a webhook sends a message only if a field value changes.
- If you want changes in any table field to trigger the webhook, click All fields.
- Optional: If you do not want the event to start checking for updates right after you save it, clear the Active checkbox.
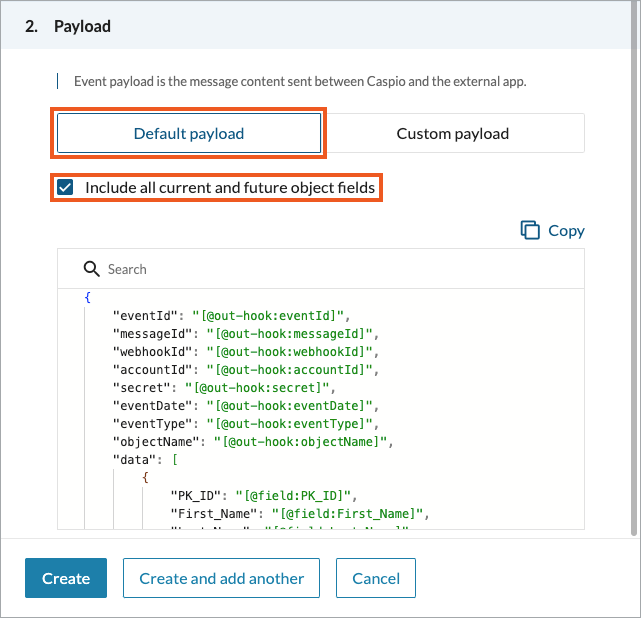
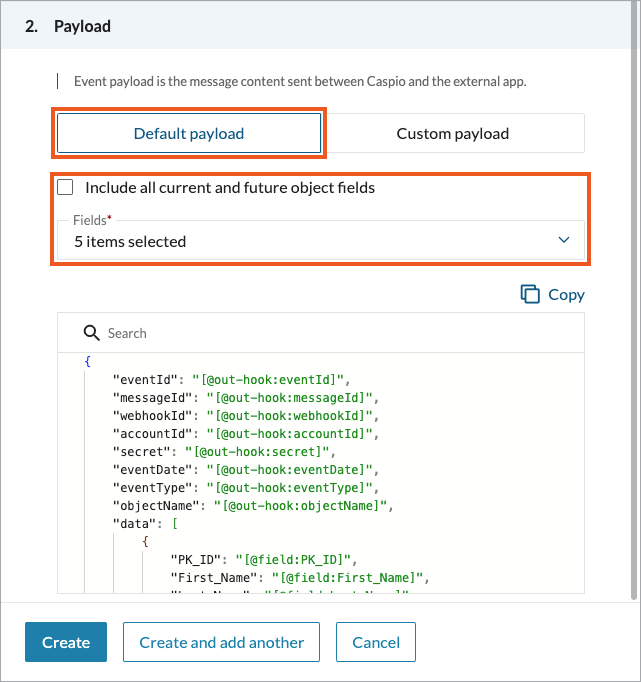
- In the Payload section, specify what content you want to send to the destination service:
If... Then... If you want to send data from all the table fields, ...click Default payload.
This option applies to all the fields that are currently in the table and any fields that you add to this table in the future.
If you want to send data from specific table fields, ...perform the following actions:
- Click Default payload.
- Clear the Include all current and future object fields checkbox.
- In the Fields list, select the fields that you want to send in the webhook payload.
If you want to define your own custom payload, ...perform the following actions:
- Click Custom payload, and then click Start.
- In the Custom payload panel, enter or paste the JSON code with your custom payload structure or load the default payload structure to use as the baseline.
Note: If you use the same key more than once on the same payload level, only the last instance is applied.
- In the code, insert parameters to map the payload with the object fields, as in the following example:
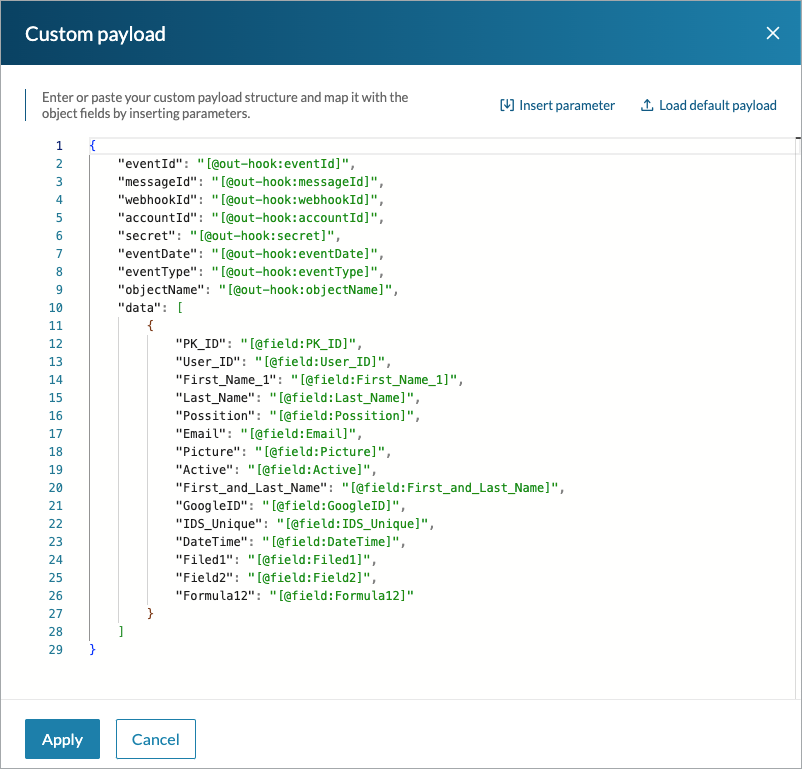
You can enter the parameters manually or through the Insert parameter option.The payload preview is updated based on your selection.
- Save your settings by clicking Create or Create and add another if you want to define more events.