You can deploy a search page and a results page into two different web pages. This can be useful if you want to provide a search interface in your navigation bar or if you want to deploy the search widget to multiple websites. This article provides instructions on how to separate a Search and Report DataPage into two DataPages to create separate search and results pages.
Prerequisites:
Before you begin to create the DataPages, create the webpage that will host the results page. This way, the URL is ready to be referenced when you create the search page. You can deploy the search page on as many web pages as needed.
Steps:
- Create a search page using a Submission Form. You are going to collect the search criteria using this DataPage and then pass it directly to the results page (a Gallery Report DataPage) which will do the actual work.
- On the Configure Fields screen, create virtual fields to collect the search data from the end-user.
- Add as many virtual fields as you need to run your search. If you are using criteria in your search, you will need to include a separate virtual field for each, for example, one field for a minimum price and another field for a maximum price.
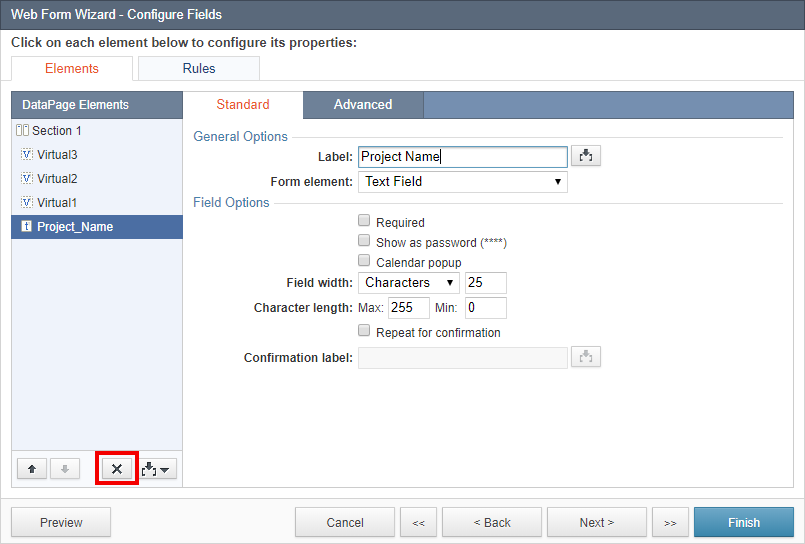
- In the DataPage Elements section, delete all non-virtual fields.
- Configure each virtual field:
-
- Modify the field label to reflect the data you want to collect.
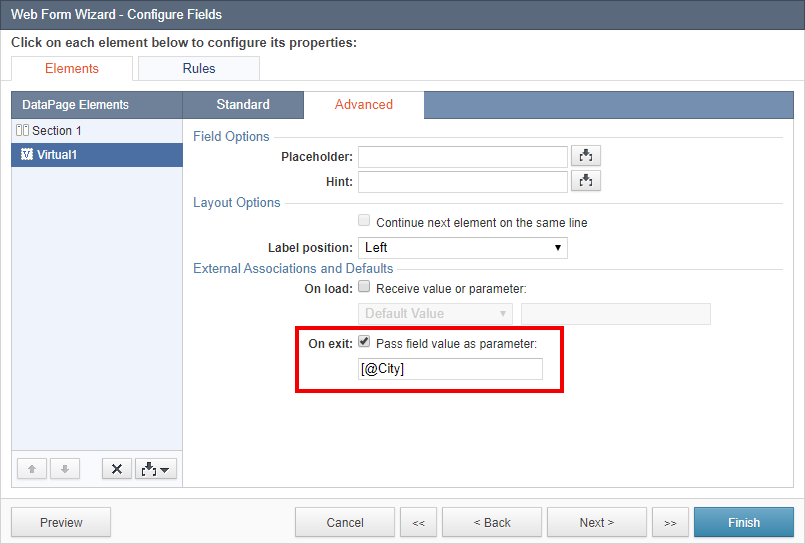
- In the Advanced tab, select the On exit, Pass field value as parameter checkbox.
- Rename the field parameter to match the data that’s being collected. Be sure to use the parameter format: [@xxxxx]
- Note the parameter name to receive the data in the results page.
- Repeat for all the virtual fields.
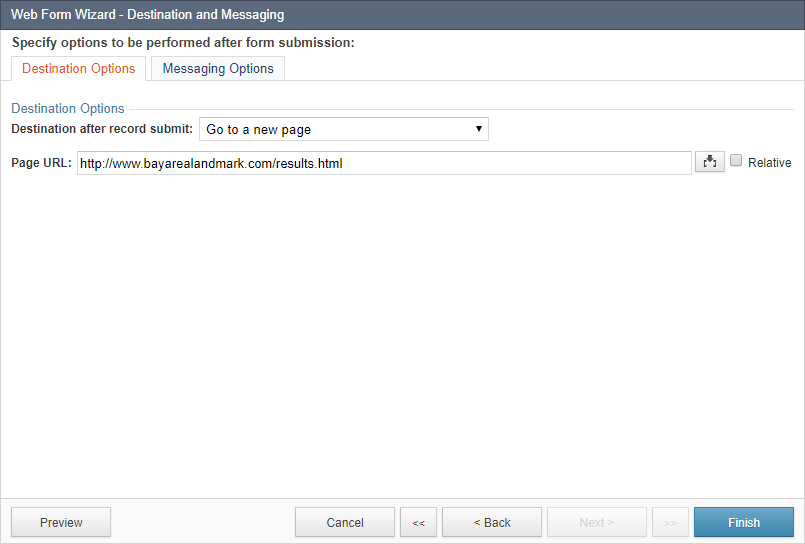
- In the Destinations and Messaging screen, set the destination to the results page. Select Go to a new page and enter the URL from the results webpage. Ensure to include the protocol (http:// or https://). Now, no matter where the search page is deployed, it will direct end-users back to this URL.
- Create a Gallery Report DataPage to receive the parameters from the search page, perform the search, and display the results to the end user. Select the table used for searching as the data source. Apply the following configuration:
-
- On the Search Type screen, check Filter data based on your pre-defined criteria.
- On the Select Filtering Fields screen, move all of the search fields to the right-hand panel.
- On the Configure Filtering Fields screen, configure the search fields to receive the parameters. Configure each DataPage element to receive the corresponding parameter data from the original search page.
-
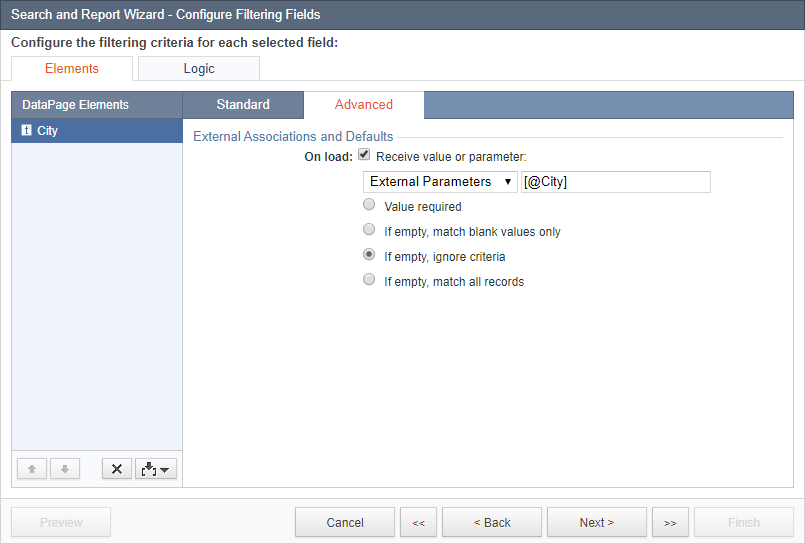
- For each DataPage element, click the Advanced tab.
- Select External Parameter from the On load option and enter the parameter name exactly as it was entered in the search page.
- Ensure to use the parameter format: [@xxxxx].
- From the radio buttons available, check If empty, ignore criteria. This way if an end-user leaves one or several options blank, they will still be able to see results.
- Repeat this for all search criteria.
- Complete the results page and details page as normal.
- Deploy the DataPages to your web pages.
- Optional: Test and format your application.
- Once the DataPages have been deployed, it is a good idea to perform searches using every available field to be sure the results are as expected. If you are having trouble with any particular field be sure that the parameter names in both the search page and the results page are exactly the same.
- Once you are happy with the functionality of the separate search and results pages, you can take a few minutes to improve the look and feel of the DataPages.
Related information: